Thursday, September 23, 2010

Nutty Chocolate Banana Clusters (aka Nikki's 'Healthy' Cookies)

I must preface this entry by saying 1) I found these to be really good. 2) My husband (who is usually my taste-tester) is a REAL cookie fan and said these were good, but definately not to be called 'cookies'--more like ice-cream toppings or parfait layers.

Having said that, I am SO glad that I made these. They are almost guilt-less treats. Made me want to scrub the toilets or dust the cobwebs just to earn a few more. I read somewhere that they amount to about 79 calories a 'cookie'. And gives you energy to boot. No butter, no eggs, no flour, no sugar. And still good.

Sort of like bread, my healthy cookie search continues. There are just never enough healthy cookies out there! Enjoy!!!!!!!

Thanks Heidi Swanson--recipe courtesy of 101cookbooks.com.


NUTTY DARK CHOCOLATE BANANA CLUSTER 'COOKIES'

3 large ripe bananas, well-mashed (about 1½ cups)
1 teaspoon vanilla extract
1/4 cup coconut oil (can be found at natural food grocery stores like Whole Foods)
2 cups rolled oats
2/3 cup almond meal
1/3 cup coconut, finely shredded and unsweetened (can purchase in bulk foods section at Whole Foods)
1/2 teaspoon cinnamon
1/2 teaspoon fine-grain sea salt
1 teaspoon baking powder
8 ounces mini semi-sweet chocolate chips (or carbo nibs for the vegans out there)

Preheat oven to 350 degrees, --you're going to use the top third rack.

In a large bowl, combine the bananas, vanilla extract and coconut oil. Set aside. Oh, and this is what coconut oil looks like:


In another bowl, whisk together the oats, almond meal, shredded coconut, cinnamon, salt and baking powder. Add the dry ingredients to the wet ingredients and stir until combined. Fold in the chocolate chips.

The dough is a bit looser than a standard cookie dough.

Drop dollops of the dough, each about 2 teaspoons in size, an inch apart onto a parchment- (or Silpat)-lined baking sheet.

Bake for 12 to 14 minutes. Check at 10 to 11 minutes to make sure the bottoms aren't burning. Mine took at least 15 minutes--check that the bottoms are burning--each oven is different.


Makes about 3 dozen 'cookies'.

FAST 'No Knead' Multi-Grain Bread


No, the bread doesn't make itself quite yet...but we're getting close. At first I thought I should put this non-rising loaf in my 'bloopers' reel, but after tasting it and hearing Cort's insistence....it's making the blog cut. You can choose for yourself--but be forewarned: this is a hearty, European-consistency bread that may look like a brick. I realize that my great mistake may have been in using 'active dry yeast' instead of 'instant' (even though per the recommendations online, I doubled the yeast amount due to difference. I probably should have 'proofed' it--but now we're getting over my head).

I served it alongside leftovers at dinner and noticed my husband hadn't eaten more than a few bites. When I asked him why, he said it was so good, that he was savoring it and saving until last. Then he went back for more. So, maybe for the amount of effort involved, I'll share it with you too....

The recipe below calls for rye flour--which I've seen in some grocery stores. I know King Arthur catalog sells it and so should Bob's Red Mill. However, I go to the bulk foods section of my natural foods store (Whole Foods).

The recipe is from Mark Bittman (quite possibly my favorite cook--author of my now standard wedding present "How to Cook Everything"). Thanks to my grad school roommate and friend, Ellie, for introducing me to him--what a find! He writes what, in my opinion, may be one of the most useful columns of the NYT.


FAST NO-KNEAD WHOLE WHEAT BREAD (MULTI-GRAIN)

2 cups whole wheat flour (I did 1 cup whole wheat flour, 1 cup bread flour)
1/2 cup whole rye flour
1/2 cup coarse cornmeal
1/2 cup vital wheat gluten (my addition to create a 'lighter' dough--it's basically wheat protein)
1 1/2 cups water
1 teaspoon instant yeast
1 1/2 teaspoons salt
(Olive) oil, as needed

Combine flours, cornmeal, yeast and salt in a large bowl. Add 1 1/2 cups water and stir until blended; dough will be 'shaggy'. Cover bowl with plastic wrap. Let dough rest about 4 hours at warm room temperature, about 70 degrees. This is what mine looked like after 4 hours (sorry about darkness).


Oil a standard loaf pan (8 or 9 inches by 4 inches; nonstick works well). Lightly oil your hands and shape dough into a rough rectangle. Put it in pan, pressing it out to the edges. Brush top with a little more oil. Cover with plastic wrap and let rest 1 hour more.

Preheat oven to 350 degrees.

Bake bread about 45 minutes, or until loaf reaches an internal temperature of 210 degrees (I used a meat thermometer). Remove bread from pan and cool on a rack. (REALLY? Let it cool? No! Eat it hot with butter! Buck the trend. Who are these people who don't eat hot bread?!)

Yield: 1 loaf.

The bread is absolutely heavenly when toasted and buttered.


Good luck and happy bread making. I'm going to keep at my efforts and if anyone has any recipes/tips to share for the lazy cook, please let me know.

Wednesday, September 22, 2010

Napa Cabernet & Fresh Fig Preserves

My parents and I spent the day at the Botanic Gardens and I finally got to see the fig plant up close. Aren't figs beautiful?


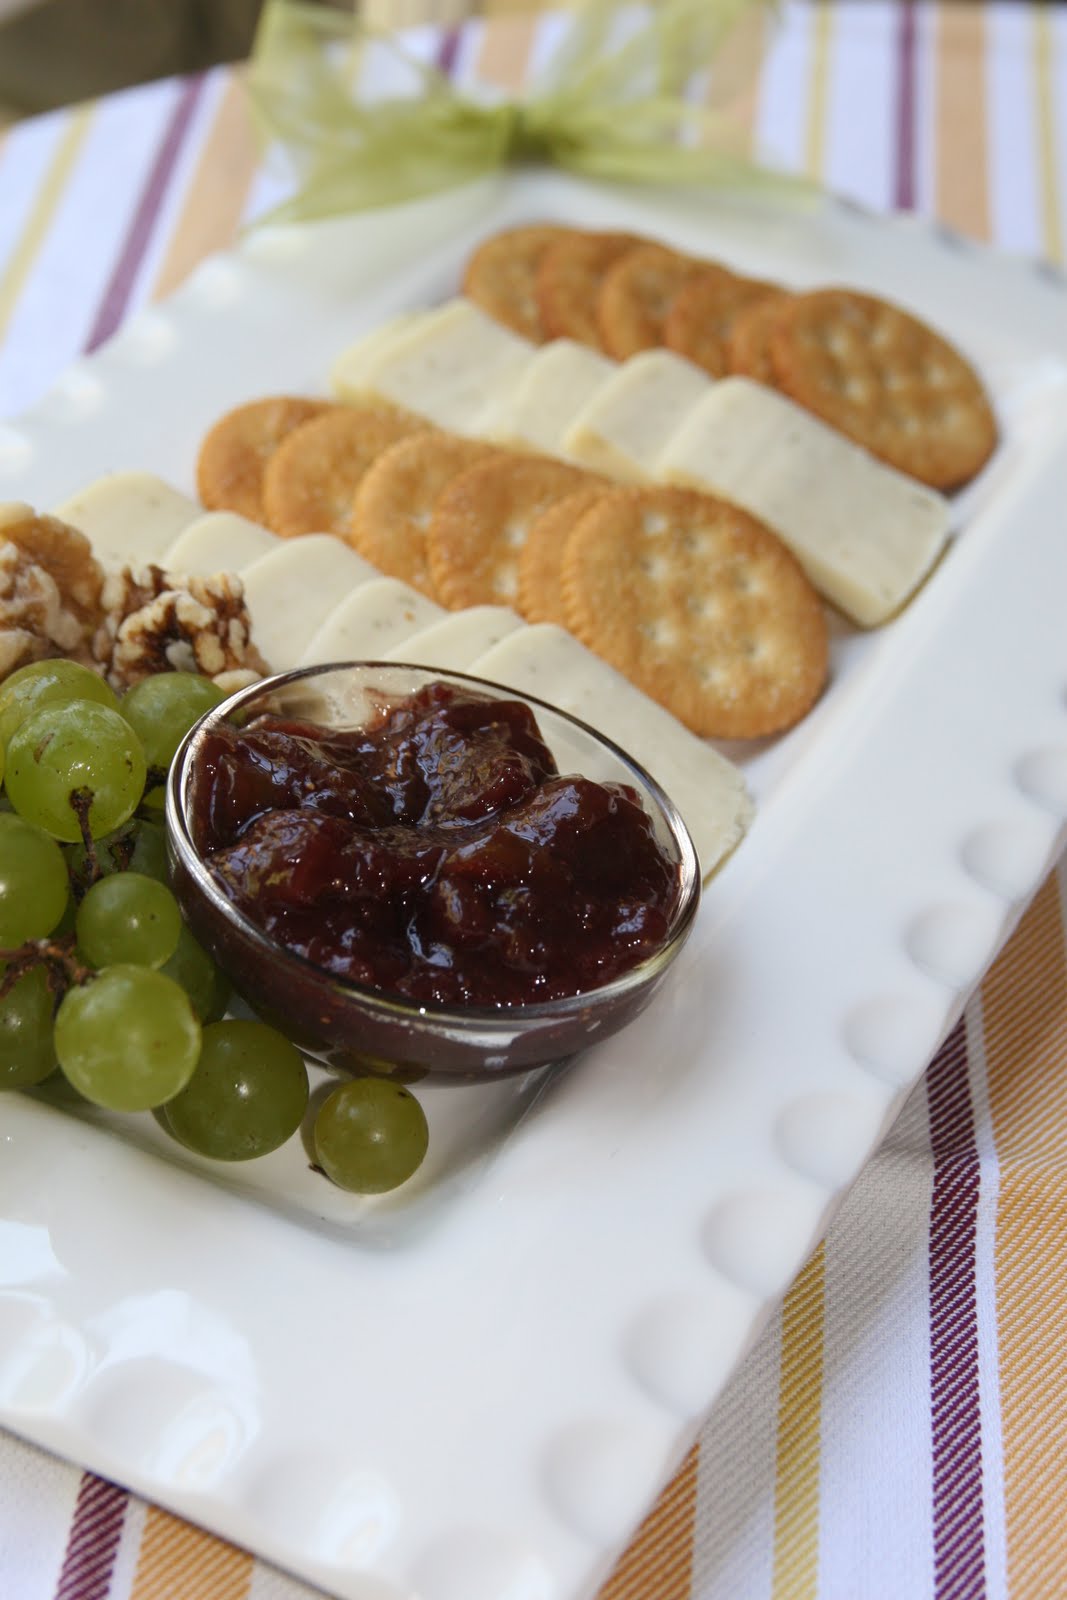
Anyway, I felt inspired. Here's what I came up with trying to use up a Napa Cab (got on major sale!) and some fresh figs.


NAPA CABERNET & FRESH FIG PRESERVES

2.5 cups figs, quartered
3/4 cup Cabernet Sauvignon* (doesn't have to be a Napa one!)
1/2-3/4 cup water
1/2 cup granulated sugar (or a little more depending on how dry your wine is)
Juice of one lemon

In a heavy saucepan, add all your ingredients and bring to a boil. Once boiling, reduce heat to low. Allow the mixture to simmer for about 20 minutes or until the jam starts thickening up and coats the back of a spoon (check on mixture every couple minutes and stir to prevent sticking or burning).

Allow the preserves to cool. Refrigerate. (I like to stir them up a bit with a fork to mash the fruit--but you don't have to do that unless you don't like your fruit chunky--in that case--cut your fruit up smaller)

My favorite way to eat them is with cheese and crackers, fruit, and nuts. Or you can serve these tasty preserves over toast with butter, peanut butter, or cream cheese. Or serve them over ice-cream. They'll taste good no matter what!

*Next time, I think I may try them with a port.....

Makes one jar (about 12-13 ounces).


Sunday, September 19, 2010

Dessert As A Provincial Peasant: Almond, Apricot, Cream Cheese Crostata


My parents came to visit this weekend and knowing that my mom LOVES apricots, I finally had a reason to pull out this recipe that I had clipped back in August of 2006. This is my favorite kind of food/dessert--the kind of rustic tart you'd eat if you were sitting at a cafe in Europe. The kind of dessert your European relatives would make. The kind that looks imperfect, but tastes wonderfully home-made.

I love the combination of almonds and apricots (think of an apricot seed and that flavor). This recipe is adapted because 1) I was in a hurry and misread only needed the egg yolk, HALF the package of almond paste and 3 ounces (not 4) of cream cheese and 2) I did not have apricot preserves and had to use mixed berry jam/preserves. Didn't matter. Still really good. Here's the original in case you want to read the reviews. And no, I did not find the almond flavoring to be overwhelming despite my misreading of the directions.

Oh, what is a crostata, you might ask? An Italian, rough-looking, free-form fruit and/or cheese pie.


ALMOND, APRICOT, AND CREAM CHEESE CROSTATA

1 (7-ounce) log almond paste
3 tablespoons sugar, divided
4 ounces cream cheese (I used 1/3 less fat)
1 large egg
1 teaspoon vanilla extract
1 refrigerated pie crust (half of 14 or 15-ounce package), room temperature
5 to 6 large apricots, quartered, pitted
1/4-1/3 cup apricot jam (or other jam)
3 crushed amaretti cookies (Italian macaroons)

Preheat oven to 400°F.

Blend first 5 ingredients in processor until finely chopped. Blend until filling is smooth. This is what my can of almond paste looked like in case you don't find a "log":


Unroll crust on heavy rimmed baking sheet. Spread filling over crust, leaving 1 1/2-inch plain border--no, I did not measure--that's crazy thinking. Arrange apricot quarters, rounded side down, in spoke pattern in 2 concentric circles atop filling (as you can see, I had to go willy-nilly with my apricots).


Fold dough border up over edge of filling.


Heat jam in microwave so it will be easier to work with and brush the exposed apricots with warm jam (I love to use a silicone brush so no brush hairs remain in my food).

Bake crostata until crust is golden brown and apricots seem tender and slightly browned (or when jam goes all over the place and the crostata looks provincially messy), about 43 minutes (seriously, did not time it, but that is VERY exact and directly from the written recipe).

Sprinkle with crushed amaretti. What do those look like? Here:


Cool the crostata for 30 minutes. Serve warm or at room temperature.


It's really good. No ice-cream needed...unless you want to go WAY over the top. Serve with some good coffee on the side, if possible.

Makes about 8 servings. So good!

Saturday, September 18, 2010

Mellow Mushrooms: Roasted Mushrooms with Cognac


I'm the kind of person that has random and various esoteric ingredients just laying around and waiting for that perfect recipe. One such example is Chardonnay salt.....But while digging around (yet again) in the cupboards, I found a little bottle of cognac and remembered that Jamie Oliver had roasted mushrooms with it. The rosemary, cognac, and truffle oil I added (instead of olive oil) made this mushroom dish very woodsy. I imagined these mushrooms would be great side to serve alongside lamb (if you make lamb) or on top of polenta with cheese.

I used all baby bellas and recipe was still good--next time, I will use a mixture of mushrooms. This is a ridiculously easy recipe & made the rest of my dinner pale in comparison. Note: Parchment paper is available in baking shops and also in the baking section of most grocery stores. In addition (or instead of rosemary), you can also use thyme and sage to flavour the mushrooms.


ROASTED MUSHROOMS WITH COGNAC

Adapted from Jamie’s Italy by Jamie Oliver

Serves 4


  • 1 pound of mixed mushrooms (cremini, oyster, shiitake), cleaned with larger mushrooms cut in half
  • 4 Tbsp. extra virgin olive oil (Truffle-flavored olive oil is awesome too!)
  • 1-1/2 tsp. sea salt (or Chardonnay-flavored salt if you're weird like me)
  • 1 tsp. freshly ground black pepper
  • 1 Tbsp. fresh rosemary, chopped
  • 2 Tbsp. cognac
  • Freshly chopped parsley, for garnish


Preheat the oven to 400 degrees F.

Combine your mushrooms in a bowl and add the olive oil, making sure that the mushrooms are evenly coated. Add the salt, pepper and rosemary and mix well. I also added the cognac at this point (why wait?) and mixed all ingredients together.


Take one sheet of parchment paper (it should be roughly 18 x 22 inches in size) and place it on a counter. Pile the mushroom mixture in the centre of the parchment, flattening the mushrooms slightly so that they're not mounded too high in the centre. (Jamie says to drizzle on the cognac at this point.) Cover the mushrooms with another sheet of parchment of equal size.

Fold all the ends of the parchment up and in so that a tight seal forms on all sides. Slide the parchment package onto a baking sheet and then place in the oven. As you can see, I did not have enough parchment paper, so I folded it and put the seam side down on the pan. Worked fine.


Bake for 15 minutes. If you like your mushrooms a little more "done", place them back on the pan and bake for 5-10 more minutes, out of the parchment paper. I think the parchment seals in the flavor first.

Open the package (carefully as a lot of steam will be released). Taste the mushrooms and adjust seasoning.

Place the mushrooms in a bowl and sprinkle on the parsley before serving. Easy!!!!


Yes, they were delicious!

Friday, September 17, 2010

Tomato Pie--A Slice of the South


A Yankee would think I was referring to a pizza. A Southerner would know I'm referring to this below....the recipe below is adapted from Paula Deen, but mainly based on reviewers' suggestions/comments from this site.

We just got back from our family vacation at Kiawah Island (right outside of Charleston, SC). That place is HEAVEN for my husband and myself. One of our traditions when we go with just the family, has become to eat a tomato pie from Rosebanks Farms for dinner one night. I've made a tomato pie before that was pretty good--but this one below was WAY better and more like the one we get at Kiawah. I highly recommend trying it! You can't go wrong with this recipe. 

TOMATO CHEESE PIE

Serves 6-8

5 tomatoes, peeled and sliced
Approximately 15 fresh basil leaves, chopped or shredded
1/2 tsp. oregano
1/2 cup chopped green onion OR 1 small onion, chopped
1 (9-inch) prebaked deep dish pie shell
3/4 cup grated part-skim mozzarella
3/4 cup grated cheddar
1/2 cup light mayonnaise
1/2 cup light sour cream 
Salt and pepper, to taste 

Preheat oven to 350 degrees F.

Place the tomatoes in a colander in the sink in 1 layer. Sprinkle with salt and allow to drain for 10 minutes--this method sometimes did not work, according to reviews. So, I came up with my own method that seemed to work great: slice the tomatoes, lay them on several layers of paper towels, salt them, and let them sit for 10 minutes. Then, pat them down with more paper towels until more of the tomato juice has absorbed. (Yes, I realize this isn't as environmentally friendly--but suit yourself.)


Layer the tomato slices, basil, and onion in pie shell.


Combine the grated cheeses, mayonnaise, sour cream, and salt and pepper together. Spread mixture on top of the tomatoes and bake for 30 minutes or until lightly browned. (Mine seemed to need slightly more than 30 minutes).

And since I always seem to overbake my crust, I added foil around the sides to cover up the crust and prevent burning and I'm happy to report that my system worked relatively well. Here's what it looked like going into the oven:


And here's the amazing goodness that came out of the oven:


To serve, cut into slices and serve warm. You will definately enjoy this--it was a real hit with the family. It would be wonderful to serve this tomato cheese pie with green beans/salad/crusty bread. YUM!

Y'all come back!

Thursday, September 16, 2010

Dr. Oz's Green Drink--Maybe This IS Craziness....Stay With Me....


Every once in a while after bad behavior (i.e.-frying, excess cheese, lack of gym time)....I turn to this "detox" drink--Cort would probably ask if this was my penance....

I don't really believe in detoxification (sorry those of you that are "so sure"--I believe in moderation and all around day-to-day healthful living with occasional splurges (although I could do better with the healthful living part, but here's step #1....).

I know that everyone is shuddering as they read this and I am dangerously close to losing my credibility....

At first, I was sort of grossed out by the combination of ingredients, but I'm not sure you'd be able to pick out every single one and to me, it doesn't taste that bad....makes me feel a bit energized. Figured I wasn't the only one who veers off the healthy path so thought I'd share this recipe for those of you who are brave.


DR.OZ'S 'GREEN DRINK'

Makes 3-4 servings (feel free to scale it back)

Dr. Oz says he makes a breakfast drink for himself many mornings that he calls his green drink.

2 cups spinach
2 cups cucumber
1 head of celery
1/2 inch or teaspoon ginger root
1 bunch parsley
2 apples
Juice of 1 lime
Juice of 1/2 lemon

Combine all ingredients in a blender. Sometimes, I need to add a little ice or water to process the mixture smoothly.


This recipe makes 28 to 30 ounces—about three to four servings--if you can get someone else to drink it with you (ha! you should see my husband's face....). I really sort of enjoy it....call me weird.

Apparently, during the episode in which this drink was featured on the Oprah show, Oprah took a sip and was pleasantly surprised, "It's a glass of fresh," she said. I can hear you now..."fresh what?!"


A toast to your health!!! On our way to 5 a day! And on our way to more 'normal' recipes from now on....

Wednesday, September 15, 2010

Roasted Sweet Potatoes with Onions

This is one of those posts where my picture does not do the recipe justice. These potatoes ARE SO GOOD! And soooooo easy! They are an absolute staple in our house. And courtesy of my mother in law, Carol. And a very healthy side dish.

Keep in mind that however you cut the potatoes, they need to all be cut the same (roughly) so that they can cook evenly.

ROASTED SWEET POTATOES WITH ONIONS

I've tried to estimate proportions, but there is no exact science to it. Seems like for every 2-3 potatoes, use one small onion. Estimate approximately one small-medium potato for each person.

2-3 sweet potatoes, (I like them in thin half moons-but you can cut them any way)
A couple TBsp. extra virgin olive oil
1 small onion, sliced into rounds or half rounds
Salt & pepper, to taste


Preheat oven to 375 degrees F.

Mix all ingredients together and evenly spread them on a large baking sheet. I like to mix them with clean hands directly onto the baking sheet and then spread them out.

Roast the potatoes for 45 minutes to 1 hour. Check halfway into the time (about the 25-30 minute mark) and mix all the potatoes to redistribute them so they get evenly roasted. It's okay if they overlap a little bit.

Serves 3-4 people as a side dish to chicken, fish, or very good part of a vegetarian meal with 'choplets' or 'multigrain cutlets'.

Friday, September 10, 2010

Fried (Gasp!) Zucchini Patties

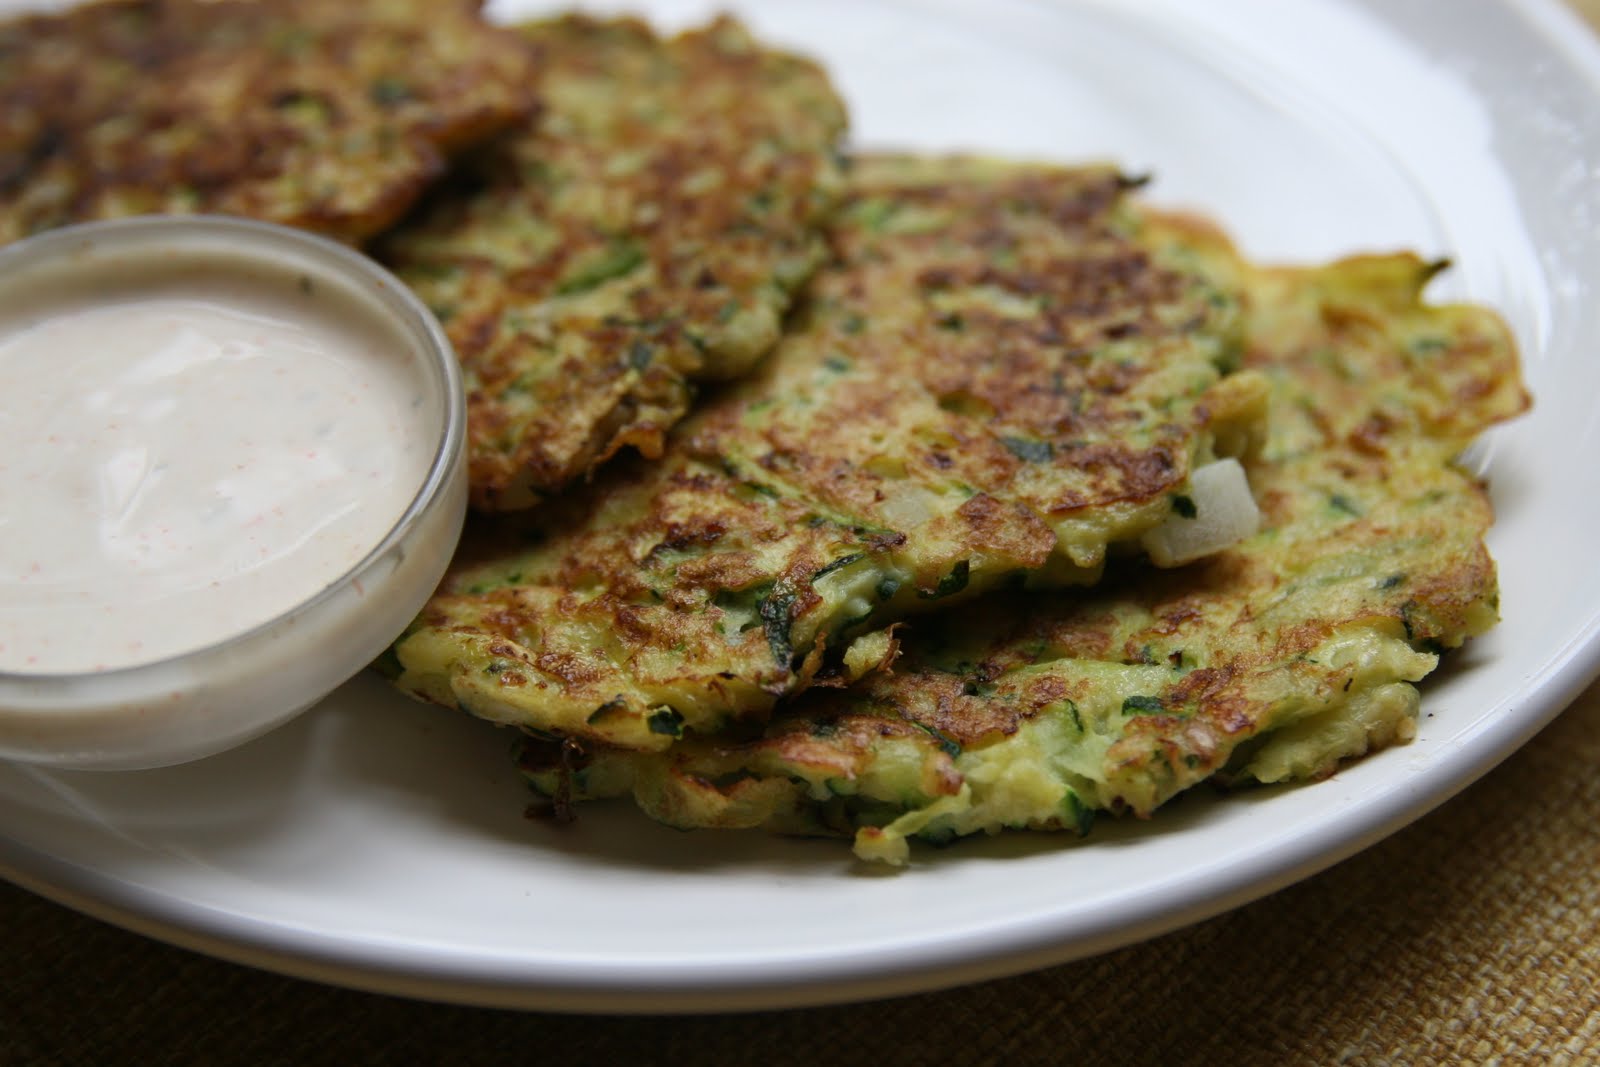
But at least I'm frying a VEGETABLE. Not that it makes it healthy....but these patties are just SO good. Earlier this spring, I had dinner at a family friend's house and the host (Mariana) served wonderful zucchini patties for dessert with powdered sugar. They were amazing! The ones below, that I made for this entry, are savory--not sweet. But, eventually, I still plan on attempting the sweeter version of these patties (that did not include any sugar in the composition).

Serve these savory patties with your favorite dipping sauce--I imagine they'd be great with marinara sauce or Ranch (the patties below are pictured alonside a zesty Ranch).

ZUCCHINI PATTIES


3 medium zucchini
1 tsp. minced garlic
1 very small onion (or half a medium onion), diced
1-1 1/2 cups breadcrumbs (I used Panko)
½ cup Asiago cheese (or Parmesan/Romano)
4 eggs
1/2 tsp. Italian seasoning
Salt, to taste
Freshly ground black pepper, to taste
Olive oil

Wash and cut the end off of the zucchini--do not peel. Shred the zucchini using the large holes of a cheese grater. Squeeze the shredded zucchini inside of a clean towel until you’ve removed as much liquid as possible. Or, alternately, you can put the shredded zucchini on several paper towels, lay more paper towels on top and pat down gently (repeat a couple times).


Place shredded zucchini into a medium sized bowl. Add garlic, onion, breadcrumbs, cheese (shredded), eggs, salt and pepper. Stir with a fork until well mixed.


Heat olive oil (about ¼ inch deep in bottom of skillet) to a medium heat (I used a bit less and it turned out ok). When the oil is hot enough drop a glob of zucchini batter into the skillet and flatten it a bit.

After about two minutes, turn the cakes over ( they should be a nice shade of golden-brown) and cook on the other side until done (about 2-3 minutes).


Place on paper towels (to absorb any oil). Serve with the dipping sauce of your choice and enjoy!

Serves 6.

Wednesday, September 8, 2010

No Knead! Ciabatta Bread (If I Can Do This, So Can You!)


If you have hands, you can make this. Seriously, it’s that easy. A lot of people seem intimidated by breadmaking. I was one of them. Until I tried the New York Times “No Knead Bread”…I will post on that sometime. The NYT no-knead bread is truly wonderful and bowled my family over. Ever since trying it, I have become open to trying other kinds of “no knead” breads.

This particular entry focuses on my experiment with no-knead ciabatta bread (which we LOVE). Ciabatta bread makes the most amazing sandwiches. Keep in mind that ciabatta is a FLATTER shaped bread--crusty on the outside and airy/chewy on the inside. And look to Chef John's example (below) of what yours should look like (this was my FIRST attempt, but I'll get better with more practice).

I can’t believe I don’t make bread more often. The only hassle is washing a bowl and a pan (2 things!) and waiting…a LOT. But bread is SO CHEAP to make compared to buying it. WOW.


This recipe is courtesy of Chef John and I made the recipe exactly as he directed. I have typed up his verbal instructions. Watch his informative video before making this bread. It helped me out a lot. Here’s his video:


No-Knead Ciabatta Bread from Foodwishes on Vimeo.


NO KNEAD CIABATTA BREAD

-Chef John from http://www.foodwishes.com/
Ciabatta means "carpet slipper" in Italian

4 cups bread flour (I used 3 1/2 cup white and 1/2 cup wheat)-*Note: you can use All-purpose flour if you want
1/4 tsp yeast
1 1/2 tsp salt
2 cups warm water

1) Mix all ingredients together (he used steel bowl). Dough will look very sticky and then too dry,. Then dough will come together perfectly & look sticky.

Cover with aluminum foil & let dough rise for 18 hours --don't place the bowl in too warm of a place so it doesn't over-rise (room temp-65-63 degrees F). Dough will look very bubbly, very soft, and have a beautiful viscosity (has amazing gluten strands--stringy when pulled by spatula).This is what mine looked like:


2) Punch it over with spatula & punch it down a few times (with spatula) and fold it over itself a few times (with spatula).

Spray a heavy half sheet baking pan with olive oil (or drizzle and spread) and generally sprinkle cornmeal over the oiled pan. Set aside.

Neat trick: Spray your work surface with water and put plastic wrap over it. It will not move as water will make it stick.

Sprinkle work surface with flour and then, using spatula, scrape dough out of bowl and onto work surface.

Lightly flour top of dough and somehow, someway (stretching, pulling), punch air bubbles out--form it into a long, flat shape and lightly punch out the air bubbles and continue to shape it manually--should move pretty easily on the plastic surface. (My mistake was that I flattened out TOO much so it didn't end up rising as it probably could have).

Drag your plastic wrap over to edge of pan and flip it over. If your bread dough loses its shape during the flipping process, just reshape it as best you can. It's not meant to look perfect.


3) Sprinkle some more flour on top of the loaf and cover with a dry kitchen towel. Let the dough rise 2 more hours. Dough will rise more out than up....totally normal! Still will be pretty flat.

4) Place in 425 degrees F for 35-45 minutes. It will rise, but it will still be flat-shaped. That is ciabatta's nature.


It will come out crisp on outside, but will be soft, moist, and spongy on the inside.

Good luck!!!!!

*Apparently, using bread flour provides extra protein/gluten and that seems to add more chewiness.

Tuesday, September 7, 2010

Grilled Chicken, Hummus, & Spinach Pizza


MORE PIZZA! In this house, you can never have too much pizza. And we like to break away from the traditional red sauce now and then....

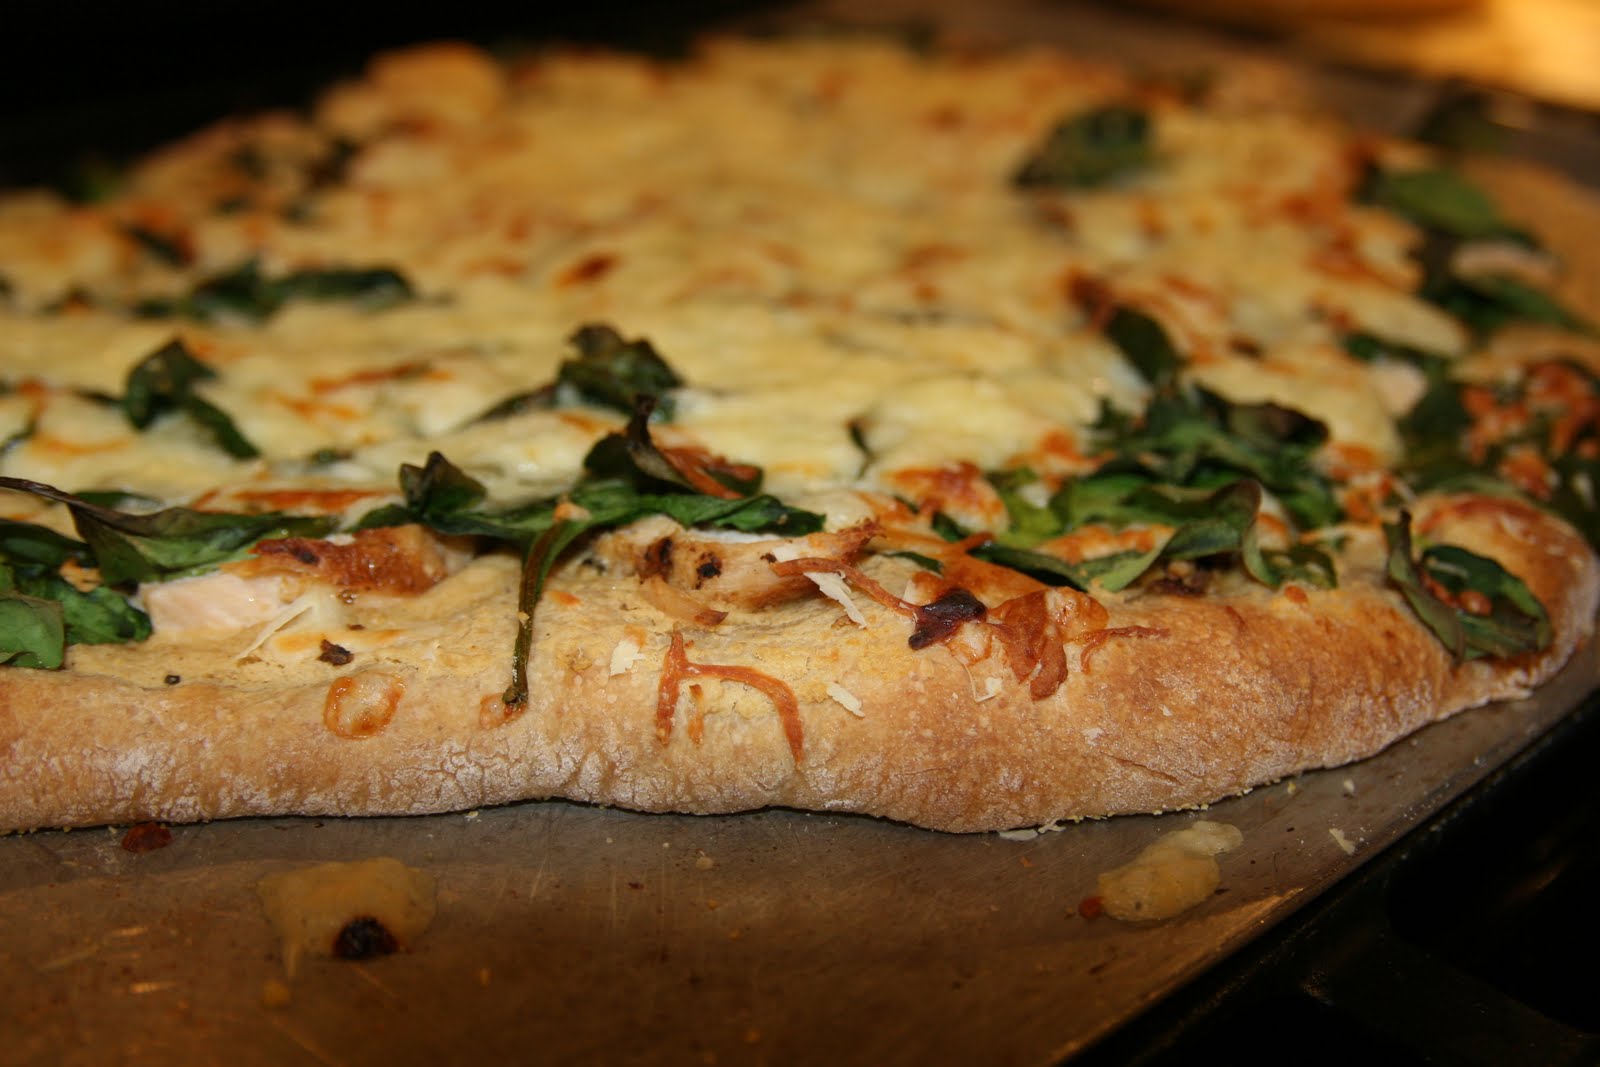
I'm a huge fan of cooking once, using twice. We had leftover grilled chicken (from the previous entry) and therefore go to make this delicious pizza for dinner last night & I again have to thank Laura Curlin. All you need is pizza dough, spinach, hummus, grilled chicken and cheese (blend) & maybe some rosemary. An easy 7-ingredient meal if you have things handy....seriously, you can roll/spread out pizza dough with your hands!


GRILLED CHICKEN, HUMMUS, AND SPINACH PIZZA

4-6 oz. (1/2 cup-3/4 cup) part-skim mozzarella cheese
1/2 cup shredded parmesan cheese
1/2 cup-3/4 cup cup plain hummus, preferably homemade; store bought is fine (see homemade hummus recipe below--the pizza will use about 3/4 of what is made below--I estimate)
2 cups packed baby spinach leaves, roughly chopped or julienne cut (I left them whole)
1-2 grilled boneless, skinless chicken breast-sliced (I used 1.5 big chicken breasts)
1 tsp. fresh or dried minced rosemary
1 ball refrigerated pizza dough (see this entry for an easy home-made pizza dough recipe)

Place crust on cookie sheet and spread out with your hands (it's fine to keep it rustic looking). Spread the crust with hummus. Then top with the grilled chicken.


Even spread the spinach on the pizzas follow that up by spreading the cheeses and rosemary over the pizza.

Bake at 425 for 15-20 minutes until your cheese is started to brown and bubble and your crust has gotten golden/brown.


I make hummus all the time but I don't use written proportions. I was happy to receive Laura's recipe because it tastes so much like mine & I actually have proportions this time! Woo-hoo!

Thanks for a great recipe--I love to add paprika and cumin too! I never thought about adding the smoked flavor and while digging through my cupboards, found this amazing smoked salish salt purchased from our culinary tour in Seattle's Pike Place Market (World Spice Merchants). So I used regular paprika and smoked salt with great success.


CURLIN FAVORITE HUMMUS--this is great!

1 (15 oz) can garbanzo beans, strain and reserve ¼ c. liquid
1/4 cup liquid from can
1/4 cup freshly squeezed lemon juice
2 Tbsp. sesame tahini (sesame seed paste found at Whole Foods or other natural markets--ask your grocer about it)
2 Tbsp. extra virgin olive oil
1-2 tsp. minced fresh garlic (about 2 small cloves)
¾ tsp. ground white pepper (black seemed ok too)
¾ tsp. fine ground sea salt
¼ tsp. cumin
1/8 tsp. cayenne pepper
1/8 tsp. paprika, pref. smoked

Strain the beans, reserving portion of liquid.

Using a food processor or blender, combine all ingredients and mix until smooth, stirring to ensure even mixing consistency if necessary.

Spoon into covered container and refrigerate overnight before serving, if possible.

Store in refrigerator. Will last for 2 weeks. Hummus can be served alone or with pita chips and veggies.

Variations for Hummus: While blending hummus any of the following can be added to change the flavor: roasted red peppers, fresh basil, chipotle peppers in adobo sauce, pine nuts, artichoke hearts, fresh flat leaf parsley, black olives or olive tapenade, or sundried tomatoes.

Enjoy!!!!

Monday, September 6, 2010

Best. Marinade. Ever. Thank you John Stamos.


It's Labor Day! Many of us are grilling out today so I thought I'd post on my favorite chicken marinade.

So, never thought much of John Stamos --ok, except he was quite the hunk back in the late 80's-early 90's-yes, from Full House)....until I ran across a recipe. Embarrassingly enough, the recipe is from InStyle Magazine--back when I had time to care about that sort of thing. Well, this marinade has STYLE! You can't screw it up. You just can't. The marinade somewhat reflects the actor's Greek heritage..

For the first time ever, I manned the chicken breasts on the grill without my husband's help. It was pretty awesome....sort of, "I am woman, hear me roar" feeling--I may not like to take out the trash, but I WILL grill. Also, I tried to locate a link to the original InStyle article, but unfortunately, I believe the site has taken it down. (In my research, however, I was relieved to see that a law student commented that ingredient lists are not copyright protected.)


BEST CHICKEN MARINADE EVER

4 big chicken breasts (probably about 2 lbs, or a bit over)

Marinade:
1/4 cup white wine (not cooking wine)
1/3 cup extra virgin olive oil
juice of one lemon
1 Tbsp. dried oregano
3/4 tsp. salt
2-3 big garlic cloves, minced
1/2 tsp. freshly cracked black pepper (he didn't call for this but I believe it to be essential)

Optional & my additions:
1/4 tsp. marjoram
1/4 tsp. parsley
Zest of 1 lemon 

Mix the ingredients together. I like to put them in a sealed jelly jar and shake to mix.

Pour the marinade over the chicken in a sealed container.

Marinate for a couple of hours and you are ready to grill!!!

Serves 4.