Saturday, July 16, 2011

Pasta with Fresh Mozzarella, Tomatoes, Arugula, and Pine Nuts


Easy dinner. Fantastic tasting. Almost like you don't even know it's healthy (used whole wheat pasta, but you can use what you like--multigrain pasta is good too). Came up with this dish last night while in a hurry to make something for dinner. We loved it! Definitely use summer's best tomatoes (heirloom tomatoes if you can get them)--this dish is much better in the summer with fresh tomatoes--not the mealy ones of the winter-grocery variety. In the winter, consider sauteing 1-2 cans of diced tomatoes in with the garlic for a few minutes for this dish. I certainly will.

We had leftover lemon basil chicken from this recipe I made (and adapted) earlier this week. It was very good!


The chicken was great with the pasta. But, I bet the pasta would also be very good with some white (cannellini) beans (instead of the chicken) for a vegetarian meal. Next time, I'm going to try it that way and maybe even replace the fresh mozzarella with feta cheese for variety. By the way, arugula is wonderful in pasta dishes!

PASTA WITH FRESH MOZZARELLA, TOMATOES, ARUGULA, AND PINE NUTS

Serves 6

  • 16 oz. pasta (farfalle (bowtie), penne, fusilli/rotini, cavatelli shapes are good options)
  • 2 Tbsp. extra virgin olive oil
  • 2 garlic cloves, minced
  • 2 large tomatoes, diced
  • 1/4-1/3 cup pine nuts (pignoli)
  • ~1 tsp. sea salt
  • ~1/2 tsp. cracked black pepper (or to taste)
  • 8-10 ounces fresh mozzarella, chopped
  • 5 oz. baby arugula (this is ~6 cups)
  • ~4 cooked chicken breasts, chopped (optional)
  • Parmesan cheese, (optional)

Cook pasta according to package directions. While that cooks, heat olive oil up with the garlic and cook slightly without browning. When garlic starts to brown, turn off the heat. Let cool until pasta finishes cooking. Combine the tomatoes, pine nuts, salt and pepper with the fresh mozzarella, and arugula. Add the cooled olive oil and garlic.

Drain pasta and combine toss with the tomato-arugula-cheese-nut mixture. Add cooked chicken, if using.

Serve immediately. For extra pizzazz--serve with freshly grated Parmesan cheese over each serving. Doesn't this look delicious? It really was. Hope you enjoy it.

Friday, July 15, 2011

Summer in My Mouth: Strawberry Pineapple Quick Bread


Quick Breads: More matter with less art.--Anonymous

Fun fact: Quick breads originated in the 1850's.

Summer in a bread.....sweet, moist, simply wonderful! This recipe is amazing--I found it on allrecipes.com, read all the lengthy reviews, and deemed it capable of handling healthy changes. The reviews proved that to be true. Here is the original recipe--it uses frozen strawberries and canned pineapple (that is not acceptable to me when it's cheaper to buy the fresh during this season). This quick bread is intensely flavorful!

My version is below--I wanted less sugar, less cinnamon taste (so the fruit flavors would be more discernible), some whole grain flour, and half the fat. The only thing I would do differently next time is to use even less sugar! It was a little too sweet to me--but still very good. This recipe makes TWO loaves--so keep in mind that if you don't freeze one, you will probably have to share with your coworkers, friends, and/or neighbors--and then you will probably have to share the recipe too (or so say the reviewers). (Each loaf has about 10 slices-give or take--more like take!)

I found it super easy and was surprised by how fast it came together. I might be making this again at the holidays--can't imagine it would compete with any fruitcake I've had. 


STRAWBERRY PINEAPPLE QUICK BREAD
Adapted from www.allrecipes.com
Makes 2 loaves

  • 1 2/3 cups sugar (definitely decreasing this further next time by another 1/3 cup)
  • 4 eggs, beaten
  • 1/2 cup applesauce (heaping)
  • 1/2 cup vegetable oil
  • 1 tsp. pure vanilla extract
  • 1.5 cups all-purpose flour
  • 1.5 cups white whole wheat flour (good, but will use whole wheat pastry flour next time)
  • 1 tsp. baking soda
  • 1 tsp. salt
  • 1 tsp. cinnamon
  • 1 cup chopped pineapple--packed and drained
  • 1 cup sliced strawberries--packed
  • 1 cup chopped walnuts (optional--but I liked the crunch)
Preheat oven to 350 degrees (F). Lightly grease two 5x9 inch loaf pans.

In a medium-large bowl, mix the eggs, applesauce, oil, vanilla extract, and sugar. Then mix in the strawberries and pineapple.

In a separate (smaller) bowl, sift together the flour(s), baking soda, salt, and cinnamon. (In all honestly, I'm not a big 'sifter' and therefore skipped this step. I don't think we suffered too much because of it. Or at all.) 

Mix the flour mixture into the bowl with the fruit until evenly moist. Fold in walnuts. Divide the batter between the prepared loaf pans.

Bake 1 hour in the preheated oven, until a toothpick inserted in the center of a loaf comes out clean. Cool on wire racks.


A dreamy treat with coffee or tea...

Thursday, July 14, 2011

Calabacita Squash with Corn, Tomato & Onion


During my first month at home with a new baby, someone gave me a copy of an Oprah magazine. I was intrigued by an article featuring Jennifer Anniston's celebrity chefs. They cook healthy meals--now, as much as I enjoy time in the kitchen (it's stress relief to me), to have a celebrity chef prepare healthy meals for my family and not to have to worry about dishes or clean up is the thing dreams are made of...well, I clipped Jill Elmore's favorite recipe on preparing squash and finally got to make it. What a wonderful way to use up summer's bounty--it's a delicious side dish! So, so, good!

You don't feel like you're eating healthy in a frustrated way....you can use whatever cheese you have around--I used Swiss and enjoyed it. It's a flexible recipe--I used 3 large zucchini and a bag of frozen corn with good results. And because I was in a hurry, I didn't drain the zucchini. I think it would make a difference so I definitely will not skip that step next time. This vegetable recipe would make a great side dish or something different to bring to a potluck dinner.

You might be asking what calabacita/calabasita is. And I have seen it spelled both with a 'c' and with an 's'. It means 'little squash' in Spanish. It's a lighter skinned, shorter (squattier), summer squash used in Mexican and Hispanic cooking. I have read that it has a less bitter skin. I used this kind of zucchini squash. It was labeled as 'calabacita' in my Hispanic grocery store, but you can find it in regular grocery stores too. I imagine that any zucchini would work, really. Not really sure which is the proper way....but in any case, at last you can eat like Jennifer Anniston with this dish (ha).

CALABACITA SQUASH WITH CORN, TOMATO, AND ONION
Adapted from The Family Chef by Jewels and Jill Elmore
Serves 5
  • 4 small zucchini, diced
  • 2 tsp. kosher salt
  • 2 Tbsp. olive oil
  • 1 medium onion, chopped
  • 1 clove garlic, minced
  • 4 ears corn, kernels sliced off
  • 2 plum (Roma) tomatoes, diced
  • ½ cup shredded mozzarella or feta (optional)

Place diced zucchini in a colander set over a bowl. Sprinkle with salt; toss and let stand 20 minutes. (This draws the excess liquid out of the zucchini.)

Transfer zucchini to a kitchen towel and pat dry. (This step is optional but worth the time: Drying zucchini prior to sautéing it keeps it from becoming watery, and Jill think this step removes its occasional bitterness.)

Heat oil in a large nonstick skillet over medium-high heat. Add onion and garlic; sauté 3 to 5 minutes until soft. Do not brown. Add zucchini and corn kernels. Saute 6 to 7 minutes until vegetables are almost tender. Add diced tomato; sauté 2 to 3 minutes until softened and zucchini is tender.

Remove from heat and stir in cheese if desired.

Per serving: 143 cal, 4 g pro, 21 g car, 4 g fiber, 7 g fat (1 g sat fat), 0 mg chol, 602 mg sod

Jill's Tip: She says she loves adding leftover calibasita to scrambled eggs in the morning for a breakfast burrito. Add a dash of hot sauce, roll it up in a tortilla and hit the road!

Sunday, July 10, 2011

Savory Zucchini Dill Corn Muffins


I've been making these savory dinner muffins for a long time and I just love them!. They are a great accompaniment to chili in the winter--particularly spicy chilies. But, in the summer, these muffins also fare well alongside grilled vegetables and meats because zucchini are so readily available and cheap in this season. So during hot months, I just make try to make them early on in the morning.

These muffins do not rise as much as regular breakfast muffins, but they are moist and tender. I have actually noticed that they are even more delicious when you use organic or stone-ground cornmeal. If you don't like feta, use goat cheese. And dried dill works fine if you can't locate fresh dill. I've always wondered how good they would be with some fresh corn kernels thrown in....Serve these muffins at room temperature or warmed a bit, with butter. 


SAVORY ZUCCHINI DILL CORN MUFFINS

Makes one dozen savory dinner muffins

  • 1 1/2 cups cornmeal
  • 1/2 cup all purpose flour
  • 1 tsp. baking soda
  • 2 tsp. baking powder
  • 1/2 tsp. salt
  • 4-5 Tbsp. butter, melted (half a stick or 1 Tbsp. more)
  • 1 cup low-fat buttermilk
  • 1 egg + 1 egg white
  • 1/4 cup chopped fresh dill (or about 1/2 tsp. dried dill)
  • 2 zucchini, grated (~2-2 1/2 cups)
  • 1/4-1/3 cup grated or crumbled reduced-fat feta cheese OR regular crumbled goat chese
Preheat oven to 375 degrees. Grease or spray a muffin pan with Pam or other cooking spray or line muffin pan with paper cups. Set aside.

In a medium sized bowl, mix the cornmeal, flour, baking soda, baking powder and salt.

In a smaller bowl, whisk together the melted butter and buttermilk. Then whisk in the egg, egg white, and dill. Using a spatula, mix in the shredded zucchini and cheese.

Add the wet ingredients to the dry ingredients and gently mix until a batter is formed.

Fill muffin cups with batter and bake for about 25 minutes or until tops are golden and a toothpick inserted comes out clean.

Yield: 12 muffins

(Note: if using paper liners, in order to prevent muffins from sticking to the liners, wait to peel them after they have nearly cooled).


Friday, July 8, 2011

Snappy Red Sauce


I have a dirty little secret. I know we all have those--whether we want to admit it or not. I'm almost too ashamed to admit it. Pause. But, here goes. I watch a bad show. It helps me realize I'm really not crazy. That there are other people out there who absolutely define crazy. People out there who put their lives front and center so that we, as viewers, can watch with shame and horror and then feel downright normal. Who are these people? They are The Real Housewives of New Jersey.


I know some of you may be take a higher road and don't watch reality tv. Or own a tv. Well, more power to you. Can someone come and take mine away? Because this really is like watching a train wreck. Do I recommend this show? No. Do I have a problem because I continue to watch it? Most likely. I always feel like I need an emotional shower and the need to pray after this show. Yet, I continue to watch it and then say to myself....'See, you're fine!' It's totally ok that you apologize before any new thing you serve to friends and family before they taste it. It's totally ok to have to physically force and rip open your tupperware drawer because everything in there is jammed in unorganized. It's totally ok to refuse to wear hosiery from February to November. It's totally ok to think the Mr. Clean magic eraser is really magical. And it's ok to be Dharma to your Greg.

Anyway, I digress. My point is that on this crazy show, the mother of all that is crazy is a character named Teresa. Who has an obnoxious life. And an obnoxious house. And an obnoxious husband. And seeminly obnoxious children. But, my goodness! It looks like her cooking is to die for! She has written two cookbooks so far (watch out Giada!). The first was 'Skinny Italian' and the second is 'Fabulicious' (because everything in her life is 'fabulous'--and you know, I think her attitude is awesome! I think we should all go around saying our lives are fabulous--whether we wear animal print and have a gold bathroom or not). Anyway, after an internet search of some of her recipes, I'm convinced that she may know what she's talking about. Her recipes make one salivate in anticipation. And they don't look that complicated! So, as a warning, I will be trying a few here and there.

Below is Teresa's 'snappy red sauce'. A basic (slightly spicy) red sauce that is a staple in her Italian family's home and the basis of many of her recipes. I tried it and really like it. And what's strange is that 2 year old ate it up by spoonfuls. It really is a fast and basic red sauce that is delicious on pasta. I'm considering using it on pizza dough. The recipe is a great jumping-off point for other additions. But it's very balanced and uses ingredients you would not have a hard time finding in your home or grocery store.


SNAPPY RED SAUCE*
Adapted from Fabulicious by Teresa Giudice

  • 1 Tbsp. extra-virgin olive oil
  • 1 small onion, chopped
  • 1/4 tsp. salt
  • 2 garlic cloves, minced
  • 1/2 tsp. red pepper flakes
  • 1 28-oz. can crushed tomatoes in thick puree
  • 3 Tbsp. chopped fresh Italian parsley

Heat oil in a large saucepan over medium heat. Add onion and salt. (Teresa says that a little salt brings out the onion flavor.) Cook, stirring occasionally, until onion is translucent, about 5 minutes.
Add garlic and red pepper flakes and stir until garlic is fragrant, about 1 minute. Stir in tomatoes with their puree and parsley and bring to a boil.

Reduce heat to medium-low. Cook at a brisk simmer, stirring occasionally, until slightly reduced, about 5 minutes. Serve hot as a pasta sauce.

Makes 3 1/2 cups (enough for 1 pound of pasta)

*For my tastes, I prefer to add a little more salt and stir in about a teaspoon of olive oil at the end. Also, if I'm not serving it with a dish already using these same herbs, I would add some basil or oregano in with the parsley.

Thursday, July 7, 2011

Super Succotash


My child and I have a love for lima beans. And now succotash. I recently learned that this dish came about during the Great Depression because of widely available and inexpensive ingredients. This is my version below. It makes for an awesome summer lunch. Flavorful, fresh, and resplendent with grilled meats and potatoes. Another example of how a vegetarian dish can be full of flavor. Also, it makes a great meal to pack for work.

Keep in mind that the version below is a bit fresher than traditional succotashes which saute the onions and bell pepper--feel free to do so and toss with the corn and beans if you prefer. Also, if you really want to 'kick it up a notch' (as our friend, Emeril, says)--add about 3-4 pieces of crumbled cooked bacon (we use turkey bacon). Feel free to add more butter--it really makes for a better taste with the creaminess of the lima beans and sweetness of the corn. We love this--hope you do too!


SUPER SUCCOTASH

Serves 4-6

  • 1 (10 oz) package frozen lima beans
  • 1 big red bell pepper, diced
  • 3-4 green onions, chopped--white and green parts
  • 3-4 ears of cooked corn--kernels cut off OR 2 cups of corn from either cans (drained) or cooked from frozen
  • 2 Tbsp. of sesame seeds (heaping)
  • 1/4-1/2 tsp. garlic powder
  • 1 Tbsp. light butter (melted) or extra virgin olive oil (can use Earth Balance spread for vegans)
  • Juice of half a lemon or lime (optional)
  • Salt & pepper to taste (a bit heavier on the pepper)
Cook lima beans according to package directions (either on the stovetop or in the microwave). While still warm, toss the onions and bell peppers with the lima beans--this softens the 'bite' of the onion. Add the corn and sesame seeds and garlic powder. Pour the melted butter (or oil), citrus juice (if using) over the ingredients and gently mix it all together. Season with salt and pepper--taste and adjust seasonings as necessary.

Wednesday, July 6, 2011

Happy Belated Birthday, America!

Hope everyone had a spectacular 4th of July! This post is way too late (been kinda busy), but below is what I made for Independence Day (4th of July).


Every single time I have made this cake, I make it with Ina Garten's recipe (Barefoot Contessa). I highly recommend you guys bookmark her recipe to make for next year. This year, I wanted to simplify my life and used a cake mix (white 18.25 ounce). Then, decided to make it healthier and modified the cake mix directions by omitting the water and replacing it with some applesauce and butternut squash puree (added extra vanilla extract). So then surely, I had to reduce the fat in the frosting. This recipe was my inspiration in lightening the cake. I was surprised that the cake was still good. Even so, with all my more health-conscious alterations, you should still make Ina's cake at some point--it's very, very good. HERE is her recipe. It's also WAY prettier!

By the way, Ina's original frosting recipe is a bit scary if you're trying to eat healthier. So this year, for the frosting--instead of using FOUR sticks of butter and 24 ounces of cream cheese, I used 1 stick of LIGHT butter, and 16 ounces of REDUCED FAT cream cheese (that's two 8-ounce packages of cream cheese). And yeah, it was still quite good! Just something to consider.

Monday, June 27, 2011

BEST EVER Coffee Cake: Blueberry, Lemon, Almond Crumb Heaven


This coffee cake is the BEST coffee cake I have ever made! I first made it years ago when my in-laws came to visit and it was the first time my mother in law asked for one of MY recipes! I always ask for hers! Anyway, it's not 'my' recipe--it's from a Cooking Light magazine from June 2005. And I made it again this weekend while my friend from college and her family came to visit. And Lila asked for the recipe too. We were talking about how there are people out there that don't give credit or share recipes and since neither of us are those types of people, the recipe is below for your enjoyment!

The texture of this moist coffee cake is crumbly and delicate. And the flavors of the blueberries, lemon, and almond are absolutely perfect together. It's the perfect side to a cup of coffee (or as dessert with a scoop of vanilla bean ice-cream). And one of my favorite recipes ever! A great weekend brunch item or a delightful treat to have if you're lucky enough to have afternoon tea!


BLUEBERRY LEMON (ALMOND) COFFEE CAKE
Adapted from Cooking Light

For cake:
  • 1 1/2 cups all-purpose flour

  • 2 tsp. baking powder

  • 1/4 tsp. baking soda

  • 1/2 tsp. salt

  • 1/2 cup sugar

  • 1/3 cup almond paste

  • 2 Tbsp. chilled butter, cut into small pieces

  • 1 large egg

  • 1 Tbsp. lemon juice

  • 3/4 cup fat-free milk

  • 1 1/2 cups blueberries

  • 2 tsp. grated lemon rind (I never measure-just use rind of a whole lemon)


  • Topping:
  • 1/4 cup sugar

  • 3 tablespoons sliced almonds, chopped

  • 1 1/2 tablespoons butter, melted (light butter is fine)

  • 1/2 teaspoon ground cinnamon


  • Preheat oven to 350°.

    To prepare cake, lightly spoon flour into dry measuring cups, and level with a knife. Combine flour, baking powder, baking soda, and salt in a small bowl, stirring with a whisk.

    Place 1/2 cup sugar, almond paste, and 2 tablespoons butter in a large bowl; beat with a mixer at medium speed until well blended. Add egg and lemon juice, beating well. Add flour mixture and fat-free milk alternately to sugar mixture, beginning and ending with flour mixture. Fold in blueberries and rind. Spoon batter into a 9-inch square baking pan coated with cooking spray (I use an 8X8 inch pan and it always works out perfectly).

    To prepare topping, combine 1/4 cup sugar and remaining ingredients in a small bowl, tossing with a fork until moist. Sprinkle topping evenly over batter.

    Bake at 350° for 35 minutes or until a wooden pick inserted in center comes out clean. Cool in pan on a wire rack.
    Note: Almond paste is found in the baking section of the grocery store. (Don't substitute marzipan, which is sweeter and has a smoother texture.) If it is hard, soften it by microwaving at HIGH 10 to 15 seconds.

    Makes approximately 12 pieces.


    Saturday, June 25, 2011

    Strawberry Yogurt Whole Grain Muffins


    Well, you knew it was coming, didn't you? Muffins + Strawberries + Yogurt + Whole Grain Flour= Awesome breakfast or snack. My friend, Nancy, first posted about this recipe a while back (here's the post). I've worked with it a bit & must say it's my second favorite muffin recipe. Here's my first. And the perfect recipe to have on hand when your strawberries are about to go bad--but not quite there, yet not worthy to be put out to be eaten either. The muffins are even better with freshly picked strawberries!

    I first made these last year and then again a couple months ago when we went strawberry picking. But I'm getting ready to make them again and figured I'd share the recipe for anyone else that finds themselves with a bumper crop of strawberries--they are still cheap at the grocery store in June! Here are a few pictures from our picking in April:


    I've included two of my trials below as notes after the recipe--you may want to read through them before trying out the recipe to see what might sound good in your own efforts. I don't know that I prefer one over the other. The original is wonderful, but I would encourage you to play around with the recipe if you wish too--it's a forgiving one. Thanks again for the inspiration, Nancy! These are really melt-in-your-mouth good!


    STRAWBERRY YOGURT MUFFINS 
    Adapted from Stonyfield Farm

      
    "these muffins are a great brunch item. for extra sweetness, dust with cinnamon sugar while still hot."
    • 1 cup all-purpose flour
    • 1 cup whole wheat flour
    • 1/2 cup sugar (I've only made them with raw sugar so far b/c I adore raw sugar)
    • 1 1/2 tsp. baking soda
    • 2 eggs
    • 1 cup lowfat plain yogurt
    • 1/4 cup butter, room temperature (used light butter before with success)
    • 1 tsp. pure vanilla extract
    • 1 cup chopped strawberries, fresh or frozen (I've only used fresh)


    Preheat oven to 375°F. Grease a 12 muffin tin or line it with paper baking cups. In a large bowl, sift together flour, sugar and baking soda. (I skipped the sifting and it was fine) In another bowl, stir together eggs, yogurt, melted butter and vanilla until blended. Toss the strawberries with the flour mixture.

    Pour the egg mixture into the flour mixture and stir until the flour is just moistened. The batter will be lumpy. Spoon the batter into the muffin cups. (Sprinkle with cinnamon sugar, if desired) Bake for 20 – 25 minutes, or until the tops are golden brown.

    Yields 12 muffins.

      
    TRIAL I

    1) I used regular strawberry yogurt and must say this made a big difference in the 'pop' of the strawberry flavor 2) Used 3 egg whites in place of 2 regular eggs 3) Substituted whole wheat pastry flour instead of whole wheat flour (I tend to prefer it for baking) 4) Added about 1/4 cup of wheat germ + ~2 Tbsp. of ground flax seeds 5) Used brown sugar instead of regular sugar 6) When my dough seemed too dry, I added a splash of skim milk. Came out spectacular and HEALTHY!

     
    TRIAL II
    1) Used Smart Balance buttery spread (stick form) instead of butter 2) Used 1/3 (raw) sugar in muffin batter and then mixed 1/4 cup of (raw) sugar with a couple teaspoons of ground cinnamon cinnamon and sprinkled this cinnamon-sugar mixture on top of the muffins before baking 3) Had to add ~1/2 cup of buttermilk b/c dough was dry 4) Used fat-free strawberry Greek yogurt. Still a smashing success!!!!

    Friday, June 24, 2011

    Mediterrean Lentil Salad


    Now that the heat is here, I like whole grain summer salads for quick meals. I found this recipe on allrecipes.com, but changed it up a bit to suit my needs--for instance, less fat, the addition of a tomato, and since I didn't have fresh parsley, I added dried parsley to the lentils cooking and then used fresh mint and basil to mix in at the end. I also liked the addition of a little bit of cheese--just a bit takes it over the top. I'm sure you can substitute the feta for Parmesan or another cheese and it will be amazing. Or, skip the cheese for a vegan meal.

    This earthy salad is very delicious and filling. It would make a wonderful meal to take to work or as an addition to a picnic. The salad travels well, and if you don't use the cheese, you can leave it out for several hours without fear that it will spoil or 'go bad.' I really enjoyed it the texture of the lentils, the tartness of the lemon, and the intense flavor of the fresh herbs. It's also a great way to squeeze in some vegetables!

    MEDITERRANEAN LENTIL SALAD
    Adapted from www.allrecipes.com

    Serves 8
    • 1 cup dry brown lentils
    • 1 cup diced carrots (~2.5 carrots)
    • 1 cup red onion, diced (about 1 red onion)
    • 1 tomato, diced
    • 2 cloves garlic, minced
    • 1 bay leaf
    • 1/2 tsp. dried thyme
    • 2 Tbsp. lemon juice (I used the zest too)
    • 1/2 cup diced celery (about 1.5 stalks)
    • *1/4 cup chopped parsley (or 1/2 tsp. dried that you can add to the lentils during cooking-see note below)
    • 1 tsp. salt
    • 1/4 tsp. ground black pepper
    • 1/4 cup olive oil (I used less)
    • 1/4-1/3 cup reduced fat feta, crumbled or grated (optional)

    In a saucepan combine lentils, carrots, onion, tomato, garlic, bay leaf, and thyme. Add enough water to cover by 1 inch (this was about 3-4 cups for me).

    Bring to boil, reduce heat and simmer uncovered for 15 to 20 minutes or until lentils are tender but not mushy. (I needed to boil my lentils for about 8-10 minutes longer to get the right tenderness in the lentils)              

    Drain lentils and vegetables and remove bay leaf. In a medium sized bowl, add olive oil, lemon juice, celery, parsley (or any other fresh herbs of your choice-see note below), salt and pepper to the lentils. Then add the feta, if using. Toss all the ingredients together and serve at room temperature.               

    *One handful of chopped herbs--a combination of mint, basil, and parsley is particularly delicious

    Wednesday, June 15, 2011

    Mixed Berry Buttermilk Gelato


    Oh Nancy...how I appreciate you. You're a good person. A person who introduces me to recipes that make me happy and a little of a soul mate. I saw this on your blog and I could not resist. But when I measured out my strawberries, I sadly realized there weren't enough, so in went the raspberries and blackberries that were in the fridge. Check out Nancy's gorgeous picture and original post right here.

    This is a WONDERFULLY easy and refreshing recipe. MUST, MUST try! You can't taste the buttermilk at all! My husband seemed skeptical at first, but then he said it was 'very good!' It's more like a 'sorbet' than gelato to me, but maybe if I had used a full-fat buttermilk, it may have tasted more like the Italian gelatos I'm familiar with.... Either way, this one is for the books.

    One thing to note...the full amount of this recipe did NOT fit my ice-cream maker. I didn't remember reading this on Nancy's blog until I poured it in and then desperately grabbed a straw to suck up the overidge. Boy, am I glad I'm not on a reality tv show because that was, Not. Pretty. I wonder if scaling all ingredients back by 25% would make it fit...? (No, I haven't figured out those proportions yet because I'm too busy eating.) But if you have this kind of ice-cream maker (like mine), then this recipe may overflow your machine as well.

    Try serving it in a waffle cone and alternate with vanilla ice-cream. The two flavors are amazing together!

    MIXED BERRY BUTTERMILK GELATO

    Yield: 8 cups (serving size: 1/2 cup)
    • 2 cups water
    • 2 cups sugar (next time I may use 1 3/4 cups)
    • 2 cups buttermilk (I used low fat, but I think full-fat may be better in this recipe)
    • A tiny pinch of salt (optional--but think recipe needed it)
    • 5 cups mixed berries of your choice or single berries of your choice (I did strawberries, blackberries, and raspberries--but all strawberry is original version)*

    Combine sugar and water in a large saucepan (and salt, if using); bring to a boil, stirring until sugar dissolves. Pour into a large bowl; cool completely.

    Place strawberries in a blender and process until smooth. (If seeds bother you, this is the time to strain the puree through a fine mesh sieve or strainer.) Add the berry purée and buttermilk to sugar syrup; stir to combine.

    Pour the berry mixture into your ice cream maker and freeze according to the manufacturer’s instructions.
    Transfer ice-cream to a separate, covered container. Place in freezer and continue to freeze for a couple hours longer before serving.

    *If you use just strawberries, this will amount to 4 pints or 2 (16 oz) containers
    NOTE: You may have to leave it out a few minutes (like 5-10 minutes depending on how cold your freezer is), because it doesn't harden in the freezer quite a bit.

    Tuesday, June 14, 2011

    Product Review: Collopsable Colanders. Where have you been all my life?


    I LOVE this collapsable colander by OXO Good Grips! I've had two of these types of colanders for a couple years. They were purchased for myself. By myself. For Christmas. Worth every bit of that $15 I paid ON CLEARANCE! I thought they were SO expensive at the time! But now, I haven't been able to find one under $19.99. They sell for $29.99 on Amazon. I loved it so much that I bought my mom one too. Keep in mind that you can always use your Bed, Bath, and Beyond 20% coupons that come in the mail for such purchases.
    There are a few different brands of collapsable colanders, but I picked OXO because they were a little slimmer shape. The products that I have that are OXO brand are good design and very helpful. I also like this smaller sized colander.

    Recently, I saw a 2-pack of colapsable colanders at Costco for $19.99 and thought they were a real steal (they were green and white). I'm all for items that take less storage space. Let me show you what I mean...below on the upper right are 'regular' colanders. Below on bottom left, is collapsable one. My smaller one is not pictured, but it fits right next to it. Makes a big difference. They are dishwasher safe or hand wash. These OXO colanders are heat resistant/safe, have great handles, wipe clean easily and stand up well in the sink. Also, food doesn't get stuck in the holes (hate that). Fantastic product.

    So if you're short on space and make pasta, wash produce, rinse beans, often, consider some collapsable colanders.

    Monday, June 13, 2011

    Raspberry Gratin...Another reason worth turning on the oven...


    This dessert is so heavenly--one that I miss during the cold winter. Not unlike like ice-cream, it's not exactly healthy, but it's SO worth the splurge! And I know, I'm all talk about not turning on your oven & then I give you two recipes in a week that require none other than: YOUR OVEN! Forgive me. It's just that it's summer. When else do we get such amazing produce with which to experiment! After this....well, I'll try to stop using the oven. Now, let's turn to the magic that is the raspberry gratin....an adult pudding--decadent, creamy, yet fresh.

    The recipe below is Bittman at his finest--simple, elegant, delicious. It's fruit 'robed in creamy custard'. And a LOT lighter than some gratin recipes out there with many, many eggs! It's been at least 6 years since I first made this, but I think of this recipe more often than I ever imagined. 

    How can you resist not eating these raspberries?! If you can, this dessert will be worth it. Here are some fun facts on raspberries.

    I have loved these fruits from a young age when my grandparents would take us kids up to the mountains.


    We used to pick white raspberries and my grandparents would teach my brother and I about bear tracks...to this day, I have a vivid image of my grandmother carrying a heavy load of raspberries in her apron over her skirt and laughing. Here is a picture of my mom with my grandparents in Romania a few years ago.


     The only thing that might make this dessert more decadent is a scraped out vanilla bean. Let me know if you try it that way. One bonus feature of this recipe is that you can prepare most of it in advance the night before or morning before entertaining. Once you fold in the cream, the next day, it only takes 10 or less minutes in the oven!!!

    Best part? You can make this with ANY fruit.


     RASPBERRY GRATIN
    Adapted from How to Cook Everything by Mark Bittman
    • 1 cup milk (I used skim)
    • 1/2 tsp. ground cinnamon
    • 1 egg, PLUS 1 egg yolk
    • Pinch of salt
    • 1/2 cup sugar
    • 1/4 cup all-purpose flour
    • 3/4 cup heavy cream
    • 3 cups fresh raspberries, rinsed and patted dry (this is about a 12 ounce container)
    Place the milk and cinamon in a small saucepan and turn the heat to medium. When steam rises from the milk, remove it from the heat.

    Meanwhile, beat the egg and yolk with the salt until light and foamy. Combine the sugar and flour and beat about half of the mixture into the eggs; add about half the milk and beat again. Add the remaining sugar-flour mixture, beat, then the remaining egg.

    Place the mixture in small saucepan and turn to the heat to medium-low. Cook, stirring almonst constantly, until the mixture begins to boil; it will thicken almost immediately. Remove the custard from the heat and continue to stir for about a minute or so longer. Cover well and chill thoroughly, at least 1 hour and up to 12 hours.

    About 20 minutes before you want to eat the dessert, preheat the broiler. Stir about 1/4 cup of the cream into the custard to lighten it. Whip the remaining cream until it holds soft peaks. Fold the cream gently into the custard.

    Place the fruit on the bottom of an 8- to 10- inch long gratin dish or an attractive 8-inch square baking dish. Pour the cream mixture over the top and shake the pan a little to distribute it among the berries or fruit. Broil about 4 to 6 inches from the heat until lightly browned on top, about 10 minutes.


    Truly, raspberries bathed in creamy, cinnamon custard.


    Dole the custard out in pretty cups before serving. Serve immediately. But, we have eaten this dessert cold and it's just as good as when it's pulled straight out of the oven. Enjoy!

    Sunday, June 12, 2011

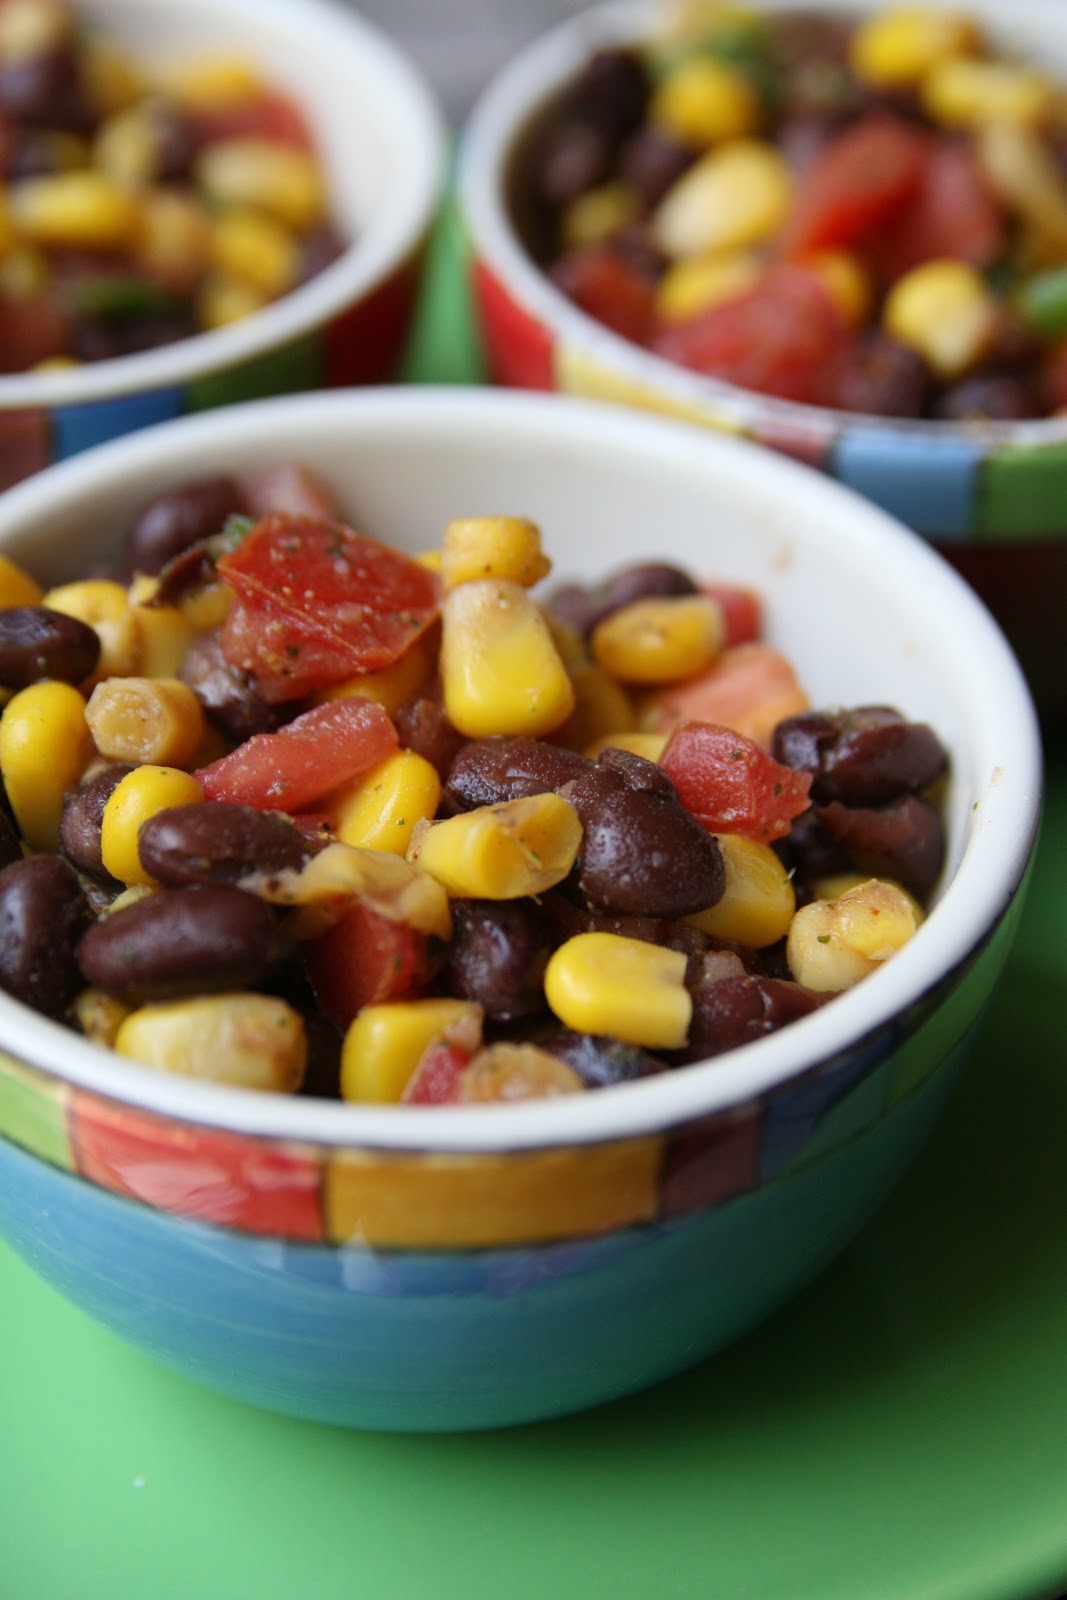
    Summer Staple: Black Bean & Corn Salad (or Salsa)


    One of my greatest buddies, Lila, posted this recipe on FB recently. She's an amazing cook. She was my college suite-mate and we used to have 'fancy dinner nights'. I miss her cooking. She recommended it from http://www.allrecipes.com/ and here is the original recipe. But, in the interest of time and availability, I had to make do today and the result was still very delicious. Thank you Lila for the recipe and I will make the original sometime soon with peppers and avocado (but with a little less oil). Below is my abbreviated, in-a-bind, version. We couldn't stop eating it--hope you all make Lila's version first!

    This is the PERFECT picnic food. Also, a salad you can make a day or so ahead of time before serving. When my friend Kelly and I used to travel for business outside of Charleston (Mount Pleasant, SC), we would always have lunch at this cute place called Square Onion at I'On--a lovely little casual lunch bistro in an idealistic community where you could eat on the sidewalk and see how the other side lived. In our case, the 'other side' were the posh stay at home moms that seemed to have nannies, perfect hair in sweltering 95 degrees, and shopped as a sport. Kelly and I would arrive, hurried, sweaty in our business attire, carrying some file folder that we'd try to sort out over caprese sandwiches and this delightful black bean and corn side salad and figure out who would get the coordinator to write up the adverse events and who would bribe the medical records lady with food for extra files that we realized we needed. Makes me miss you Kelly! Can't eat this salad without thinking of those times....

    Hope you all will enjoy this summer staple--salty, tart, spicy, and full of flavor. A great side to sandwiches or quiche or a delicious dip with crispy tortilla chips.


    BLACK BEAN AND CORN SALAD

    Serves 4

    • 1 can black beans, rinsed and drained
    • 1 can corn, drained
    • 2 Roma tomatoes, diced
    • 2-3 green onions, chopped (use both white and green parts)
    • 1 handful of fresh cilantro, chopped (I used a cilantro 'cube' from Trader Joe's)
    • 1 clove garlic, minced
    • 1 lime, juiced
    • 1 Tbsp. olive oil
    • 1/2 tsp. ground cumin
    • 1/8 tsp. chili powder
    • 1/8 tsp. cayenne pepper
    • Salt & pepper, to taste
    Toss all ingredients together and serve as a side dish or with chips as a salsa. Taste for seasonings. You can serve the salad either cold or at room temperature.

    Store leftovers, covered, in the refrigerator.

    Saturday, June 11, 2011

    Blackberry Basil Yogurt Popsicles


    We had a wonderful beach vacation last week. Thanks to my in-laws for our annual trip to Kiawah Island. While there, my mother in law had the cool idea to freeze lemonade in popsicle molds for the kids to take down to the beach. Absolutely, positively BRILLIANT idea for these hot days. The kids were in heaven...and I have to say, I was a bit jealous the adults didn't get any. But then I saw their joy, and it was ok. Just look at how cute they seem from our beach chairs....


    So fast forward to the present: we're back and I got my hiney on Amazon faster than Wienergate made the news...Ok, so that may be stretching it; however, I received my popsicle molds in 2 days (this does bring me to the point of 'Amazon Mom'--if there are any newish moms out there, check it out--wish I'd heard about it sooner. Here's a link.)

    My daughter was ecstatic to open and play with these cute molds--they are made by Orka. After reading a lot of popsicle reviews, I decided to go with a quality brand in a smaller size (2 oz) so they can be easily eaten by a 2 year old (and portion control for the mom). Hey, it's summer here from May to October....anything keeping a person cool should be justified.


    So while staring inside the fridge (for the tenth time today) and looking out at the basil growing on the porch, I remembered this amazing blackberry-basil flavor combination crisp I made from Barbara Kingsolver's book, Animal, Vegetable, Miracle.


    My child is not as big of a yogurt fan as I'd like her to be, so sneaking Greek yogurt into a 'treat' was starting to sound better and better. And local honey got used as a natural sweetener...


    And thus, the healthy blackberry basil yogurt popsicles were born. Can't wait to try this recipe with strawberries or raspberries and mint or basil.


    BLACKBERRY BASIL YOGURT POPSICLES

    Makes 5-6 (2 oz) popsicles
    • 1 (12 oz) container blackberries, rinsed and patted dry (OR 1 pint strawberries, cored and quartered)
    • 1/4 cup honey (agave nectar or raw sugar would work well too)-I used 1/3 cup & it was quite sweet
    • 1/2 tsp. pure vanilla extract
    • small handful of basil leaves (amounts to a 1-2. Tbsp chopped basil)
    • 1 tsp. freshly squeezed orange or lemon juice
    • *7-8 ounces (~1 cup) Greek-style yogurt (I used fat-free, but any kind is fine) 

    Bring the blackberries, honey, basil, vanilla extract, and orange or lemon juice to a simmer in a medium sauce pan. Simmer for approximately 5-8 minutes, or until blackberries are very soft or bubbly. Place fruit mixture into a food processor and pulse a few times, until the fruit mixture is almost pureed, but not completely liquified.


    If desired (sort of recommend this actually if you hate berry seeds), push the puree pieces through a fine mesh sieve and discard seeds. Chill the berry puree in the refrigerator until cooled.

    Stir the yogurt into the blackberry mixture until combined. Pour the puree into molds and freeze for at least 8 hours, or overnight. To remove the popsicles from the molds, run some warm water over the outside of the mold until you can gently pull/wriggle the popsicle out.

    *You can also use regular vanilla yogurt and omit the vanilla extract.

     
    And after an unfortunate spillage incident after the third serving, we learned that even the dog loved these popsicles.