Tuesday, January 17, 2012

Easy Little Bread (No Knead, 30 Minute Rise, Whole Grain, & Delicious!)


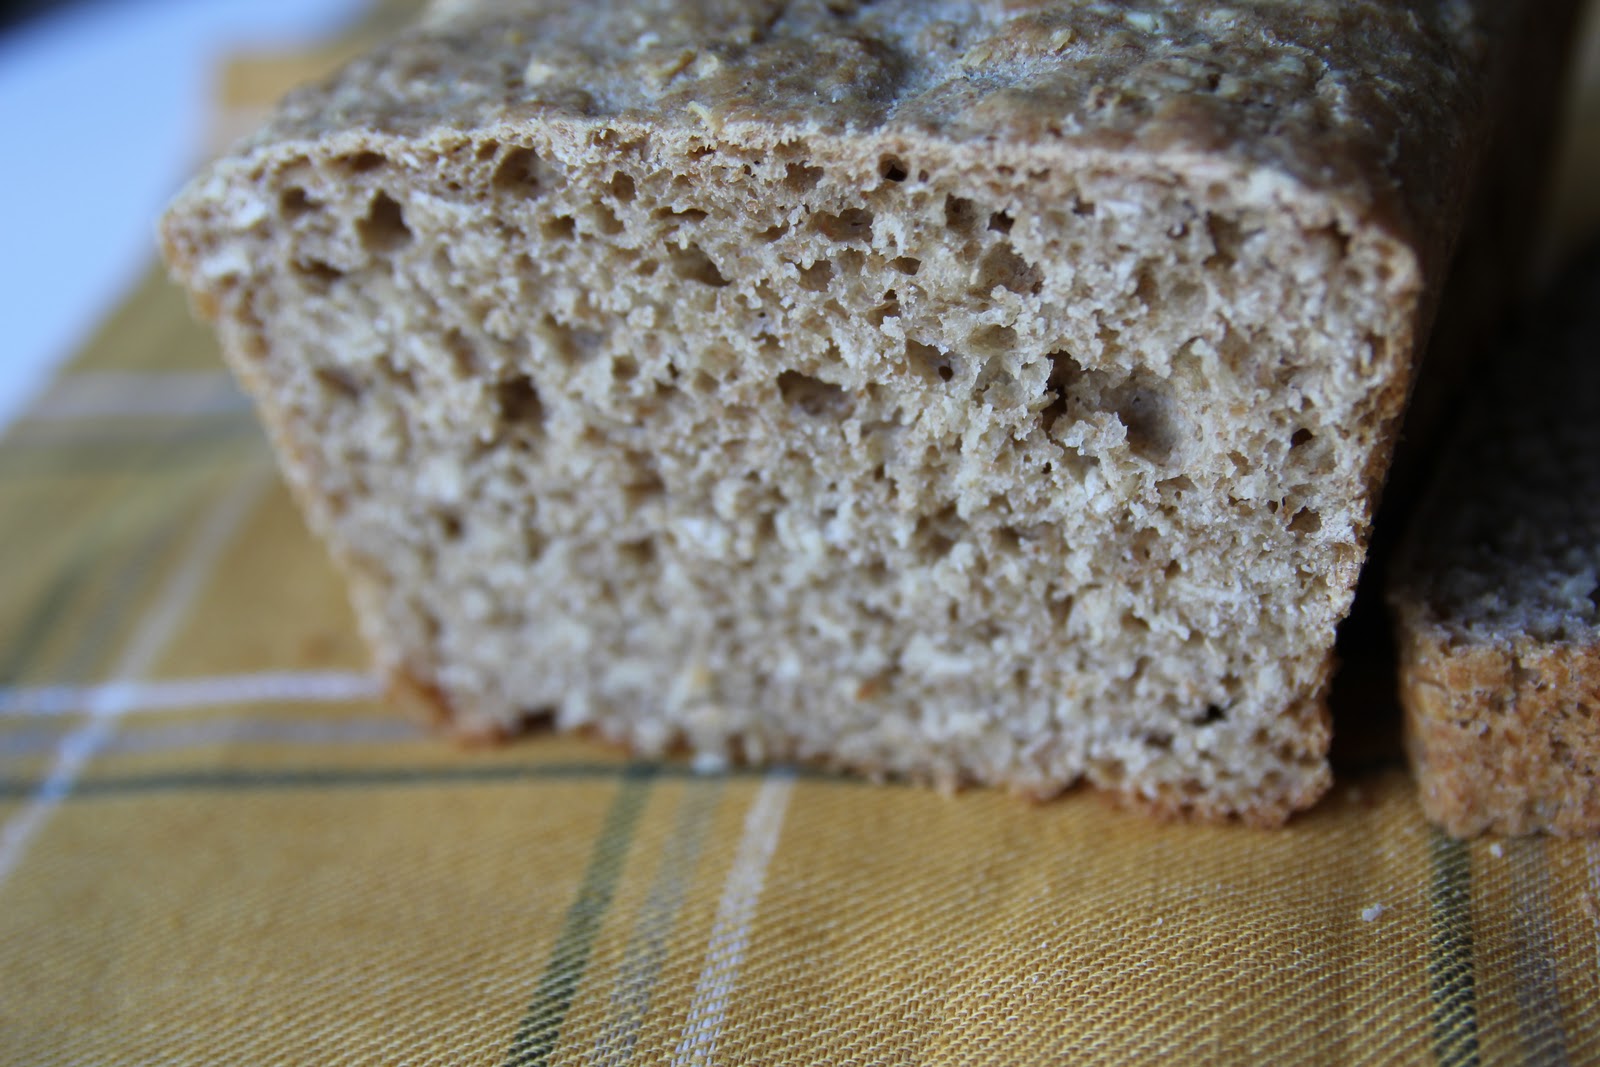
This bread is delicious! And it was SO easy! It is another one of Heidi Swanson's great finds (from 101 Cookbooks--great blog--here is the original post). Ran across this bread on Pinterest. It may be the fastest, easiest little bread recipe I've tried so far. You can literally have bread within a 2 hours of starting this recipe. Though, I prefer my longer wait method breads (from Kneadlessly Simple), this one is a great one if you're short on time and would be a perfect bread to 'cut your teeth on' if you haven't made any yeast breads yet. 


The best part of making this bread is that it uses ingredients you will most likely have on hand in your pantry. The crust is crispy, the texture is hearty, and the flavor is still light enough to not feel overly cardboard-healthy--but it is still healthy! I wish I had made THREE loaves and frozen two of them. Next time, I will. Seriously, this bread is NO knead (use your stand mixer to blend the ingredients). And requires only a 30 minute rise. Check out how beautifully this yeast proofed! (Don't mind my falling-apart measuring cup. Santa needs to bring me a new one next year. Also, this may be the first time I can tell my new camera may actually take better pictures than my old one...)


I'm hoping to incorporate this bread  into toasts for dinner, later this week, by topping it with mushrooms, bell peppers, and provolone cheese and broiling the toasts. This would be a great bread for that kind of thing. It is the perfect Sunday afternoon bread--the kind you want to eat while taking a break from doing laundry. I am assuming that's how everyone spends their Sundays....laundry and dreading going back to work the next day. So how to make Sundays better?? I have found three ways: 1) Bake bread! It's a cheerful way to greet the week. 2) Finish a creative project--thank you Pinterest for more inspiration!


And 3) Take your kids for a neighborhood ride in a wagon at sunset into the early evening. 


Here's to hoping everyone's Sunday nights get happier!


By the way, check out those air bubbles--keep in mind this bread does NOT rise much at all. I wouldn't say it's an impressive looking bread, but get past the fact that it's a little brick shaped (as was Heidi's if you go to her original post); slather some butter on it, hot from the oven, and you'll be good to go--yes, I know you're not supposed to cut it out of the oven, but who can resist? 


EASY LITTLE BREAD 

  • 1 1/4 cups / 300 ml warm water (105-115F)
  • 2 tsp. active dry yeast (one packet)
  • 1 Tbsp. honey
  • 1 cup / 4.5 oz / 125 g unbleached all-purpose flour
  • 1 cup / 5 oz / 140 g whole wheat flour
  • 1 cup / 3.5 oz / 100 g rolled oats (not instant oats)
  • 1 1/2 teaspoons fine grain sea salt
  • 2 Tbsp. butter, melted, for brushing

In a medium bowl, sprinkle the yeast onto the warm water and stir until the yeast dissolves. Stir in the honey and set aside for a few minutes, until the yeast blooms and swells a bit - 5 - 10 minutes.
In the meantime, mix the flours, oats, and salt in a large bowl. Add the wet mixture to the dry and stir very well.
Brush a 8-cup loaf pan (just a regular loaf pan you have around, really!) generously with some of the melted butter. Turn the dough into the tin, cover with a clean, slightly damp cloth, and set in a warm place for 30 minutes, to rise.
Preheat the oven to 350F / 180C, with a rack in the middle. When ready, bake the bread for 35-40 minutes, until golden and pulling away from the sides of the pan. (Heidi says: I finish things up by leaving the bread under the broiler for just a heartbeat - to give the top a bit deeper color.)
Remove from oven, and turn the bread out of the pan quickly. Let it cool on a rack so it doesn't steam in the pan. Serve warm, slathered with butter.
Makes 1 loaf.


Monday, January 16, 2012

Curried Chicken & Wild Rice Soup


It's been a while since I've posted on a soup and I have been looking for a chicken and wild rice soup that wasn't super rich. I try not to make meals that require heavy cream or a lot of cream cheese--and found most chicken and rice soups to be very rich due to those ingredients. When I stumbled upon this recipe, I decided to give it a go. I have adapted this recipe to be even lighter and don't miss the heaviness at all! But, feel free to make it as 'creamy' as you wish by adding a fuller fat dairy. We enjoyed it and I even sent some home with my dad when he came to visit. They said they loved it.


The soup calls for a little curry powder and many people think that curry powder brings out the flavor of chicken. I do not find it overpowering, but you can always add a little less. We really loved the texture of this soup due to the sliced almonds--how neat is that? Crunch in a soup. And almonds are so good for you! My husband said it reminded him of our avocado curry on brown rice. This is really great comfort food. And I may also try it with vegetarian 'chicken' next time.


Tips:
  • If you really in a hurry, you can buy one of those frozen mirepoix bags in the freezer section of your grocery store--one bag is a fine substitute for the chopped onion, celery & carrot required in the recipe (or so it seemed for me anyway!) 
  • In the comments section of this recipe, someone said they used the food processor to chop the onions, carrots, and celery--so I may try that next time. It's a forgiving recipe so a little more of this and a little less of that won't kill the flavor.
  • Also, in the comments section, someone said they put everything in the crockpot, raw chicken & I'm assuming uncooked rice (EXCEPT for the cream/milk), left it on low--I'm assuming for 4-6 hours, and added the milk/cream when everything was cooked through. That would be easy, wouldn't it?

CURRIED CHICKEN & WILD RICE SOUP

Adapted from www.allrecipes.com

Serves 6-8
  • 1 Tbsp. butter (+a little olive oil, if necessary)
  • 1 finely chopped onion (about 1 medium onion)
  • 1/2 cup chopped celery
  • 1/2 cup sliced carrots
  • 1/2 pound fresh sliced mushrooms (I used 1 lb. sliced mushrooms because we LOVE them!)
  • 3/4 cup all-purpose flour
  • 6 cups chicken broth
  • 2 cups cooked wild rice
  • 1 pound boneless skinless chicken breasts, cooked and cubed
  • 1/2 tsp. salt
  • 1/2 tsp. curry powder
  • 1/2 tsp. mustard powder
  • 1/2 tsp. dried parsley
  • 1/2 tsp. ground black pepper
  • 1 cup slivered almonds
  • 3 Tbsp. dry sherry (vermouth would work well too)
  • 2 cups half-and-half (I USED 2% milk—but you could go even lighter with 1% or skim or fat-free half & half)

Melt butter in a large saucepan over medium heat. Stir in the onion, celery and carrots and saute for 5 minutes (add a little olive oil if necessary to prevent sticking). Add the mushrooms and saute for 2 more minutes. Then add the flour and stir well. 

Gradually pour in the chicken broth, stirring constantly, until all has been added. Bring just to a boil, reduce heat to low and let simmer.

Next, add the rice, chicken, salt, curry powder, mustard powder, parsley, ground black pepper, almonds and sherry. Allow to heat through, then pour in the half-and-half or milk.

Let simmer for 1 to 2 hours. (Note: Do not boil or your roux will break.)


Wednesday, January 11, 2012

Dark Chocolate Lavender Truffles....LOVE at First Bite


WOW. I have been dreaming of lavender recipes lately....and finally, I tried something with my dried lavender (courtesy of the bulk spice department in Whole Foods). Chocolate & lavender are an amazing team. If you like the smell of this herb, then you will like the taste of this treat. If you don't...then maybe you should still try it--but make 1/2 a recipe. Lavender is native to the Mediterranean region. I've heard a lot of people say that they can't imagine lavender in food--that it just reminds the of soap. I suppose it is clean & relaxing. And the word does come from the latin, lavare, which means 'to wash'...It's one of those herbs like cilantro or tarragon--you either love it or hate it. I happen to love it. My aunt and I dream of visiting lavender fields across the globe!

Here's one in Tasmania (photo from Wikipedia):


and one in Provence (photo from Lizzie Shepherd: Photography):


There is something incredibly decadent about combining these two flavors--the peaceful, calming nature of lavender--with the explosive, luxurious, and deep flavor of chocolate. It's like having a vacation in a bite! Truffles are an easy, but heavenly, treat to make.

When making these heady treats--read my recipe all the way to the end first--I wrote a note on whether to include or eliminate the lavender flowers.

I made a double recipe of these awesome truffles (so I'd have something to give out at the tail end of the Christmas holiday) and tried hard to remember the yield....I think 25-35 for a double recipe. But of course, it also depends on how big you make your truffles....now, I can't wait to try other flavor possibilities--these chocolates are otherwise expensive at the store! Somehow, they tasted expensive at home too.....


DARK CHOCOLATE LAVENDER TRUFFLES
Adapted from www.voilawithemily.com

  • 8 oz. dark chocolate (53% cocoa or above), chopped--the better the quality, the better the truffle
  • 1/2 cup heavy whipping cream
  • 2 tsp. dried lavender buds
  • 1 tsp. pure vanilla extract
  • 1/4 cup unsweetened cocoa powder or 1/4 cup blanched almond crumbs (I needed more like 1/3 cup)


Chop chocolate into small chunks (I actually didn't even bother to chop them!), place in medium size bowl and set aside. Simmer cream in small sauce pan. Once simmering, pour in lavender buds and vanilla, whisk together. 
Now, this is just my suggestion-- let sit a few minutes to let the lavender flavor fully set and then strain the lavender pieces out through a sieve (RESERVING HOT CREAM!) Some people don't like their chocolate to have anything in it--like herb leaves/buds. I prefer my chocolate smooth so I can be undistracted during my afternoon moment of bliss as I tune out the cats that are in heat on my porch, the crashing of some dish off the countertop my toddler has pulled on, or the sound of the garbage truck dragging my recycling across the street. But, that's just me and my untethered moment (bliss).
Add cream/lavender mixture to the chopped chocolate. Let sit for a few minutes before stirring until smooth. (I just stirred immediately until it was all combined.)
After the mixture is smooth, place in fridge for 3 hours or more.
Remove bowl and with a teaspoon or melon baller, roll out balls of the chocolate, placing on a cookie sheet lined with parchment paper. Place the cookie sheets back in the fridge for another 30 minutes. When truffles are firm, roll in your (clean) hands quickly to form small spheres (the temporary heat of your hands helps the cocoa/almonds to adhere to them better). Roll these round spheres in cocoa powder or the chopped almonds, and either serve or return to the fridge for safe keeping. 
Store in refrigerator. They save for at least several weeks!!
Really: BLISS BITES!

Sunday, January 8, 2012

Quinoa Burgers


If you're on Pinterest, you may have seen these quinoa burgers. I have had two friends make and love these burgers. They really are delicious! How in the world have I never thought to try something like this, even after making the black bean-millet burgers? I didn't use a lot of oil to fry them, but hope to figure out how to bake them next time.

If you're new to using quinoa, don't be scared--it's a really, healthy and delicious new food to add to your diet. Here is a great little article on the awesome benefits of quinoa. Did you know that quinoa is super high in protein? You can use quinoa in exchange for rice in many recipes (though it is more expensive). I'm still looking for ways to incorporate it--a few months ago, I made stuffed bell peppers with quinoa and black beans and corn. They were so delicious and I'm kicking myself for not writing down how I made them. I'll have to try them again to blog about because I was convinced that in some recipes, quinoa is even better than rice!

I've made these burgers (or patties, if you wish) twice now and both times, the first few burgers I put in the frying pan, fell apart. So, after the first time this happened, I added an extra egg to the rest of the composition and they held up fine. The second time, I added two egg whites (actually eggbeaters) to the composition and they stayed firm again. I don't know why they didn't hold up for me as they did for the creator of the recipe (Linda). Maybe it will work for you to leave the recipe as is--but if it doesn't, you'll be able to tell after the first few burgers go in the pan--well, when you flip them. I, however, am always going to be adding another egg or 2 egg whites when making these again. I love them too much to waste 3-4 burgers. Also, you can also add one handful of chopped fresh parsley to the composition if you like. I did it the first time, but didn't add the parsley the second time and they were still very good!

Another curious thing about the recipe--the creator (Linda) calls for sweetener. I found it sort of strange, but added it anyway (agave nectar instead of splenda). But, sometimes quinoa can have a slightly bitter aftertaste and this sweetness balances the flavor out. It's a well-rounded tasting burger. Yum, yum, yum! You can even serve them as patties with a salad or with some sauteed veggies.

We put them on a whole wheat bun with lettuce, tomato, gouda cheese, and mustard/mayo. Really love these burgers and they will be put into our regular dinner repertoire. 

QUINOA BURGERS


  • 2 rounded cups cooked quinoa (see cooking instructions below)
  • 3/4 cup shredded cheddar cheese (or other variety, if you prefer)
  • 1/2 cup low-fat cottage cheese
  • 1 medium carrot, finely grated (OR 1 cup shredded zucchini, squeezed-though I haven't tried it yet)
  • 3 eggs + 2 egg whites (the egg whites were my addition)
  • 3 Tbsp. all purpose flour 
  • 2 green onions, including white parts
  • 1 /2 tsp. Splenda or sugar (I used agave nectar)
  • 1/4 tsp. black pepper
  • 1/4 tsp. ground cumin
  • 1/8  tsp. salt
  • 1/8 tsp. garlic powder
  • Olive oil for frying

To cook quinoa:
  • 1 cup uncooked quinoa
  • 2 cups water
  • 1/2 teaspoon salt


In a medium saucepan bring the 2 cups water and 1/2 teaspoon salt to a boil over high heat. Add quinoa and reduce heat to low. Cover and cook for 18-20 minutes, or until all water is absorbed and the seeds are tender. Allow to cool for a few minutes.

To Make Burgers:
In a large bowl combine the cooked quinoa, cheddar cheese, cottage cheese, carrot, eggs (and egg whites if using), flour, green onions, Splenda (or sugar), pepper, cumin, salt, and garlic powder.

Heat a frying pan and a couple teaspoons olive oil over medium-low heat. Mixture will be slightly sticky, so using a 1/4 cup measuring cup, drop mixture into pan and lightly flatten to 1/2 inch thick.


Fry until golden-brown, about 4 minutes on each side.

Makes approximately 10 burgers.


Wednesday, January 4, 2012

Quick Cranberry Cake (with our without Lemon Curd)


Time for some cake! Even though Christmas has come and gone, a treat here and there should still be allowed, right? Plus, the New Year is here! Welcome 2012! Let's continue to celebrate. Cranberries should still be in season at your grocery store...

I love the change in seasons--all seasons have something so wonderful to contribute to our lives--I can even stomach the shorter days of winter knowing that I can come home, cuddle with my loved ones, have candles burning, or be forced to read--but I just can't take the illnesses from winter anymore! And we've been sick some more. Baking cheers me up, so I wanted to post on this super easy cranberry cake I tried in between rocking my daughter for comfort, doing laundry, and trying to pack for a trip that no longer happened (thank you viruses)--then again, this may also have saved me from another speeding ticket...

Hope everyone had wonderful holidays! Here is what I've enjoyed so far in this winter season:


I had my husband take some of this lovely cranberry cake over to the neighbors on Christmas for good cheer and made a second one for us just to use up the frozen cranberries in my freezer. The first batch I made with the addition of lemon curd and the second, just plain. I loved them both. However, here is what I learned:

  1.  I preferred to use the 9X13 pan better than the 10-inch round pan. The 10-inch round pan will give you more of a gooey center--which is alright--almost pudding-like. But, I think I preferred a more sponge-like cake and settled on the longer, thinner pan. But, either way is wonderful. 
  2. For the second cake, I sprinkled a little Turbinado sugar on top before baking. I love the crunch! 
  3. I'm sure the cake would also benefit with the addition of lemon or orange zest--but it's also nice to not have all cranberry recipes taste the same and this one really pulls out the freshness of the berry when it stands alone.
  4. I used half light butter and half regular fat butter for the first recipe and all light butter for the second recipe and preferred the first version better due to the moistness (so, it's fine to use a little light butter--probably not for the whole cake, though if you do, you will still like it a lot).
  5. You could also replace the cranberries with blueberries if you prefer--but I love the tartness of the seasonal cranberry! YUM!
  6. *Like my first cake, you could add 2-3 tablespoons of lemon curd (add 1 extra Tbsp. of flour if you add lemon curd)

This is a wonderfully rustic dessert with vanilla ice-cream or with a hot drink like cocoa. Or eat it on its own. Though not terribly healthy, it is tart and sweet, and seems to fill the need for comfort. Enjoy!


QUICK CRANBERRY CAKE

  • 3 eggs
  • 2 cups sugar
  • 3/4 cup butter, slightly softened and cut into chunks (I used salted, but original recipe calls for unsalted)
  • 1 tsp. vanilla
  • 1 Tbsp. kirsch (optional)--I skipped this even though I had it
  • 1 tsp. of salt
  • 2 Tbsp. of milk
  • 2 cups all-purpose flour
  • 2 1/2 cups cranberries (1 bag)
  • *2-3 Tbsp. lemon curd (OPTIONAL--see Point #6 above)

Preheat oven to 350°F. Lightly grease a 9x13 pan or a 10" springform pan.

Beat eggs and sugar together for 5-7 minutes; the eggs will increase in volume quite a bit, streaming into ribbons when you lift the beaters. They will also turn pale yellow.

Add butter and extracts (and lemon curd, if using). Beat for 2 minutes. Add the milk and salt and mix for another 30 seconds.

Stir in flour and fold in cranberries. Pour into greased pan.

Bake 45-50 minutes for a 9x13, or a little over an hour for the springform. You may need to tent the cake with foil in the last 15 minutes or so to keep the top from browning. Cool completely on a wire rack before serving.

Hello my little bright spot in a dreary day.


Thursday, December 15, 2011

Back in Business: Crusty Rosemary-Olive Peasant-Style Pot Bread


Alright, so I realize that I have slacked on posting...life has been chaotic for our family. Between doing a half marathon, my husband's crazy schedule, the holidays, flus & colds, extensive travel, house repairs, managing a toddler, and general busy-ness of everyday life, my little blog has suffered. Everyone is busy, I know! But after I made this bread, yesterday, I was motivated to post again. It was that good. Especially if you're into rustic food. This bread would be amazing with the hearty soups of this season, along stews, and as a sandwich bread. I'd even use it as the foundation of a broiled caprese toast (think pesto, fresh mozzarella, vine-ripe tomatoes).

If you have seen any of my other posts, you will see that I am insanely into this nice woman named Nancy Baggett and her fabulous bread cookbook, Kneadlessly Simple. By the way, the book has gone down in price on Amazon. And how can you not want to make something from someone that emails you back every time you email her with a question?! Anyway, I was so excited about this bread because it reminds me of the fantastic Italian bread served at Maggiano's Corner Bakery (in Chicago area). I usually get the tuna salad on this kind of olive bread and never imagined I could make something like it at home! And so easily!

The bread is very easy to make--you just have to patiently wait and go about living your life--which shouldn't be hard considering the holidays are around the corner...right? However, I will confess that while in a hurry, I misread the directions after the second rise, and let the bread rise on the counter instead of the fridge overnight. Imagine my surprise to see that the bread STILL turned out amazingly well--I'm not saying I recommend doing what I did, just that it was surprising to see that the dough continued to rise, air pockets were visible, the crust was intact, and it tasted wonderful with a piece of hard goat cheese and a crisp apple. YUM! Enjoy!

Make the basic white version if it's your first time making a bread, or add in the kalamata olives and fresh rosemary like I did (I brought in my outdoor plant and somehow it's surviving inside!)--you will be very surprised that you can make a bread with the same quality of that at your local European bakery.

NOTE: The crust softens if you store the bread in plastic wrap or plastic bags.


From the author, Nancy Baggett:

Pot boules — round, peasant-style breads that are simply popped into a sturdy, lidded pot and baked — are about the easiest loaves possible, but among the most gratifying. They puff up well, brown beautifully and always come out crusty, due to the moisture trapped inside the pot during the first few minutes in the oven. (In fact, the pot actually serves as a minioven.) As a bonus, the loaves need no hand shaping because the dough just conforms to the container shape as it expands.

Like the basic black dress, this basic white loaf is always appropriate and in favor. The interplay of light mild crumb, crunchy golden crust and deep, sweet yeast taste and aroma (coaxed out by long, slow rising) is downright amazing. In fact, eating this bread is a far more complex and exciting sensory experience than one might expect from the simple ingredients.

Should you ever want a change of pace from the basic loaf, it's an easy matter to add a few accents for a rather different effect. See the rosemary-black olive variation at the end of the recipe.


CRUSTY WHITE PEASANT-STYLE POT BREAD-with Rosemary-Olive Variation 

Makes 1 large loaf, 12 to 14 slices.

  • 4 cups (20 ounces) unbleached all-purpose white flour or white bread flour, plus more as needed (I used 3 cups white flour + 1 cup whole wheat flour + ~1 Tbsp. Vital wheat gluten)
  • 1 teaspoon granulated sugar
  • 2 teaspoons table salt
  • 3/4 teaspoon instant, fast-rising or bread-machine yeast
  • 2 cups ice water, plus more if needed
  • Corn oil, canola oil or other flavorless vegetable oil or oil spray for coating dough (I used olive oil for the Rosemary-Olive version I made)

First Rise: In a large bowl, thoroughly stir together the flour, sugar, salt and yeast. Vigorously stir the water into the bowl, scraping down the sides and mixing until the ingredients are thoroughly blended. If the mixture is too dry to incorporate all the flour, stir in more water, a bit at a time, just enough to blend the ingredients. 

Don't over-moisten; the dough should be very stiff. If necessary, stir in enough more flour to yield a hard-to-stir dough. Brush or spray the top with oil. Cover the bowl with plastic wrap. If desired, for best flavor or for convenience, you can refrigerate the dough for three to 10 hours. Then let rise at cool room temperature for 18 to 24 hours. If convenient, vigorously stir the dough once about halfway through the rise.

Second Rise: Using an oiled rubber spatula, gently lift and fold the dough in toward the center, all the way around, until mostly deflated; don't stir. Brush or spray the surface with oil. Re-cover the bowl with plastic wrap that has been coated with nonstick spray. Let rise using any of these methods: for a 1 1/2- to 2 1/2-hour regular rise, let stand at warm room temperature; for a 1- to 2-hour accelerated rise, let stand in a turned-off microwave along with 1 cup of boiling-hot water; or for an extended rise, refrigerate, covered, for 4 to 24 hours, then set out at room temperature. Continue the rise until the dough doubles from the deflated size; remove the plastic if the dough nears it.

Baking Preliminaries: 20 minutes before baking time, put a rack in the lower third of the oven; preheat to 450 degrees. Heat a 3 1/2- to 4-quart (or larger) heavy metal pot or Dutch oven in the oven until sizzling hot (test with a few drops of water), then remove it, using heavy mitts. Taking care not to deflate the dough (or burn yourself), loosen it from the bowl sides with an oiled rubber spatula and gently invert it into the pot. Don't worry if it's lopsided and ragged-looking; it will even out during baking. Generously spritz or brush the top with water. Immediately top with the lid. Shake the pot back and forth to center the dough.

Baking: Bake on the lower rack for 55 minutes. Remove the lid. Reduce the heat to 425 degrees. Bake for 15 to 20 minutes longer, or until the top is well browned and a skewer inserted in the thickest part comes out with just a few crumbs on the tip (or until center registers 209 to 212 degrees on an instant-read thermometer). When it seems done, bake 5 minutes longer to ensure the center is baked through. Cool in the pan on a wire rack for 10 to 15 minutes. Remove the loaf to the rack and cool thoroughly.

VARIATION: Crusty Rosemary And Olive Pot Bread — Stir 1 cup pitted, coarsely chopped kalamata olives (well drained) and 3 tablespoons finely chopped fresh (not dried) rosemary needles (discard the stems) into the dough along with the water. Proceed exactly as directed in the original recipe.


Serving And Storing: Cut or tear the loaf into portions; it tastes good warm but will cut much better when cool. Cool completely before storing. To maintain the crisp crust, store draped with a clean tea towel or in a heavy paper bag. Or store airtight in a plastic bag or wrapped in foil: The crust will soften, but can be crisped by heating the loaf, uncovered, in a 400 degree oven for a few minutes. The bread will keep at room temperature for three days, and may be frozen, airtight, for up to two months.