Sunday, February 27, 2011

Sweet Potato Leek Frittata


First, let me start off by saying I had no hand in making this. My mother in law made this for us while we were visiting. We LOVE to be her guinea pigs and try her cooking. Second, I really enjoyed this frittata and therefore wanted to feature it for you guys. This frittata made a good vegetarian breakfast-but I think it would make a great dinner served with some crusty bread and a green salad. If you're looking for a fun way to use healthy sweet potatoes and an easy meal--try this frittata.

A few recipe notes: Don't get scared by the amount of eggs--three of us ate it two mornings in a row and we STILL have half the frittata left. The recipe is supposed to yield 6 servings....however, our portions were smaller and we served it with fruit and lemon bread. The original recipe calls for 4 garlic cloves, but we all thought that we would use less next time we made it. In addition, we're big cheese lovers, so my mother in law added extra cheddar on top (WONDERFUL!).

Leeks always make me think of spring.....so this may be your 'good-bye winter' meal.

 SWEET POTATO LEEK FRITTATA
Adapted from the Rachel Ray Show
  • 3 Tbsp. extra virgin olive oil
  • 2 large sweet potatoes, cut in half and thinly sliced
  • 2 medium leeks, thinly sliced
  • 2-4 cloves garlic, finely chopped or grated
  • 12 extra-large eggs (large eggs should be fine)
  • 1/3 cup milk or half-and-half  (fat free half & half would work well here)
  • A splash of hot sauce (such as Tabasco brand)
  • Salt and ground black pepper
  • 1/2 cup shredded white sharp cheddar cheese (regular is fine too)
  • 1/2 cup (a couple of handfuls) flat-leaf parsley leaves, chopped
Heat a 12-inch, nonstick, oven-safe skillet over medium-high heat. Add olive oil, sweet potatoes, leeks and garlic, and cook until the veggies are tender, 6-7 minutes.
 
Beat eggs together with milk or half-and-half, a splash of hot sauce, some salt and pepper. Pour the eggs in the skillet over the filling. Using a spatula, raise the cooked egg off the bottom of the pan, allowing more of the still-liquid eggs to settle on the bottom of the pan.

When the frittata has set, sprinkle the top with cheese and transfer to the oven. Cook for 10-12 minutes until top is deep golden brown. Remove and let stand 5 minutes.

Garnish with parsley, cut into wedges and serve.

Thursday, February 24, 2011

An Excellent Side: Baby Carrots with Dill Butter


I'm always looking for new ways with vegetables and it's probably safe to assume that we're all needing to eat more of them.... This has been a recent favorite that we've been having alongside rice, some protein, and another green vegetable. It's super easy and very delicious! And a change from brown sugar carrots that most people serve. My daughter (who is not a big carrot fan for the last year) really loves them too. The original recipe calls for bagged baby carrots, but I love to use regular carrots in bias cut. Give these carrots a try--you'll wonder why you hadn't thought of eating them like this before.

BABY CARROTS WITH DILL BUTTER
Adapted from www.allrecipes.com

1 (16 ounce) package baby carrots (or about 6-8 medium carrots, sliced)
2 Tbsp. butter or a butter-flavored spread (light is fine)
1 Tbsp. chopped fresh dill (dried dill works great too!--just use slightly less)
1-2 Tbsp. fresh lemon juice
~1/4 tsp. salt
~1/8 tsp. freshly ground black pepper

Place carrots in a saucepan with enough water to cover. Bring to a boil, and cook about 9-10 minutes, or until tender. Remove from heat, and drain.

Gently toss with margarine, dill, and lemon juice. Season with salt and pepper.

Makes about 4-6 side servings.

Wednesday, February 23, 2011

Frozen Chocolate (Kahlua) Pie with Pecan Crust


Celebration time! Dinner with friends, birthdays coming up, and time to make something fun that I can share. And if we don't have celebrations, we make them--life is SHORT. Right? I found this recipe in one of the cookbooks I was given as a wedding present. This pie came together surprisingly fast! I will warn you that you may have several bowls leftover to clean, but it really isn't that difficult of a recipe. And it's AMAZINGLY good! Like a frozen, creamy mousse with a crunchy crust and then a creamy topping. SO good! If you like chocolate, you will love this!

Not sure about you guys, but the concept of a double boiler is intimidating to me. However, I was able to conquer my fear of cooking eggs over boiling water without turning them into scrambled eggs (that did indeed happen to my husband and myself while attempting to make ice-cream years ago--it was disgusting! Not this time though...). I love that this crust has no flour in it...just sugared nuts--it's a fun change from working with dough! If you don't have, or want to use Kahlua, I'm sure using strong coffee would do just as well.


FROZEN CHOCOLATE PIE WITH PECAN CRUST
Adapted from: Southern Living, 30 Years of Our Best Recipes

Pecan Crust:
2 cups finely chopped pecans
1/3 cup firmly packed brown sugar
¼ cup butter or margarine, melted
2 tsp. Kahlua
Cooking spray

Pie Filling:
6 (1-ounce) squares semisweet chocolate
½ tsp. instant coffee granules
2 large eggs, beaten
3 Tbsp. Kahlua or other coffee-flavored liqueur
¼ cup powdered sugar
¾ cup whipping cream
1 tsp. vanilla extract

For serving:
¾ cup whipping cream
1 Tbsp. Kahlua
1 Tbsp. confectioner's sugar (optional)
Grated chocolate (optional)

To make crust: Combine first 4 ingredients, mixing well. Firmly, press mixture into bottom and up sides of a 9-inch pie plate coated with cooking spray. Bake at 350 degrees for 12 to 14 minutes or until pecans are toasted. Press sides of crust with back of a spoon. Cool completely.

To make filling: Place chocolate squares and coffee granules in top of a double boiler; bring water to a boil. Reduce heat to low; stir until chocolate melts. This is what my 'double boiler' looked like--a glass bowl over a regular pot of water:


Gradually stir about one fourth of a melted chocolate mixture into eggs, mixing well; add to remaining chocolate mixture in double boiler. Gradually stir in Kahlua and powdered sugar. Cook, stirring constantly (until mixture reaches 160 degrees—check with a meat or candy thermometer). Remove from heat. Cool to room temperature.

Beat ¾ cup whipping cream with the vanilla (and the 1 Tbsp. powdered sugar, if using) until soft peaks form; fold into chocolate mixture. This is what mine looked like:


Spoon the whole chocolate-whipping cream mixture into the pecan crust. Cover and freeze.

Transfer pie from freezer ONE HOUR before serving.

Before serving: Beat ¾ cup whipping cream until foamy. Gradually add 1 Tbsp. of Kahlua, beating until soft peaks form. Pipe or dollop (meaning drop with a spoon) the whipped cream around the edge of the pie. Sprinkle with grated chocolate, if desired.


YIELD: 1 (9-inch) pie

Friday, February 18, 2011

Orzo with Garbanzo Beans, Red Onion, Basil and Mint

Now that we have weather back in the 70s, it's time to plant some herbs! When I saw fresh mint and basil at the grocery store, I was inspired to make this wonderful orzo salad again--a simple lunch or side dish that is great side to grilled meats/burgers. This is the perfect salad to take to potlucks or serve at picnics (since you can safely leave it at room temperature). Even kids like it! I used to take it to the office with me when I worked outside of the home--it's a great meal for the office. The flavors sit and the salad is even better the next day!


A few things I have learned in making this INCREDIBLY DELICIOUS salad:

  • Try adding the vinaigrette at the point where the pasta is hot to soak the flavors up better
  • I prefer to add the tomatoes right before serving to keep them from getting “mushy” or watering down the salad. This salad can be made ahead and served at room temperature.
  • If you want to take the bite out of the raw onion, try adding the onion to the hot pasta right away
  • Feel free to substitute cannellini beans if you don't like or can't find garbanzo beans
  • Feel free to substitute green onions for red onion
  • You can also crumble feta on top of the salad--it's delicious
  • The salad adapts well with the addition of sun dried tomatoes, roasted red peppers, and/or black olives
  • The original recipe includes honey in the vinaigrette, but I don't think it needs it so I never include it. If you're in a pinch, store bought vinaigrette works fine, but the one below is really good!
ORZO WITH GARBANZO BEANS, RED ONION, BASIL & MINT
Adapted from Food Network's Giada di Laurentis

Makes 6 servings.

4 cups reduced-sodium chicken broth or water
1 ½ cups orzo (tiny pasta that looks like rice)
1 (15 oz.) can garbanzo beans (aka chickpeas), drained and rinsed
¾ cup chopped red onion
½ cup chopped fresh basil
¼ cup chopped fresh mint
¾ cup red wine vinaigrette (recipe follows)
salt & pepper, to taste
1 ½ cups teardrop or grape tomatoes, halved

Salad:
Bring the broth to a boil in a large, heavy saucepan over high heat. Stir in the orzo. Cover partially and cook, stirring frequently, until the orzo is tender but still firm to the bit, about 7 minutes. Drain the orzo through a strainer. Transfer the orzo to a large wide bowl and toss until the orzo cools slightly. Set aside to cool completely.

Toss the orzo with the beans, tomatoes, onion, herbs, and enough vinaigrette to coat; you may not need all ¾ cup. Season the salad with salt and pepper, and serve.

Viniagrette:
1/2 cup red wine vinegar
3 Tbsp. lemon juice
2 tsp. salt
Freshly ground black pepper
1 cup olive oil

In a small bowl, whisk the vinegar, lemon juice, olive oil, salt, and pepper (OR, add the ingredients in a lidded jar and shake).

Monday, February 14, 2011

Sweets for my Sweeties

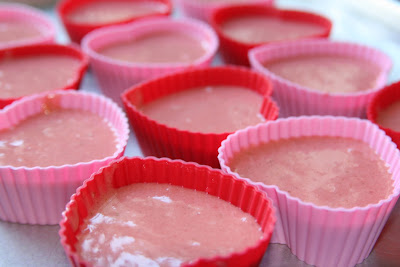
Valentine's Day sort of caught me by surprise. But, I had some cupcake liners that were waiting to be tried out...


So, what did I make with them? These:


Here's the recipe if anyone wants to try them--thanks http://www.ezrapoundcake.com/!!

http://www.ezrapoundcake.com/archives/2403

Sunday, February 13, 2011

Savory Swiss Cheesecake


My husband loves cheesecake. But, when it's just the two of us, it's hard to make a whole cheesecake. However, being that it is almost Valentine's Day....I needed some kind of cheesecake--the man works hard after all! I first made this appetizer years ago when hosting a girls' night in and it was very well received. When the boys came home to get their girls, they inhaled the leftovers and said, 'You have to make that again.' And thus the savory cheesecake has made a permanent place on our family favorites list.

I love the idea of a savory 'cheesecake'--it's a wonderful first entree to serve with crackers and veggies while sipping on something sweet and waiting for dinner to come out. Or, I can see a slice served on top of a green salad with some crusty bread.

And the best thing is that you make it the day before! The original recipe is from http://www.allrecipes.com/, but I have changed it a bit. I hope you like it!


SAVORY SWISS CHEESECAKE
Adapted (changed) from www.allrecipes.com

Can probably serve 10-12 as an appetizer.

For thin crust:
1 cup finely crushed crackers (original recipe says 'thin wheat' but any crackers will do)
3 Tbsp. light butter, melted

For cheesecake:
12 oz. reduced fat cream cheese (1/3 less fat), softened
2 8-oz. containers plain fat-free yogurt, Greek style preferred (sour cream will work also)
1 egg
1 egg yolk (I use about 1/4-1/3 cup eggbeaters)
1/4 tsp. dried basil
1/8 tsp. dried rosemary
1/4 tsp. salt
1/4 tsp. pepper
2 cups shredded Swiss cheese
1/4 cup freshly shredded Parmesan cheese (optional)
3 green onions, chopped--green and white parts

To Serve:
Assorted crackers
Fruit or vegetables

In a small bowl, combine cracker crumbs and butter. Press onto the bottom of a 9-in springform pan; set aside.

In a large mixing bowl, beat cream cheese until smooth. Add the yogurt, egg, yolk (or whites), basil, rosemary, and salt & pepper; beat on low speed just until blended. Stir in Swiss cheese, green onions, and Parmesan cheese (if using).

Pour cheesecake mixture into prepared springform pan. Place the pan on a baking sheet. Bake at 350*F for 40-50 minutes or until center is almost set.


Cool on a wire rack for 10 minutes. Carefully run a knife around edge of pan to loosen; cool 1 hour longer.

Refrigerate overnight. Remove sides of pan. Cut into wedges; serve with crackers.


Refrigerate any leftovers.

Saturday, February 12, 2011

RAW Fudge-y Coffee Brownie Truffles


With Valentine's Day approaching, we're all thinking chocolate....here is an alternative chocolate dessert. Ok, so they're not super pretty to look at, but these little guilt-free treats are REALLY good!

I'm really apprehensive when it comes to 'raw' recipes....most 'raw' things I've had have been pretty scary. But I want to learn more about it so that I can find things that actually taste good. I'm sure a lot of people feel that way when going from a meat-eating diet to vegetarianism. Anyway, there are a lot of vegan recipes that actually taste pretty good and I'm always interested in tried & true....

While perusing some food blogs, I found this recipe on a food blog I am now in love with (http://www.bakingwithbasil.com/) and am absolutely DELIGHTED at how delicious these are! Check out Brooke's great blog. Many of us need our chocolate fix, but need to find less fattening ways to sustain our love affair...give these a try. I hope you like them. I have 3 more raw truffle-like recipes waiting to be tried out...since the first experiment went well. You can find pitted dates next to the raisins and other dried fruit at your grocery store. And most of them shouldn't have sugar--unfortunately mine did, but that also allowed for super dark cocoa to be used. Yum......

RAW FUDGE-Y COFFEE BROWNIE TRUFFLES
Adapted from Baking With Basil

Makes approximately 16 'truffles'

1/2 cup unsalted cashews
1 1/4 cup pitted dates (I used an 8 oz. package of diced, pitted dates)
4-5 Tbsp. cocoa powder (I used dark cocoa since my dates had sugar listed in the ingredients)
1 tsp. vanilla extract
1/2-1 tsp. instant coffee

In a food processor, chop/blend all ingredients. (Or you can chop the nuts finely and set aside. Then you can place the dates in a mini food processor and chop/grind for about 2-3 minutes until they are in small pieces. Add cashews, vanilla, chocolate, and instant coffee. Mix until all ingredients are combined.) The mixture will be somewhat sticky.

Roll into bite size balls. Store in fridge (my experience has been that they hold up better when cool). I got about 15-16 truffles and I think I will double the recipe next time.

Mine turned out slightly darker because I processed the nuts finer, but as mentioned above, you can chop them and retain the polka dot look as can be seen in the original post.

Wednesday, February 9, 2011

Morning Glory Muffins


It's been a while since I've posted a muffin recipe...I'm sure you all are wondering where my restraint has been. But, I broke down yesterday--my love of the morning glory muffins sold at Whole Foods won me over. Fortunately, they have been kind enough to share that recipe with the public on their website. The great thing about this muffin is that you don't feel guilty eating it--it's choc full of good-for-you ingredients: carrots, apples, walnuts, whole grains....and then there's the wonderful addition of raisins and coconut. It's like a healthier carrot cake recipe. My 2 year old and I are in love with this recipe. It was wonderful and I highly recommend it.

What did I do different? Well, instead of 2/3 cup oil, I used 1/3 cup canola oil and 1/3 cup applesauce. Worth the change. Also, I added all the coconut in the batter and not on top. I used less sugar than called for, but then sprinkled the tops of the muffins with turbinado sugar because I like the crunch and the sparkle. Also, instead of a whole apple, I used 1/2 an apple and 1/2 a pear. But you don't have to do any of these things--I was impressed that it held up to my changes. It's a sign of a really good recipe.

MORNING GLORY MUFFINS
Adapted from Whole Foods

Yield: 16 according to Whole Foods, 12 according to me


1 1/3 cups whole wheat pastry flour
1/2 cup sugar
1/4 cup packed natural brown sugar
1 1/2 teaspoons baking soda
1 teaspoon ground cinnamon
1/4 teaspoon salt
2 eggs
2/3 cup canola oil
1 teaspoon vanilla extract
1 Fuji apple, cored, peeled and diced
1/2 cup seedless raisins
1/2 cup grated carrots
1/2 cup walnuts, finely chopped
1/4 cup plus 2 tablespoons dried flaked unsweetened coconut, divided

Preheat oven to 350°F. In a large bowl, mix together flour, sugar, brown sugar, baking soda, cinnamon and salt; break up any brown sugar lumps with your fingers or a wooden spoon.

In a separate bowl, whisk together eggs, oil and vanilla, then add to flour mixture and stir just until combined. Add apples, raisins, carrots, walnuts and 1/4 cup of the coconut and stir gently until well combined. Look at how pretty healthy can be:


Spoon batter into 16 paper-lined muffin tins, filling each about 2/3 full. Top evenly with remaining 4 teaspoons coconut and bake for 25 to 30 minutes, or until cooked through.

YUM!!!!!


By the way, these muffins make wonderful afternoon snacks with tea.

Tuesday, February 8, 2011

Bourbon-Glazed Salmon


My favorite thing to order at The Fresh Market deli is their bourbon marinated salmon. I cannot locate the recipe anywhere. But in my search, I came across this recipe that had 97 reviews and averaged averaged 5/5 stars. So, why not give it a shot? It was FANTASTIC! What impressed me the most is how fast this meal cooks! Once the fish is marinated, you could DEFINITELY get your salmon & sides out within 30 minutes. If you make couscous as a side, your meal will be ready in 20 minutes. And if you use one of these Uncle Ben's ready rice bags that take 2 minutes or under in the microwave, you could serve dinner within 15 minutes.

We served it with multigrain pilaf (2 minutes to cook-Trader Joe's brand), green beans, and chili-roasted cauliflower (but you could do jasmine or brown rice, and I think edamame would be wonderful alonside the fish). I think you will really love this. My husband said this fish goes in the all-time favorite fish recipes of all time file. Enjoy!

BOURBON-GLAZED SALMON
Adapted from Southern Living

Serves 4

1/2 cup packed brown sugar (I think I might try a little less sugar next time)
3-4 Tbsp. bourbon
1/8 cup low-sodium soy sauce
1 Tbsp. fresh lime juice
1 tsp. grated peeled fresh ginger
1/4 tsp. salt
1/8 tsp.  freshly ground black pepper
1 garlic clove, crushed
4 (6-ounce) salmon fillets (about 1 inch thick)
Cooking spray
2 tsp. sesame seeds
1/4 cup thinly sliced green onions

Combine the first 8 ingredients in a large zip-top plastic bag; add salmon fillets. Seal bag, and marinate in refrigerator 30 minutes, turning bag once. Remove fillets from bag; discard marinade.

Preheat broiler.

Place fillets on broiler pan coated with cooking spray. Broil 11 minutes or until fish flakes easily when tested with a fork.

Sprinkle each fillet with 1/4 teaspoon sesame seeds and 1/2 tablespoon green onions.

Monday, February 7, 2011

Fennel Pine Nut Shortbread Cookies


While I was making these cookies, it hit me: this was the exact flavor I was used to smelling when I would eat cookies from an authentic Italian bakery back in Chicago-land! In high school I was friendly with our mayor's daughter (both the mayor and his kids were absolutely terrific, salt-of the earth people, but I digress) and her family owned the Gonnella Baking company. I was fortunate enough to have Italian class with Flavia, who graced us with cookies from her family's great bakery. The smell of fennel has transported me to memories of going to the Nutcracker and eating at Italian Village.....But it's also the smell that can often you like a heavy wave when you walk into a bakery in Napoli or Venezia or Roma....it's ITALY and it's wonderful......!!!!!!

Now that I saw some of the awesome looking recipes on their website, I'll be visiting again. Gonella makes great bread!!! I encourage you to try it if you're ever in the Chicago area.

In the meantime, I'd like to encourage you to try these amazing, light, tender-crisp cookies. If all you know of fennel is to think of licorice, then you need to get out more. And experiment. I used my coffee grinder to grind up the fennel seeds I had in my pantry. But, I think you can find fennel in the spice aisle. The earthiness of the pine nuts is balanced with the sophistication of the fennel and the creaminess of the butter. Your first bite will make you do a double-take.

Even though I don't consider Giada a TRUE italian cook, she has some amazing recipes with which I've had much success. Thank you, Giada. I doubled the recipe as suggested by all the raving reviews. These cookies are not very sweet. A perfect end to a meal with a cup of coffee. Or with a glass of moscato or even with tea for an afternoon snack.


FENNEL PINE NUT SHORTBREAD COOKIES
Adapted from FoodNetwork's Giada De Laurentiis

Yield: About 2 dozen cookies (double the recipe-you can always freeze the dough until ready to use)

1 stick (1/2 cup) unsalted butter, at room temperature
1/2 cup plus 2 tablespoons sugar
1 teaspoon vanilla extract
1 teaspoon ground fennel seed
1/4 teaspoon salt
1 large egg
1 1/4 cups all-purpose flour
1/4 cup pine nuts--often called pignoli (I think I used slightly more)

Using an electric mixer, beat the butter, sugar, vanilla, fennel seed, and salt in a large bowl until light and fluffy. Beat in the egg. Add the flour and mix just until blended.

Transfer the dough to a sheet of plastic wrap. Shape the dough into an 8-inch-long log. Wrap the dough in plastic and refrigerate for 2 hours.

Preheat the oven to 350 degrees F. Line heavy large baking sheets with a silpat or parchment paper. Cut the dough log crosswise into 1/8 to 1/4-inch thick slices. Transfer the cookies to the prepared baking sheets, spacing evenly apart.

Press the pine nuts decoratively atop the cookies. Bake until the cookies are golden around the edges, about 15 minutes.


Sunday, February 6, 2011

Does This Sound Familiar? Yup.


-cartoon courtesy of www. xkc.com


I have a TON of failures in the kitchen. Do you? My honest friends say yes (and I love you for it). Heck, half of the ones I think are successes may be failures to some of you that try them.....But every time I'm ready to throw in the towel and live on take-out, I get the itch. To try again. And again. And again. It's my therapy. Sort of like how other women swear they would lose their mind by cooking, I swear it's relaxing for me. Not necessarily when the phone is ringing off the hook, the dog is barking at the horses, the mailman is at the door, and my toddler is pulling on my leg all while I'm trying to stir something like risotto...not then.

Working in the kitchen and cooking--there's the joy of creation--of working with your hands, of making food for people you love. Even after a string of failures...to get something right...it's like cotton candy for your soul.

The only thing that would make it all easier...a person to actually do the dishes. Any volunteers? I'll feed you.

A month into the new year--my new slogan in the kitchen: Occasional failure is ok. But, continue to do what makes you happy. Because life is short. 

Hope you're encouraged to keep trucking along--even if something doesn't go as it should. Happy cooking!

Fiesta Chowder


I know, it's the day of the superbowl and everyone is eating dips and chips or ordering pizza or having barbeque sandwiches. Well, I figured I'd share a delicious Fiesta Chowder recipe, courtesy of Southern Living, that would bode well for a super bowl party. We had company over the weekend and everyone really liked it. It's one of my favorite soups and definately a good one to keep warm in the crock pot while people are over.

The original recipe called for cooked, chopped chicken, but I boiled and shredded mine this time--I wanted to see if it would work and it did. But I like either method just fine and included both methods.  I've even made this soup with Fri-Chik (vegetarian chicken). If you can't find a can of corn with red and green peppers, just use regular corn. I'll often use Rotel tomatoes and chilies and regular corn instead of the Mexican stewed tomatoes and chilies. It's really a fail-proof recipe! And a hit with all ages and sexes.

We served this soup with my hot corn dip (see recipe here), cheddar-chili bread (previous post), a wonderful strawberry orange almond salad (that my friend, Lindsay, brought over), and warm apple crisp with vanilla bean ice cream (courtesy of my friend Chelsea). I'll see if I can procure those recipes for you all sometime. Dip, soup, bread, salad, comfort dessert, beer for the guys? Who's not going to be happy, right?

FIESTA CHOWDER
Adapted from Southern Living
The ingredient list may be long, but the results are fast and delicious.


Yield: Makes 8 to 10 servings

3 tablespoons all-purpose flour
1 (1.4-ounce) package fajita seasoning, divided
4 skinned and boned chicken breast halves, cubed
3 tablespoons vegetable oil (I use olive oil when I do fry the chicken)
1 medium onion, chopped
1 teaspoon minced garlic
1 (15 1/4-ounce) can whole kernel corn with red and green peppers, drained
1 (15-ounce) can black beans, rinsed and drained
1 (14 1/2-ounce) can Mexican-style stewed tomatoes
1 (4.5-ounce) can chopped green chiles
3 cups water
1 cup uncooked instant brown rice
1 (2 1/4-ounce) can sliced ripe olives (optional-but good!)
1 (10 3/4-ounce) can condensed nacho cheese soup (I used cheddar cheese soup)
3 tablespoons chopped fresh cilantro
1 tablespoon lime juice (I squeezed half a lime)

Garnish: chopped fresh cilantro, chopped green onions (my favorite), breadsticks (optional)
*Combine flour and 2 tablespoons fajita seasoning in a heavy-duty zip-top plastic bag; add chicken. Seal and shake to coat. Cook chicken in hot oil in a large Dutch oven over high heat, stirring often, 4 minutes or until browned.

Reduce heat to medium-high; add onion and garlic; sauté 5 minutes. Stir in remaining fajita seasoning, corn, next 5 ingredients, and, if desired, olives.

Bring mixture to a boil; reduce heat to medium-low, cover and simmer 5 minutes.

Remove lid, and stir in nacho (or Cheddar) cheese soup, chopped cilantro, and lime juice.

Garnish and serve with breadsticks, if desired (they recommend breadsticks, I recommend cheddar-chile bread--recipe to follow).

*Or use shredded boiled or roasted chicken and follow the recipe as follows (skipping the flour coating and frying, but adding all the fajita seasoning in with the soup).


NOTE: I threw everything except the condensed cheese soup in the crock pot (chicken was cooked this time) and left it on the lower setting for about 6-7 hours. An hour before serving, I added the nacho/Cheddar cheese soup and mixed it all in. It was a real winner in my book. So, you can try it that way too. Email me if you have any questions.

Cheddar and Chilies Bread--NO Knead Again


Yet again, Nancy Baggett has given me confidence. This may be the seventh loaf I have made out of her cookbook. Simply Amazing is what she should have called her bread. This bread tastes very, very good. It's so pretty when you slice it...you can see green and yellow bits. And it goes very well with a chili or Mexican soup. I hope you will love it as much as we did.

One thing to note, of all the breads I've tried, this one was a bit harder since I actually ended up using my hands (HA!) to incorporate the cheese and chilies in the dough...but, it was only minimal effort. You guys should try this bread--making bread is easy once you read through the recipes and see how little is actually required of you. The biggest work is waiting and planning ahead. But, it's so worth it! I can't believe how easy this is!!!!

CHEDDAR & CHILIES BREAD

Adapted from Kneadlessly Simple by Nancy Baggett

From the forward: The Hispanic influence on American culture over the past decades has been pervasive and shows up not only in the popularity of Mexican and Tex-Mex fare, but also in the widespread availability of ingredients like assorted chiles. Once found only in ethnic communities and markets, green chiles turn up in everything from soups and quiches to corn casseroles and both quick and yeast breads. (If you aren’t familiar with green chiles, note that they are just slightly piquant; they are not the same as jalapeños.) This is a delightfuly savory bread, particularly if a top-quality white cheddar is used. The loaf is shot through with cheese and bits of green chiles, and the crust is golden brown. It is great with chili, hearty, full-bodied soups, and bean dishes; it also makes an unusual but very appealing sandwich bread.

For a different look and milder taste, prepare the equally easy cheddar and pimiento variation provided at the end of the recipe.

Super-Easy: A minimum of fuss-free, easily mixed ingredients. No hand-shaping.

Yield: 1 large loaf, 12 to 14 slices each

3 1/2 cups (17.5 ounces) unbleached white bread flour, plus more as needed
1 Tbsp. granulated sugar
1 1/2 tsp. table salt
1 tsp. instant, fast-rising, or bread machine yeast
2 Tbsp. corn oil, canola oil, or other flavorless vegetable oil, plus extra for coating dough top and baking pan
1 2/3 cups ice water, plus more if needed
8 ounces (3 lightly packed cups) coarsely grated very sharp cheddar cheese, preferably white cheddar (I used regular orange cheddar)
1/2 cup very well-drained and patted dry chopped canned green chiles


FIRST RISE: In a large bowl, thoroughly stir together the flour, sugar, salt, and yeast. In another bowl or measuring cup, whisk the oil into the water. Thoroughly stir the mixture into the bowl with the flour, scraping down the sides until the ingredients are thoroughly blended. If the mixture is too dry to incorporate all the flour, a bit at a time, stir in just enough more ice water to blend the ingredients; don’t over-moisten, as the dough should be stiff. If necessary, stir in enough more flour to stiffen it. Brush or spray the top with oil. Cover the bowl with plastic wrap. If desired, for best flavor or for convenience, you can refrigerate the dough for 3 to 10 hours. Then let rise at cool room temperature for 15 to 20 hours. If convenient, stir the dough once partway through the rise.

SECOND RISE: Vigorously stir the dough, gradually sprinkling over and incorporating the cheese and chiles. Fold them in very thoroughly to ensure they are evenly distributed . If necessary, thoroughly stir in enough more flour to yield a very stiff dough. Using a well-oiled rubber spatula, fold the dough in towards the center, working all the way around the bowl. Invert the dough into a well-greased 9 × 5-inch loaf pan. Evenly brush or spray the dough top with oil. Using well-oiled kitchen shears or a serrated knife, make a G-inch-deep slash lengthwise down the center of the loaf. Cover the pan with nonstick spray–coated plastic wrap.

LET RISE USING ANY OF THESE METHODS: For a 1 1/2- to 2 1/2-hour regular rise, let stand at warm room temperature; for a 1- to 2-hour accelerated rise, let stand in a turned-off microwave along with 1 cup of boiling-hot water; or for an extended rise, refrigerate for 4 to 24 hours, then set out at room temperature. Continue the rise until the dough nears the plastic. Remove it and continue until the dough reaches 1/2 inch above the pan rim.

BAKING PRELIMINARIES: 15 minutes before baking time, place a rack in the lower third of the oven; preheat to 425ºF.

BAKING: Reduce the heat to 400ºF. Bake for 30 to 40 minutes, until the top is nicely browned; cover the top with foil as needed. Continue baking for 20 to 30 minutes longer, or until a skewer inserted in the thickest part comes out with just a few particles clinging to the bottom (or until the center registers 204º to 206ºF on an instant-read thermometer). Then bake for 5 minutes more to be sure the center is done. Cool in the pan on a wire rack for 10 minutes. Turn out the loaf onto the rack; cool thoroughly.

SERVING AND STORING: Cool thoroughly before slicing or storing. Store airtight in plastic or aluminum foil. The bread will keep at room temperature for 2 to 3 days, and may be frozen, airtight, for up to 2 months.

CHEDDAR AND PIMIENTO BREAD—Omit the green chiles and substitute an equal amount of well-drained and patted dry chopped jarred pimientos. Otherwise proceed exactly as directed.

Check out this gorgeous cheese and chili flecked bread that came out of my oven! YUM! If it comes out seeming like the crust is a rock and you're nervous, just wrap it in a kitchen towel and let it cool. I promise the crust will soften. This may be one of our favoite breads--the flavor is amazing!

Thursday, February 3, 2011

Roasted Vegetable Salad


When we lived downtown, we had some fun neighbors that we became friends with and ate dinners with.... Kelly Daniel made this amazing grilled vegetable salad and I have thought of it often. Thanks for the inspiration, Kelly! Being that it's cold outside, I improvised by roasting the vegetables. I think Kelly uses eggplant, but I didn't have it on-hand--but feel free to add some to the roasted vegetables if you have eggplant. I also didn't have zucchini/squash, but the salad ended up being amazingly delicious with just red bell pepper, asparagus, and mushrooms. I'm sure that even adding potato would be delicious! If you don't have feta, you can probably use goat cheese or blue cheese.

I think you'll really love this salad. Enjoy!

Roasted Vegetable Salad

Serves 6-8

To Roast:
1 red bell pepper, cut into big pieces
1 small bundle of asparagus, washed, with tough stems removed (probably about 1/3 of the asparagus)
1 package whole mushrooms, rinsed and cut in half
1 zucchini or squash, chopped
2 red potatoes, scrubbed and cubed small (optional)

For rest of salad:
1 head of red leaf lettuce, rinsed and dried with paper towels, then torn or roughly chopped
4 oz. reduced-fat feta, crumbled
4 green onions, chopped (optional)

Dressing:
1-2 cloves garlic, minced (preferably crushed)
2-3 Tbsp. olive oil
1-2 Tbsp. red wine vinegar
1-2 Tbsp. lemon juice
Salt & pepper, to taste

Preheat the oven to 375 degrees F.
Place whatever vegetables you are using in a large mixing bowl and drizzle with some olive oil, salt, and pepper--just enough to coat them evenly.

Spread the vegetables in one layer in a large roasting pan, and roast in the preheated oven for about 20 minutes--or until the vegetables are tender (I like them to still stay a bit crisp-tender so I don't cook them very long. But you can leave them in longer-just make sure to check on them). Halfway through the roasting process, stir once if you can remember to do it.

Remove the roasting pan from the oven and allow the vegetables to cool completely. This may take about 15 minutes. (You can roast the vegetables a day in advance and just store them in the fridge until you are ready to use them.)

Meanwhile, in a capped container (like a jelly jar or small tupperware), shake your dressing ingredients.

In a large bowl, toss your vegetables with your lettuce greens, the feta, green onions (if using) and your dressing.

Serve immediately.


By the way, you can leave the garlic out of the salad, but man does it make it good!

What garlic is to salad, insanity is to art. --Augustus Saint-Gaudens

Tuesday, February 1, 2011

On Nights We're Paupers....Spanish Rice & Black Beans


This meal holds sentimental value to me.  My mother in law made this meal the first weekend my husband took me home to meet his family. That was 11 years ago and we still love it! One weekend in college, my husband tried to make it with his roommates and missed a step. The beans ended up being disastrous on our GI system--and a small crowd of 6-8 of us all suffered. I've never forgotten that weekend. And now I'm really careful when cooking beans (ha!).

If you want to go the long route in cooking beans from scratch, here's a great article on the myths of soaking and salting beans and also how to properly cook them. This meal is healthy, affordable, and it's a surprising crowd pleaser. My mother in law makes the beans in a crock pot, but I've adapted the recipe to make it faster to prepare on an everyday evening. So I'm sharing this recipe in case you are like myself and most moms trying to find a meal for your family that is both fast to prepare and healthy. If you want a from-scratch recipe for yellow rice (and want to avoid MSG), see Emeril's recipe here. But below is the cheater's version :)

You will be surprised at how something so simple can be so good!

SPANISH RICE AND BLACK BEANS
Serves 4

For beans:
2 cans black beans, undrained
2 garlic cloves
1-2 tsp. olive oil (or chili-flavored olive oil)
1-2 tsp. Worcestershire sauce
OPTIONAL spices--a couple dashes of any or all of these: cumin, marjoram, cayenne pepper, oregano, chili powder

10 oz (you can buy 2 (5oz) pkgs) of (saffron) yellow rice (some brands are Mahatma, Vigo, or Goya)

1 bunch green onions, chopped
2 tomatoes, diced
Shredded mexican cheese and/or light sour cream (OPTIONAL)

Cook rice according to package directions. While rice is cooking, in a medium cooking pot over low heat, lightly saute the garlic in the olive oil for a minute or two. Add both undrained cans of black beans, Worcestershire sauce, and any spices you are using.

Continue to cook over low heat, stirring every so often to prevent beans from sticking to the bottom of the pan. You can mash part of the beans or leave them whole. Turn off the flame and cover to keep warm.

To serve, place rice on each plate, top with black beans, green onions, tomatoes, and any cheese or sour cream you are using.