Showing posts with label tomato. Show all posts

Thursday, September 6, 2012

RIDICULOUSLY EASY Rustic Tomato Basil Parmesan Bread


A couple weekends ago I met my girlfriends for a weekend trip in Nashville. I'd like to take a moment and say that the only thing more wonderful than homemade bread is sharing it with women who can laugh at themselves. And you. And then make even you laugh at you.


We went to the spa in honor of one of our friend's new baby--instead of a baby shower. And as if that weren't smart enough (wish I could take credit for that genius plan)...two of the significant others of the girls...well, they made us food. Like real food. Not microwave popcorn food, but like BAKED bread, NYT recipe egg strata, oven roasted potatoes and onions, and buckwheat pancakes on the griddle. We need more of these men in our lives, no? I mean, it's been a while since a man made me French press coffee like this...


Well, we took the bread to the spa. Because that's what one does when olive oil is the spa theme. Here's a picture of girlfriend, Harmony, enjoying the fruits of a man's labor before the spa. (And check out her absolutely hilarious blog HERE.)


Now, tell me you wouldn't want to eat, drink, and be merry and then rubbed down with women who are probably going to cause problems in a nursing home with you one day...instead of making small talk with people you may not know over tissue paper and diapers (sorry Jolene).


Anyway, when I got back from Nashville, I started craving homemade bread again. Just like that. Even if the temperature has been in the 80s. Years ago, my good friend, Erinn, would make tomato basil bread in her breadmaker. It was delicious. And now years later, I miss it (and her, since we're discussing friends) and wonder what a rustic tomato-bread loaf would taste like. So, after playing around, the conclusion is that it is delicious and almost as easy if you don't mind waiting overnight (so worth it). I urge you to try my little experiment because I think it's going to turn out beautifully for you. And again, if you know me by now, you know...NO KNEADING!

This bread is the perfect transition between summer and fall. If you have basil growing on your porch like myself, give it a go. Read this slowly: This bread is idiot proof. I mean, it is RIDICULOUSLY EASY. 

All you need that's considered special equipment is a cast iron pot (a dutch oven if you will) like the ones Le Creuset or Staub makes. Even Aldi sells knock offs these days. You can find these pots on Amazon, at Target, TJMaxx, Marshalls, even Walmart. It is THE ultimate 'tool' in making rustic breads. You definitely need one. LOVE LOVE LOVE these pots.


RIDICULOUSLY EASY RUSTIC TOMATO BASIL PARMESAN BREAD


  • 3 cups all purpose flour
  • 3/4 tsp. yeast
  • 1 1/2 tsp. salt
  • 3 Tbsp. grated Parmesan cheese
  • 1 large handful of fresh basil, rinsed and patted dry
  • 5 sun-dried tomatoes, preferably NOT oil-packed
  • 1 1/2 cups water
  • *A DUTCH OVEN (I used a 3.5 qt size--which is about 3.3 L)

Using a food processor or large knife, process or chop finely the dried tomatoes and basil.

Using a stand mixer OR a medium to large sized bowl and spatula, mix all the ingredients, except the water. Then pour in the water and mix until the dough is shaggy and comes together easily. This should only take a minute or two.

Cover the bowl with plastic wrap and set aside for 12-18 hours. Overnight is really ideal.

When you are ready to bake the bread, place some flour on a clean kitchen towel. Dump your dough onto this floured towel and flip it over once or twice until it is a round shape and evenly covered with flour. Flip the towel to cover the round shape. Next, place a lidded dutch oven pot in the oven and turn the oven on to 450 degrees. When the oven has preheated, continue to let the pot heat or 'bake' on its own for another 10-15 minutes.

When the pot is good and hot, carefully take the pot out. Then, carefully lift up dough with edges of the damp cloth/towel and dump your dough into the hot dutch oven pot. Shake the pot gently side to side to let the dough even out in the pot. Cover with lid and bake for 30 minutes.

After 30 minutes, remove the lid and continue baking the bread for another 15 minutes until it is baked throughout and golden in color.


Check out the green and red flecks of color...


I made two loaves. So glad I did. And that's how you meet your neighbors in a big city.


Before I forget....some major things to keep in mind with the breads I post on this blog:
  1. If you want a crispy crust, store the bread in a paper bag.
  2. If you want a chewy crust, store the bread in a plastic bag after it has cooled. 
  3. I suggest refrigerating it after a couple of days and warming it up either in the oven (which can restore some crispi-ness, the microwave--which can restore some chewiness, or just toast it). Due to the fact that it doesn't have preservatives, the bread can spoil faster than store-bought breads.


And boys? Thanks again. You done good. Sorry I didn't take your picture as you smiled when you served us food. Your mommas would be proud. 


*You can use a bigger size pot, but the bread will be a bit thinner and spread out more. The 3.5 quart size is probably my favorite for rustic breads. I use the Le Creuset brands (mainly round shape) and if you have these brand of pots and don't know what size they are, check the number on the bottom of the pot. I found this little chart on a message board and it is helpful in understanding what size I'm dealing with--so if your Le Creuset pot has a 16 on the bottom of it, it's a 1.5 quart pot, etc. See below:

For Round Dutch Ovens:

16: 1.3 liters (L) = 1.5 quarts (qt) 
18: 1.8 L = 2 qt
20: 2.4 L = 2.5 qt
22: 3.3 L = 3.5 qt
24: 4.2 L = 4.5 qt
26: 5.3 L = 5.5 qt
28: 6.7 L = 7.25 qt
30: 8.4 L = 9 qt
34: 12.4 L = 13.25 qt

HAPPY BAKING!


Wednesday, August 22, 2012

Almond and Herb Crusted Roasted Heirloom Tomatoes


Alright, this is another one of those non-recipe-recipes that I urge you try. I know everyone's super busy with the kids going back to school and the cramming of the last bits of errands and family vacations and activities before this season is out. The last thing you may want to do is try something complicated for dinner. This is not a complicated side dish. Bear with me. I mean, really. TRY IT. Throw a piece of fish, steak, tofu, or chicken on the grill. Then boil some potatoes, nuke some frozen green beans or saute some spinach, and MAKE THESE TOMATOES! Because, they turned out INCREDIBLY delicious!

We've had a bumper crop of heirloom tomatoes because my parents have decided to turn their tiny backyard into a tomato sanctuary. They somehow manage to make time for these beauties despite their long work hours. They baby them. They worry about whether they get enough water. They love to share them. It's truly precious. And because of their nurturing, I get to share in this amazing bounty. But there's only so many tomatoes a person can eat before getting creative. So, after spying my pantry ingredients...it was either pistachios or almonds. I went with the almonds because I thought of the beloved Romesco sauce...check out the nutty coating:


So this side dish, is summer boiled down. Garden tomatoes. Herbs. Nuts. It's low-carb....it's vegan...it's delicious. We served these little veggie wonders with some hot crash potatoes (thank you Pioneer Woman--those are a dinner staple in our house), edamame, a Costco veggie souffle, and some ciabatta bread. Our little family loved them. LOVED them.

Try them with a variety of heirloom tomatoes for the best presentation--I had yellow, green, and red tomatoes. The savory crunch really compliments the flavor of the roast tomato. They shrink down a bit when you roast them...in fact, I'm making a double recipe next time because they were that good. And then I'm going to put the leftovers in a sandwich. Maybe with Havarti cheese and some turkey or veggie bacon.

*In my 'recipe,' I used a mixture of both fresh and dried herbs. Remember that if you're using dry herbs, use a little less than fresh herbs--dry herbs tend to be much more potent in flavor. 

My three year old wanted to 'take my picture'---the result is below. Have to encourage creative outlets...


ALMOND and HERB CRUSTED ROASTED HEIRLOOM TOMATOES
Loosely adapted from www.familyfreshcooking.com

Serves 2-4

  • 4 heirloom tomatoes, sliced in ~1/4 inch slices (or just slightly bigger)
  • 3/4 cup almonds (roughly)
  • One handful fresh herbs--your choice, rinsed and patted dry--(I used fresh basil, mint, rosemary, and dill and added a small dash of DRY parsley and oregano)
  • Sea salt & freshly ground pepper
  • ~1/2 tsp. garlic powder 
  • ~1/2 tsp. smoked paprika
  • Olive oil spray

Preheat oven to 375 degrees.

Spray a baking sheet with olive oil spray and set aside.

Place the almonds and herbs in the bowl of a food processor. Pulse until combined and the nuts have been made to look similar to bread crumbs. 

Place crumbs in a shallow bowl and add the rest of the seasonings (salt and pepper, garlic powder, and paprika). 

Dip each tomato slice in the nut mixture and pat the mixture on if it starts to come off. Place the tomato slices onto the baking sheet and spray the tomatoes lightly with olive oil. 

Bake for 15 minutes and then gently flip each tomato piece--being careful not to scrape off the herb-nut coating. Continue to bake for another 15 minutes. They should be browned and crispy. 

Serve the tomatoes warm or at room temperature.

Serves about 3-4 as a side dish OR 2 people if they are more of the main entree.


I think these tomatoes would be amazing with a piece of good cheese (layer with some goat cheese for a pretty presentation), some fresh bread, and a lovely Chardonnay. But they'll probably taste best if you eat them on the porch during a cooler August evening. 

Thursday, May 17, 2012

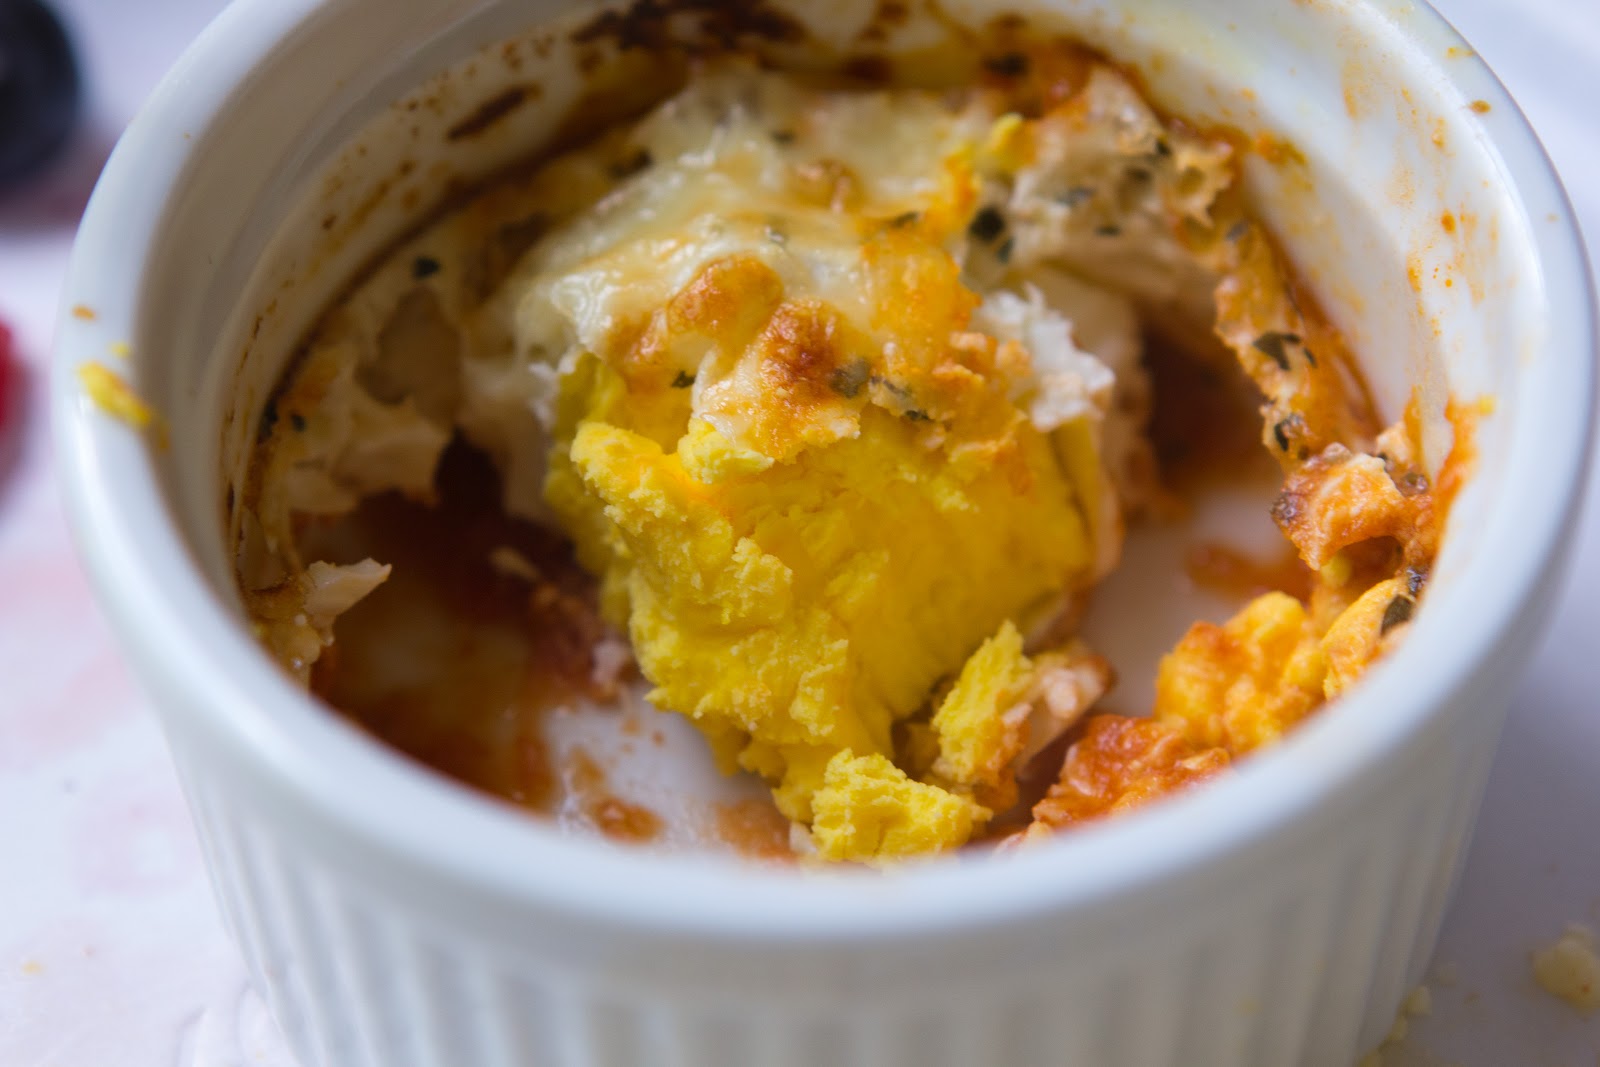
Individual Breakfasts: Baked Eggs In Tomato Sauce


I first saw this idea years ago in a Self Magazine. What a neat concept--individual baked eggs with sauce! We love them because they are easy, delicious, and 'recipe' is so versatile. It's not much of an 'exact' recipe, so your imagination is key. This breakfast requires only a few ingredients and they're usually things you have on hand: cheese, tomato sauce, and eggs. Then you can dress them up with whatever seasonings you want. These eggs are one of those perfect breakfasts to make when having guests over because ALL the eggs come out at once and you don't have to make them to order--yet, they are still customizable.

I have only made them with an 'Italian' flavor (as described below), but have yet to try them with salsa, cumin/chili powder, and a Mexican cheese blend instead. I can't imagine that wouldn't be good!

You will love these--play around with different cheeses--for a sophisticated breakfast, I bet Talegio, vodka sauce & rosemary would be a good combo with some crusty ciabatta :) While your eggs are baking, you can brew coffee, make hash browns, and cut up fruit. Breakfast can be ready in 30 minutes from start to finish.

By the way, I HAVE noticed that the type of egg you use, does make a difference as I have made these with both organic and non-organic eggs. The organic eggs tend to taste a bit better--too bad the price isn't better also!


INDIVIDUAL BAKED EGGS 

Yield: Servings vary-see below.

Preheat oven to 375 degrees.

Grease as many ramekins (4 oz or 6 oz) as you plan to have portions.

For each serving--layer in this order:

  • 3 tsp. pasta sauce (any flavor)
  • ~2 Tbsp. Mozzarella cheese or 2 tsp. Parmesan cheese, or a little of each (preferable)
  • 1/8-1/4 tsp. dried basil or Italian herbs
  • Salt & pepper, to taste

Bake them for less time (15-18 minutes) if you like your centers running--bake them longer (22-24 minutes) if you prefer your yolks hardened like us.

Serve with buttered toast :)

NOTE: It's easier to place all the ramekins on a baking sheet and take the baking sheet in and out, than take each ramekin out one by one.

Enjoy!

Friday, March 9, 2012

North African Inspired Tomato, Chickpea & Spinach Stew (Vegan)


Inspired by pantry staples, I made this super basic, but healthy, vegetarian stew a few weeks ago. My intention was to serve it over rice or with pita bread, but instead I ate two bowls plain by myself. Really enjoyed the flavors and textures together. Thought I'd pass it along if you've got a hungry family and a few cans to use up.

If you're not a big spinach fan, cut the spinach amount in half!!! My picture, above, does not show the bright green vibrancy of the spinach because this particular portion was reheated as leftovers :)

I'm sure this stew would benefit from with some cayenne pepper for heat and topped with some Greek yogurt (if you weren't vegan) or fresh lemon/lime juice (if you are a vegan). The stew was also good over a wild rice mix with a little grated cheese on top (Kashkaval is particulary delicious). Enjoy.


NORTH-AFRICAN INSPIRED TOMATO, CHICKPEA, & SPINACH STEW


Serves ~6


  • 2-3 Tbsp. extra virgin olive oil
  • 1 medium-large onion, thinly sliced in half moon shapes (1/2 circles)
  • 4 garlic cloves, minced
  • 1 (28 oz.) can tomatoes, pureed (I used Muir Glen's fire-roasted tomatoes)
  • 2 cans chickpeas (also called garbanzo beans), drained & rinsed--(can save a little liquid)
  • 1 tsp. coriander 
  • 3/4 tsp. turmeric
  • Salt & pepper to taste (I used ~1/2 tsp. of each)
  • 1 (10 oz.) package frozen chopped spinach (thawed or defrost, if you prefer) OR 2 cups fresh spinach

In a medium-sized pot with lid (I used a dutch oven), heat olive oil over medium heat and add onion. Add a couple tablespoons of water (or any of the liquid from the chickpeas). Saute until onion is translucent--about 10 minutes--making sure onion doesn't burn.

Add garlic and tomatoes. Stir until combined and cover. Lower heat to medium-low. Mix in chickpeas and spices, including salt & pepper, and continue to cook for about 10 more minutes or until the chickpeas are tender.

Add the spinach (mine was a frozen block that thawed in the hot stew). Gently mix it in and try to break it up if yours is frozen like a block as well (I used a fork to separate it). You can turn off the heat once most of the spinach has thawed--or when the spinach has wilted, if you are using fresh spinach.

Friday, February 10, 2012

Feta Avocado Salsa Dip


What did you eat during Superbowl Sunday? I had intended to post on this ahead of time, but of course I ran out of time. We had this feta-avocado salsa and it is too wonderful not to share! We all have trouble taking more than a couple bites. It's fresh, creamy, and salty--with just a little bit of crunch from the onion. 

Feel free to add more onion if you like! I'm tempted to add some olives next time I made it. TIP: Try to use avocados that are just on the shy side of ripe--the more ripe the avocado, the more they fall apart and the salsa starts to look more like guacamole--but that's fine too (it will still taste good)! I just like to see and taste the texture of a less ripe avocado. 

This is a great salsa/dip to make when you have friends over, but would also be a terrific topping to a grilled chicken breast in the summer. I'm confident you'll really love this salsa/dip!


    FETA AVOCADO SALSA DIP

Serves 6-8

  • 3 plum tomatoes, chopped
  • 1 1/2 ripe avocado - peeled, pitted and chopped (semi-firm work best)
  • 1/4 cup finely chopped red onion
  • 1 clove garlic, minced
  • 1 handful chopped fresh cilantro
  • ½ tsp. dried oregano
  • 1 Tbsp. olive oil
  • 1 Tbsp. red wine vinegar
  • 4-5 ounces crumbled feta cheese (reduced-fat is fine to use)
  • Salt & pepper, to taste


    In a bowl, gently stir together tomatoes, avocados, onion, and garlic. 


    Mix in cilantro and oregano. Gently stir in olive oil and vinegar. Then stir in feta. Taste, and season with salt & pepper.


    Cover, and chill for at least 2 hours (but no more than 6 hours). Serve with tortilla chips.


Monday, February 6, 2012

Black Bean and Lentil Soup with Smoked Paprika


First of all, this was fabulous. Second of all, this was healthy AND fabulous. Third of all, you should make it!!! Saw this soup on Cookin' Canuck and was surprised to see lentils and black beans together--we love both and would have not thought to put them together. What a great idea! I've adapted the recipe somewhat because of my love of all things smoked. It's awesome. Shared it with folks and was asked for the recipe. Definitely going in my permanent rotation. Filling, straight-forward and delicious.

As has been my recent method, I made a double recipe and froze half of the soup--it defrosted beautifully. The smoked paprika is what makes this soup--do not skip it or use regular paprika--the soup will not be the same.

This soup is perfect for a cold day. It's perfect to reheat at work. It's perfect to serve for a casual dinner with grilled cheese sandwiches and fresh fruit. Enjoy!


BLACK BEAN AND LENTIL SOUP WITH SMOKED PAPRIKA
Adapted from www.cookincanuck.com

  •   1 Tbsp. olive oil
  • 1/2 large onion, chopped
  • 2 large stalks celery, diced
  • 2 cloves garlic, minced (I used 3 cloves)
  • 2 tsp. smoked paprika
  • 2 bay leaves
  • 1 (14 oz.) can diced tomatoes (use 'fire-roasted' if you can find them)
  • 1 cup dried brown lentils
  • 4 3/4 cup low-sodium vegetable or chicken broth, divided
  • 3 cups water
  • 1 (14 oz.) black beans, drained and rinsed
  • 1/4 cup chopped fresh parsley
  • Salt and pepper to taste (I used a smoked salt—it was fantastic!)

Heat olive oil in a large sauce pan set over medium heat. Add onions and celery and cook, stirring occasionally, until the vegetables are beginning to soften, 6 to 7 minutes.

Add garlic, smoked paprika and bay leaves and saute for 30 seconds.

Stir in diced tomatoes with juices, lentils, 3 cups vegetable or chicken broth and 3 cups water. Increase heat to medium-high and bring the mixture to a boil. Reduce the heat slightly and cook, stirring occasionally, until lentils are tender, 25 to 35 minutes.

Remove from the heat and let cool for about 10 minutes. Remove and discard the bay leaves. 

*Transfer half of the lentil mixture, half of the black beans and 3/4 cup vegetable or chicken broth to the bowl of a blender or food processor. Pulse until combined, but not pureed. It should be a chunky texture. Pour the blender mixture back into the lentils in the saucepan, along with the remaining 1 cup of chicken broth and remaining black beans. 

Stir the soup and reheat over medium heat. Stir in parsley. Season with salt and pepper to taste--seriously, the smoked salt is wonderful in this! (Trader Joe sells smoked sea salt for $3)

Serve with freshly grated Parmesan cheese, if possible. Would probably also be great with fat-free Greek yogurt and sliced green onions. YUM!

*Note: I did NOT take the soup out of the pot—I inserted my stick blender into the soup pot for about 5 seconds or until just a bit of the soup was pureed to give it some creamy feel but still retained the chunky texture. Therefore, I added ALL of the broth into the soup all at once.


Saturday, September 10, 2011

Balsamic Chicken with 3 Grain Risotto & Summer Squash Medley


I'm almost hesitant to say this in case someone has problems with this recipe, but my husband told me this was one of my best chicken dishes so far. And I had to agree that it was good. While digging for some olive oil in my pantry, I spotted the balsamic vinegar and threw it over the simmering chicken, while crossing my fingers. It ended up being delicious. You can have dinner ready in about 30 minutes with frozen chicken--you can make the sides simultaneously. I think the chicken may take a little less time if you use defrosted chicken instead of frozen.

We had the chicken with a summer squash saute and a Trader Joe's 3-Grain Blend Risotto (about $2.29) that I doctored up. If you are near a TJ's--try this! My aunt introduced me to it and I'm sold! You can cook this risotto in a separate pot on another burner next to the chicken.

Why I love this Trader Joe's 3 Grains Blend risotto:

1) It's healthier than white rice
2) It is creamy like risotto
3) It takes about half the time to cook
4) No continual stirring over the stove as with traditional risotto.


If you don't have a TJ's near you, try a multigrain pilaf from any grocery store. Or any starch you prefer.

BALSAMIC CHICKEN WITH SUMMER SQUASH MEDLEY

Serves 4-6 (depending on the thickness of your chicken breasts)

  • 2 Tbsp. olive oil
  • 4-6 chicken breasts (I use 5 big frozen chicken breasts)
  • 1 cup chicken broth
  • 1/2 cup white wine
  • 4 cloves garlic, chopped
  • Scant 1/4 (or less) cup balsamic vinegar
  • Salt & pepper, to taste (I tried a chardonnay scented coarse salt once & was bowled over)

Place all ingredients in a large (non-stick) skillet or frying/saute pan. Bring to a low boil and continue to cook for about 10 minutes. Flip the chicken and reduce heat to medium low. Continue to cook until most of the liquid evaporates and the chicken is cooked through (skim off any fat). This took about another 20 minutes for me with frozen chicken breasts. The chicken will be caramelized and brown when ready.

Cover to keep warm until ready to serve.


3-Grain Blend Risotto with Olives & Tomato

Serves 4-6 (with leftovers)

  • 1 Tbsp. olive oil
  • 1 onion, minced
  • 1 tomato, diced
  • ~1/3 cup sliced pimento-stuffed green olives
  • 1/4 tsp. dried parsley
  • Salt & pepper, to taste
  • 1 cup Trader Joe's 3-Grain Blend (rice, barley, spelt)
  • 2.5 cups of water or chicken broth (I used water)

Saute onion for a minute or two in olive oil. Add water and bring to a boil. Then add all the remaining ingredients and stir until combined. Cook according to package directions--about 16 minutes or until liquid has evaporated.

Serve the risotto with the chicken. (We had leftovers of the risotto.)


Summer Squash Medley

Serves 4 as a side dish (may have leftovers)

  • 1 Tbsp. olive oil
  • 1/2 onion or a couple shallots, diced
  • 1 zucchini, sliced in ~1/3 inch rounds
  • 1 yellow summer squash,  sliced in ~1/3 inch rounds
  • 1 tomato, diced
  • 1 clove minced garlic
  • Salt & pepper, to taste.

Saute onion in olive oil until it is almost translucent. Add the rest of the ingredients and continue to saute until the zucchini is cooked through (only takes a few minutes--we like ours fork-tender).
 
 
To serve: Plate the chicken with the risotto and summer squash medley. Top with some freshly grated Parmesan cheese and/or chopped fresh basil.

Tuesday, August 30, 2011

Teresa Giudice's 'Amazing Arugula Salad'


Well, after some more horrific episodes of my guilty pleasure (Real Housewives of New Jersey)--aka, self-esteem check, I decided to try another one of Teresa's recipes. She made it on a morning talk show in Los Angelos. For a complicated woman, this was a super fast and easy salad. And not with a lot of 'ingredientses,' as she says. It is exactly the kind of salad we would make on a given weeknight with regular lettuce and a few more vegetables. This arugula version is wonderfully basic, goes with just about any entree, and makes for a refreshing side.

Try it with roasted tilapia and a mixed wild rice medley. I love it and had to share it with you guys. I'll be making it again and again and again. Did I mention it was healthy? Thanks, Teresa. Now please go make up with your family--your fighting is stressing me out.

AMAZING ARUGULA SALAD
Adapted from Fabulicious

Makes 4 servings
  • 2 Tbsp. freshly squeezed lemon juice
  • 3 Tbsp. extra-virgin olive oil
  • 1/4 cup freshly grated Parmigiano-Reggiano cheese
  • Salt, to taste 
  • 6 ounces baby arugula, washed and dried
  • 1 cup cherry or grape tomatoes, halved (I used 1 large tomato, diced)

Pour the lemon juice into a small bowl. Gradually whisk in the oil. Whisk in the Parmigiano cheese and season with salt.

Combine the arugula and tomatoes in a large bowl. Add the dressing and toss to coat. Serve immediately.

Wednesday, August 17, 2011

Italian Toasts with Roasted Grape Tomatoes

Lately, we seem to be really busy. And I haven't had time for fussy meals. Sometimes we need something a little bit lighter with a piece of grilled chicken, or a summer salad, or some fruit. This dish fits the bill. I can still remember my husband making me cheese toasts in college with processeed cheese and topping the toasts with slices of fresh tomatoes. But, after we got married, we started to use the real stuff--Cheddar (what does Maya Angelou say? When you know better, you do better?).

And we've always served roasted tomatoes as a vegetable side dish, but on night I decided to combine these two things and we really enjoyed this as a light dinner. The crispiness of the bread pairs well with the savory melted cheese and the light sweetness and pop of the tomatoes.


Roasting the tomatoes takes some time, but you can probably them ahead of time and reheat them in the microwave before making the toasts (which take a few minutes only). Otherwise, the dish is super easy. I love it if I have extra tomatoes the next day after I roast them--they are delicious tossed in a salad or in a pasta dish.

By the way, I've never made SLOW roasted tomatoes, but when the weather cools down, I definately want to try Smitten Kitchen's idea. See here.


ITALIAN TOASTS WITH GRAPE TOMATOES

Serves 4 as part of the main entree or 6-8 as an appetizer.
  • 1 package grape tomatoes or a mixture of yellow and red teardrop tomatoes, rinsed (no need to dry off)
  • 2-3 cloves garlic, minced
  • 2 Tbsp. olive oil
  • Salt & pepper to taste (1 tsp. coarse sea salt + ½ tsp. cracked black pepper)
  • 4-8 pieces of country multi-grain bread (the hearty stuff—like La Brea brand, not the soft sandwich type bread, although I'm sure that might work ok, just not as good for this recipe)
  • 4-8 pieces of provolone cheese (smoked is fine)
  • ~2 tsp. Italian seasoning OR 1 handful of freshly chopped basil leaves


Preheat oven to 400 degrees F. 

Place the tomatoes on a large baking sheet. Drizzle with olive oil. Add the garlic, salt and pepper. Using your (clean) hands, roll the tomatoes around until they are even covered by all the ingredients.

Roast for 20 minutes, and then stir. (I had read somewhere that if your tomatoes seem to dry, to add 2 to 3 tablespoons of hot water, but mine have always seemed fine).

Meanwhile (during the time you're waiting to stir the tomatoes), place the bread on another large baking sheet. Top each piece of bread with a slice of provolone and sprinkle the Italian seasoning over the toasts. (If using fresh basil—wait to use it until the toasts are assembled).

Return the tomatoes to the oven and cook for about 20 to 30 more minutes (but before they turn black).

In addition, add the toasts to the bottom rack simultaneously. Let the edges of the toast crisp up and the cheese melt before taking the toasts out (this should about 5 minutes or so—depending on your oven—but keep an eye so they do not burn). Take the bread out and set aside.

When the tomatoes are ready, they will have begun to shrivel.
 

You can assemble the toasts by placing one or two pieces per plate and adding a few roasted tomatoes on top—best if tomatoes are still warm. If you have fresh basil around, top the toasts with some slivered pieces and serve immediately.

Saturday, July 16, 2011

Pasta with Fresh Mozzarella, Tomatoes, Arugula, and Pine Nuts


Easy dinner. Fantastic tasting. Almost like you don't even know it's healthy (used whole wheat pasta, but you can use what you like--multigrain pasta is good too). Came up with this dish last night while in a hurry to make something for dinner. We loved it! Definitely use summer's best tomatoes (heirloom tomatoes if you can get them)--this dish is much better in the summer with fresh tomatoes--not the mealy ones of the winter-grocery variety. In the winter, consider sauteing 1-2 cans of diced tomatoes in with the garlic for a few minutes for this dish. I certainly will.

We had leftover lemon basil chicken from this recipe I made (and adapted) earlier this week. It was very good!


The chicken was great with the pasta. But, I bet the pasta would also be very good with some white (cannellini) beans (instead of the chicken) for a vegetarian meal. Next time, I'm going to try it that way and maybe even replace the fresh mozzarella with feta cheese for variety. By the way, arugula is wonderful in pasta dishes!

PASTA WITH FRESH MOZZARELLA, TOMATOES, ARUGULA, AND PINE NUTS

Serves 6

  • 16 oz. pasta (farfalle (bowtie), penne, fusilli/rotini, cavatelli shapes are good options)
  • 2 Tbsp. extra virgin olive oil
  • 2 garlic cloves, minced
  • 2 large tomatoes, diced
  • 1/4-1/3 cup pine nuts (pignoli)
  • ~1 tsp. sea salt
  • ~1/2 tsp. cracked black pepper (or to taste)
  • 8-10 ounces fresh mozzarella, chopped
  • 5 oz. baby arugula (this is ~6 cups)
  • ~4 cooked chicken breasts, chopped (optional)
  • Parmesan cheese, (optional)

Cook pasta according to package directions. While that cooks, heat olive oil up with the garlic and cook slightly without browning. When garlic starts to brown, turn off the heat. Let cool until pasta finishes cooking. Combine the tomatoes, pine nuts, salt and pepper with the fresh mozzarella, and arugula. Add the cooled olive oil and garlic.

Drain pasta and combine toss with the tomato-arugula-cheese-nut mixture. Add cooked chicken, if using.

Serve immediately. For extra pizzazz--serve with freshly grated Parmesan cheese over each serving. Doesn't this look delicious? It really was. Hope you enjoy it.

Thursday, July 14, 2011

Calabacita Squash with Corn, Tomato & Onion


During my first month at home with a new baby, someone gave me a copy of an Oprah magazine. I was intrigued by an article featuring Jennifer Anniston's celebrity chefs. They cook healthy meals--now, as much as I enjoy time in the kitchen (it's stress relief to me), to have a celebrity chef prepare healthy meals for my family and not to have to worry about dishes or clean up is the thing dreams are made of...well, I clipped Jill Elmore's favorite recipe on preparing squash and finally got to make it. What a wonderful way to use up summer's bounty--it's a delicious side dish! So, so, good!

You don't feel like you're eating healthy in a frustrated way....you can use whatever cheese you have around--I used Swiss and enjoyed it. It's a flexible recipe--I used 3 large zucchini and a bag of frozen corn with good results. And because I was in a hurry, I didn't drain the zucchini. I think it would make a difference so I definitely will not skip that step next time. This vegetable recipe would make a great side dish or something different to bring to a potluck dinner.

You might be asking what calabacita/calabasita is. And I have seen it spelled both with a 'c' and with an 's'. It means 'little squash' in Spanish. It's a lighter skinned, shorter (squattier), summer squash used in Mexican and Hispanic cooking. I have read that it has a less bitter skin. I used this kind of zucchini squash. It was labeled as 'calabacita' in my Hispanic grocery store, but you can find it in regular grocery stores too. I imagine that any zucchini would work, really. Not really sure which is the proper way....but in any case, at last you can eat like Jennifer Anniston with this dish (ha).

CALABACITA SQUASH WITH CORN, TOMATO, AND ONION
Adapted from The Family Chef by Jewels and Jill Elmore
Serves 5
  • 4 small zucchini, diced
  • 2 tsp. kosher salt
  • 2 Tbsp. olive oil
  • 1 medium onion, chopped
  • 1 clove garlic, minced
  • 4 ears corn, kernels sliced off
  • 2 plum (Roma) tomatoes, diced
  • ½ cup shredded mozzarella or feta (optional)

Place diced zucchini in a colander set over a bowl. Sprinkle with salt; toss and let stand 20 minutes. (This draws the excess liquid out of the zucchini.)

Transfer zucchini to a kitchen towel and pat dry. (This step is optional but worth the time: Drying zucchini prior to sautéing it keeps it from becoming watery, and Jill think this step removes its occasional bitterness.)

Heat oil in a large nonstick skillet over medium-high heat. Add onion and garlic; sauté 3 to 5 minutes until soft. Do not brown. Add zucchini and corn kernels. Saute 6 to 7 minutes until vegetables are almost tender. Add diced tomato; sauté 2 to 3 minutes until softened and zucchini is tender.

Remove from heat and stir in cheese if desired.

Per serving: 143 cal, 4 g pro, 21 g car, 4 g fiber, 7 g fat (1 g sat fat), 0 mg chol, 602 mg sod

Jill's Tip: She says she loves adding leftover calibasita to scrambled eggs in the morning for a breakfast burrito. Add a dash of hot sauce, roll it up in a tortilla and hit the road!

Friday, July 8, 2011

Snappy Red Sauce


I have a dirty little secret. I know we all have those--whether we want to admit it or not. I'm almost too ashamed to admit it. Pause. But, here goes. I watch a bad show. It helps me realize I'm really not crazy. That there are other people out there who absolutely define crazy. People out there who put their lives front and center so that we, as viewers, can watch with shame and horror and then feel downright normal. Who are these people? They are The Real Housewives of New Jersey.


I know some of you may be take a higher road and don't watch reality tv. Or own a tv. Well, more power to you. Can someone come and take mine away? Because this really is like watching a train wreck. Do I recommend this show? No. Do I have a problem because I continue to watch it? Most likely. I always feel like I need an emotional shower and the need to pray after this show. Yet, I continue to watch it and then say to myself....'See, you're fine!' It's totally ok that you apologize before any new thing you serve to friends and family before they taste it. It's totally ok to have to physically force and rip open your tupperware drawer because everything in there is jammed in unorganized. It's totally ok to refuse to wear hosiery from February to November. It's totally ok to think the Mr. Clean magic eraser is really magical. And it's ok to be Dharma to your Greg.

Anyway, I digress. My point is that on this crazy show, the mother of all that is crazy is a character named Teresa. Who has an obnoxious life. And an obnoxious house. And an obnoxious husband. And seeminly obnoxious children. But, my goodness! It looks like her cooking is to die for! She has written two cookbooks so far (watch out Giada!). The first was 'Skinny Italian' and the second is 'Fabulicious' (because everything in her life is 'fabulous'--and you know, I think her attitude is awesome! I think we should all go around saying our lives are fabulous--whether we wear animal print and have a gold bathroom or not). Anyway, after an internet search of some of her recipes, I'm convinced that she may know what she's talking about. Her recipes make one salivate in anticipation. And they don't look that complicated! So, as a warning, I will be trying a few here and there.

Below is Teresa's 'snappy red sauce'. A basic (slightly spicy) red sauce that is a staple in her Italian family's home and the basis of many of her recipes. I tried it and really like it. And what's strange is that 2 year old ate it up by spoonfuls. It really is a fast and basic red sauce that is delicious on pasta. I'm considering using it on pizza dough. The recipe is a great jumping-off point for other additions. But it's very balanced and uses ingredients you would not have a hard time finding in your home or grocery store.


SNAPPY RED SAUCE*
Adapted from Fabulicious by Teresa Giudice

  • 1 Tbsp. extra-virgin olive oil
  • 1 small onion, chopped
  • 1/4 tsp. salt
  • 2 garlic cloves, minced
  • 1/2 tsp. red pepper flakes
  • 1 28-oz. can crushed tomatoes in thick puree
  • 3 Tbsp. chopped fresh Italian parsley

Heat oil in a large saucepan over medium heat. Add onion and salt. (Teresa says that a little salt brings out the onion flavor.) Cook, stirring occasionally, until onion is translucent, about 5 minutes.
Add garlic and red pepper flakes and stir until garlic is fragrant, about 1 minute. Stir in tomatoes with their puree and parsley and bring to a boil.

Reduce heat to medium-low. Cook at a brisk simmer, stirring occasionally, until slightly reduced, about 5 minutes. Serve hot as a pasta sauce.

Makes 3 1/2 cups (enough for 1 pound of pasta)

*For my tastes, I prefer to add a little more salt and stir in about a teaspoon of olive oil at the end. Also, if I'm not serving it with a dish already using these same herbs, I would add some basil or oregano in with the parsley.

Friday, June 10, 2011

Tomato, Squash & Feta Gratin


Hello folks! Let me introduce you to my new favorite vegetable side dish....courtesy of the Costco Connection. I have SO many summer vegetable gratin recipes. And for some reason, I never made a one. Not today. Today was not the day that I would shirk away from a dreamy vegetarian, eye-popping recipe. This took about 15 minutes to assemble. The dish requires few ingredients and yes, it's worth turning on your oven for this one once the sun goes down.  This side dish is truly wonderful--a little cheese goes a long way and I'm mighty disappointed I didn't make two pans of this gratin. Serve it with a rice pilaf and grilled meat. I was thinking it would also go well with some roast chicken (or Worthington multigrain cutlets) and mashed potatoes.

The recipe below is the one featured in Connie Guttersen's book, The New Sonoma Cookbook. Dr. Guttersen is the creator of "The Sonoma Diet". Another cookbook that I own, that has yet to be dusted off. But now that I've tried this recipe, I can't wait to see what else she's got for me :))

And speaking of Sonoma...did I mention how in love with it I am? Below is a (tiny) picture my husband took from a trip back a few years ago while we were at the wonderful Chateau St. Jean winery--an exquistely beautiful and peaceful place (just couldn't get the picture to stretch with my blog format).


So, while we can't exactly go back to Sonoma for a while....I will enjoy its food. Hope you will too!


TOMATO, SQUASH, AND FETA GRATIN

Serves 4 as a side dish

  • 6 oz zucchini sliced 1/4" on long bias
  • 6 oz yellow squash sliced 1/'8' on long bias
  • 2 scallions chopped
  • 1 1/2 tsp. minced garlic
  • 1 1/2 tsp. oregano
  • 2 oz feta cheese, crumbled (I used reduced fat feta cheese)
  • 12 oz tomatoes cut in half then sliced 1/4"thick crosswise (If you use Roma tomatoes, you don't need to cut again)
  • 2 tsp. olive oil
  • salt & pepper to taste

 
Lightly oil 6" diameter corning ware or pyrex dish (Dr. Guttersen says saute pan works fine too).

 
Toss zucchini with salt & pepper. Toss yellow squash with salt & pepper. In a bowl mix scallions, garlic, oregano, & feta.
 
Lay zucchini slices in pan slightly overlapping like shingles. Sprinkle with salt & pepper. Top with a layer of tomatoes slightly overlapping. Sprinkle on half of the scallion mix. Top with a layer of yellow squash & another of tomatoes sprinkling each with salt & pepper. Top with remaining scallion mix then drizzle with olive oil.

Bake for 30 min at 400 degrees or until top is slightly browned. Allow to sit for 10 min then cut into wedges & serve. 4 servings.
 
Here's the part where I come clean: I didn't follow the recipe exactly because I was lazy. I didn't weigh the squash, tomatoes, etc....I can tell you that I used approximately 1.5 zucchinis, 2 yellow squash zucchinis, about 3 Roma tomatoes, 1 big clove of garlic, and 1 1/2 green onions. Then I mixed the olive oil with the garlic, oregano, salt and pepper. I alternated the vegetables in the pan, drizzled the oil-garlic-oregano on top and sprinkled it all with the green onions and feta. My way seemed much easier (maybe it's not). And it was simply amazing. I'm going to continue to eat my vegetables this way....