Showing posts with label eggs. Show all posts

Monday, July 23, 2012

Like Healthier Hostess Cupcakes: Flourless Double Chocolate, Peanut Butter, & Banana Mini Muffins


I have, again, been remiss in posting as our family has been living out of suitcases for a month or so and then moved across a few states. Life is chaotic most days, but I recently found myself craving the need to bake in a new home surrounded by boxes. Therefore, I am doing the second best option and posting something decadent and healthy for those that are willing to brave the summer heat by turning on the oven....if you're not willing to turn your oven on yet, bookmark this recipe, because they are truly worth trying! Even the kids love them!

I cannot get over how these delicious mini-muffins don't taste like they have healthy ingredients!--Ok, except for the chocolate chips on top. The best part is, the blender/food processor does all the work for you. Here is the original recipe from Dashing Dish that also shows nutritional information. Thank you for such an awesome recipe, Katie! I have adapted the recipe to use DARK chocolate cocoa, semi-sweet mini chocolate chips, (these latter two ingredients make it 'double dark') and added flaxmeal (this affects fat content a bit). Feel free to try it with peanut butter chips instead if you prefer more of a peanut butter flavor. Or skip the chips and frost for healthier cupcakes. Either way, the banana and peanut flavors make for terrific pairing with the chocolate. My daughter thinks she's getting cake when these come out.

Oh guys.....I am in awe of how delicious these muffins are--we are calling them chocolate 'treats' in our house. They have the softness and texture of a cupcake. I have made them several times now...you will think you are cheating on your diet when eating these...we even took them on a picnic in the mountains last month. Here are some pictures of that glorious day where the mini-muffins were just part of the delights:


And here are the mini-muffins (or cupcakes) thawing out from our cooler:


Flourless Double Chocolate, Peanut Butter, and Banana Mini-Muffins


Adapted from www.dashingdish.com

Yield: 12 regular sized muffins or 24 mini-muffins


  • 1 ¾ cups old fashioned oats
  • 3 egg whites
  • ¾ cup cocoa powder (I use Hershey’s Special Dark Chocolate Cocoa)
  • 1 ½ bananas (this makes ½ cup mashed banana)
  • ½ cup plain, fat-free Greek yogurt
  • ½ tsp. vinegar (or ½ tsp. cream of tartar)
  • 1 ½ tsp. baking powder
  • 1 ½ tsp. baking soda
  • ¼ tsp. salt
  • 1 cup hot water
  • ½ cup baking stevia OR 1 cup sweetener of choice that measures like sugar (I like raw sugar)
  • 1 Tbsp. ground flaxseeds (also called ‘flaxmeal’)
  • ½ cup creamy peanut butter, ‘natural’ preferred
  • 1 cup semi-sweet mini-morsels (or more)

Preheat oven to 350 degrees.

Line a 24 cup mini muffin pans with silicone mini muffin liners, or spray muffin tin with non-stick cooking spray. OR, you can use one 12 cup regular muffin tin pan. Set aside. 

Place the peanut butter in a mug or microwave safe bowl, and microwave for 30-45 seconds, or until melted.

In a blender, (or food processor), mix all of the ingredients together. Blend until oats are ground and mixture is smooth. (The batter will be sort of liquid-y, but that’s ok!)

Divide batter between muffin tins. Sprinkle each muffin top with mini-chocolate chips, dividing them evenly.

Place muffin tin(s) in the oven and bake for 12-15 minutes, or until a toothpick comes out clean. 

Cool muffins before removing from pan. ENJOY!!!

Thursday, May 17, 2012

Individual Breakfasts: Baked Eggs In Tomato Sauce


I first saw this idea years ago in a Self Magazine. What a neat concept--individual baked eggs with sauce! We love them because they are easy, delicious, and 'recipe' is so versatile. It's not much of an 'exact' recipe, so your imagination is key. This breakfast requires only a few ingredients and they're usually things you have on hand: cheese, tomato sauce, and eggs. Then you can dress them up with whatever seasonings you want. These eggs are one of those perfect breakfasts to make when having guests over because ALL the eggs come out at once and you don't have to make them to order--yet, they are still customizable.

I have only made them with an 'Italian' flavor (as described below), but have yet to try them with salsa, cumin/chili powder, and a Mexican cheese blend instead. I can't imagine that wouldn't be good!

You will love these--play around with different cheeses--for a sophisticated breakfast, I bet Talegio, vodka sauce & rosemary would be a good combo with some crusty ciabatta :) While your eggs are baking, you can brew coffee, make hash browns, and cut up fruit. Breakfast can be ready in 30 minutes from start to finish.

By the way, I HAVE noticed that the type of egg you use, does make a difference as I have made these with both organic and non-organic eggs. The organic eggs tend to taste a bit better--too bad the price isn't better also!


INDIVIDUAL BAKED EGGS 

Yield: Servings vary-see below.

Preheat oven to 375 degrees.

Grease as many ramekins (4 oz or 6 oz) as you plan to have portions.

For each serving--layer in this order:

  • 3 tsp. pasta sauce (any flavor)
  • ~2 Tbsp. Mozzarella cheese or 2 tsp. Parmesan cheese, or a little of each (preferable)
  • 1/8-1/4 tsp. dried basil or Italian herbs
  • Salt & pepper, to taste

Bake them for less time (15-18 minutes) if you like your centers running--bake them longer (22-24 minutes) if you prefer your yolks hardened like us.

Serve with buttered toast :)

NOTE: It's easier to place all the ramekins on a baking sheet and take the baking sheet in and out, than take each ramekin out one by one.

Enjoy!

Saturday, October 8, 2011

Maple Apple Pecan Bread


My friend (and neighbor), Lindsay, and I went apple picking for the first time this season. We took our girls and enjoyed seeing them take delight from picking fruit off the tree and putting the apples in their own baskets.


It was a gorgeous, sunny day!


Lindsay made apple pie with the apples and I made applesauce and Maple Apple Pecan Bread. It's my new favorite quickbread that I stumbled upon at www.cookingforseven.com. This blog is so beautiful! (I have adapted the recipe a bit, but wanted to give credit to the Erica--she's an incredibly talented 21 year old!) I'm glad I made extra to share with our other neighbor, Chelsea. I can't wait to make this again. It's delicious in the morning with a cup of coffee or as a snack in the afternoon with a piece of cheese and a cup of tea.


Reasons why I absolutely LOVE this Maple Apple Pecan bread and think you will too:

  1. It is tender and moist.
  2. It has a crumbly-crunchy topping.
  3. It is made with whole grains and is sweetened with maple syrup instead of sugar.
  4. It makes the whole house smell like fall.
  5. It has complex layers of flavor--the vanilla, the maple, the cinnamon, the nuttiness--simply delicious.


MAPLE APPLE PECAN BREAD
inspired by www.cookingforseven.com

INGREDIENTS:
  • 1 cup white whole wheat flour (I love King Arthur brand)
  • 3/4 cup all-purpose flour
  • 3 Tbsp. old fashioned oats 
  • 1 Tbsp. ground flax seeds (flaxmeal)
  • 2 tsp. baking powder
  • 1 tsp. baking soda
  • 1/2 tsp. salt
  • 1 heaping tsp. ground cinnamon
  • 1/8 (or less) tsp. ground nutmeg
  • 2 eggs
  • 2/3 cup low-fat buttermilk or fat-free plain Greek yogurt (or a combination of the two)
  • 5 1/2 Tbsp. melted butter (I did a combination of light and regular butters)
  • 3/4 cup pure maple syrup
  • 1 tsp. pure vanilla extract
  • 1 1/2 cups chopped apples (relatively finely chopped)
  • 1/2 cup chopped pecans
Topping:

  • Ground cinnamon & brown sugar (Turbindo or raw sugar preferred)
  • 1/4-1/3 cup chopped pecans

DIRECTIONS:

Preheat oven to 350 degrees.

Butter and flour a 9X5X3 inch loaf pan. I use the spray below instead--makes it so much easier!


In a medium bowl, whisk together flours, oats, flaxmeal, baking powder, baking soda, salt, cinnamon and nutmeg. Add the apples and pecans. (I like to add them at this point so that they are covered with the dry ingredients first and think it makes a little bit of a difference so they don't sink as far into the bread when baking.)

In a smaller bowl, whisk together the eggs, buttermilk/yogurt, melted butter, maple syrup, and vanilla extract. Then, mix the wet ingredients into the dry ingredients with apples and pecans. Gently fold to incorporate the ingredients thoroughly.

Scoop the batter into the prepared loaf pan and top with cinnamon and sugar and the pecans reserved for topping. Bake for 40 to 50 minutes or until a skewer inserted in the center of the loaf comes out clean.

Let bread cool in the pan for 15 minutes then invert onto a cooling rack to cool before wrapping & storing.  Serve slightly toasted with butter.


Makes one large loaf that welcomes fall! Enjoy.


Friday, August 26, 2011

Mushroom Tart in Potato Crust


I love this recipe. I found it in a newspaper somewhere as a new bride. Those were the days where I would leave my husband with meals for every night I was traveling for business. Those days are long gone. But guilt that he was a new medical student and studying hard and would come home to an empty fridge (while I was out having expensive business dinners), motivated me to spend time in the kitchen for him. Making this mushroom potato tart reminds me of coming home from a business trip to our first modest apartment down by the Mississippi River, and settling down to eat with Cort at my in-laws' old table (man do I miss that table--it's been making the rounds in the family), venting about the cost of textbooks, laughing at how the groundskeeper cracked another one of our windows while mowing, not answering the phone, and promising ourselves the best was yet to come.

So if you want a good and easy meal, try this tart. Every time we eat it, we ask why we don't make it more often. I've gotten to the point that I don't even measure the mushrooms, onions, or cheese--it's quite forgiving. This mushroom potato tart makes for a delicious vegetarian dinner when paired with a crisp green salad, a hunk of bread, some roast asparagus, and a lovely Chardonnay. Or just have it for breakfast with some turkey bacon or sausages and sliced strawberries. Or take it to work the next day for lunch. We love it. Hope you do too!


MUSHROOM TART IN POTATO CRUST
Makes approximately 6 servings
  • 4 cups frozen shredded hash brown potatoes
  • 6 scallions, sliced or 4 big shallots, diced
  • 3 Tbsp. grated Parmesan cheese
  • ½ tsp. freshly ground pepper (salt is optional--but it depends how salty your feta is-I like to add a few dashes)
  • 4 large eggs, beaten
  • 1 Tbsp. olive oil
  • 8 oz. assorted mushrooms (white, cremini, shiitake, and oyster), sliced (about 3 cups)--you can use just one kind too--baby portabellas are particularly good
  • ½ cup crumbled feta cheese
  • ½ cup milk
  • 1 tsp. fresh thyme leaves, finely chopped, or dried Italian seasoning works really great!

Place a baking sheet on the middle shelf of the oven and heat oven to 475 degrees.
Spray a 12-inch tart pan with removable bottom, or a 12-inch pizza pan, with butter-flavored nonstick cooking spray. (I've never tried it in a pizza pan)

Combine potatoes, half the scallions (or shallots), half the parmesan, and half the pepper in a large bowl.

Stir in half the eggs and mix until well blended. Spread the potato mixture evenly on the bottom and up the sides of the pan. Put the tart on the preheated baking sheet and bake for 10 minutes or until golden brown. Remove from the oven.

Reduce oven temperature to 375 degrees. Meanwhile, heat the oil in a skillet over high heat; add the mushrooms and sauté for 5 minutes. Remove from heat.

Stir in the feta, milk, thyme and remaining scallions, Parmesan, pepper and eggs. Pour the mushroom mixture into the potato crust and bake for 10-15 minutes or until set.

Serve warm or at room temperature.

Monday, June 13, 2011

Raspberry Gratin...Another reason worth turning on the oven...


This dessert is so heavenly--one that I miss during the cold winter. Not unlike like ice-cream, it's not exactly healthy, but it's SO worth the splurge! And I know, I'm all talk about not turning on your oven & then I give you two recipes in a week that require none other than: YOUR OVEN! Forgive me. It's just that it's summer. When else do we get such amazing produce with which to experiment! After this....well, I'll try to stop using the oven. Now, let's turn to the magic that is the raspberry gratin....an adult pudding--decadent, creamy, yet fresh.

The recipe below is Bittman at his finest--simple, elegant, delicious. It's fruit 'robed in creamy custard'. And a LOT lighter than some gratin recipes out there with many, many eggs! It's been at least 6 years since I first made this, but I think of this recipe more often than I ever imagined. 

How can you resist not eating these raspberries?! If you can, this dessert will be worth it. Here are some fun facts on raspberries.

I have loved these fruits from a young age when my grandparents would take us kids up to the mountains.


We used to pick white raspberries and my grandparents would teach my brother and I about bear tracks...to this day, I have a vivid image of my grandmother carrying a heavy load of raspberries in her apron over her skirt and laughing. Here is a picture of my mom with my grandparents in Romania a few years ago.


 The only thing that might make this dessert more decadent is a scraped out vanilla bean. Let me know if you try it that way. One bonus feature of this recipe is that you can prepare most of it in advance the night before or morning before entertaining. Once you fold in the cream, the next day, it only takes 10 or less minutes in the oven!!!

Best part? You can make this with ANY fruit.


 RASPBERRY GRATIN
Adapted from How to Cook Everything by Mark Bittman
  • 1 cup milk (I used skim)
  • 1/2 tsp. ground cinnamon
  • 1 egg, PLUS 1 egg yolk
  • Pinch of salt
  • 1/2 cup sugar
  • 1/4 cup all-purpose flour
  • 3/4 cup heavy cream
  • 3 cups fresh raspberries, rinsed and patted dry (this is about a 12 ounce container)
Place the milk and cinamon in a small saucepan and turn the heat to medium. When steam rises from the milk, remove it from the heat.

Meanwhile, beat the egg and yolk with the salt until light and foamy. Combine the sugar and flour and beat about half of the mixture into the eggs; add about half the milk and beat again. Add the remaining sugar-flour mixture, beat, then the remaining egg.

Place the mixture in small saucepan and turn to the heat to medium-low. Cook, stirring almonst constantly, until the mixture begins to boil; it will thicken almost immediately. Remove the custard from the heat and continue to stir for about a minute or so longer. Cover well and chill thoroughly, at least 1 hour and up to 12 hours.

About 20 minutes before you want to eat the dessert, preheat the broiler. Stir about 1/4 cup of the cream into the custard to lighten it. Whip the remaining cream until it holds soft peaks. Fold the cream gently into the custard.

Place the fruit on the bottom of an 8- to 10- inch long gratin dish or an attractive 8-inch square baking dish. Pour the cream mixture over the top and shake the pan a little to distribute it among the berries or fruit. Broil about 4 to 6 inches from the heat until lightly browned on top, about 10 minutes.


Truly, raspberries bathed in creamy, cinnamon custard.


Dole the custard out in pretty cups before serving. Serve immediately. But, we have eaten this dessert cold and it's just as good as when it's pulled straight out of the oven. Enjoy!

Sunday, June 5, 2011

Easy Breakfast or Dinner: Quesdillas Huevos Rancheros


I cut this quick little recipe out of a magazine almost 7 years ago and it has become one of our favorite breakfasts. And if you're rolling your eyes at another Mexican breakfast, you are once again going to miss out on a good meal. We are obsessed with Mexican=type things in this house... Bookmark this recipe to use next year when you are left scratching your head and wondering what to do with leftover hard boiled eggs after Easter has passed.

This dish makes me think of what healthier fast food could be (well, if you omit the pimento cheese especially)....but still cheesy, quick, easy (well not as easy as going through the drive through....but easy when you consider how few ingredients it has and simple preparation), and amenable to all ages. A fun meal for a real family. 

If you have hard boiled eggs already waiting in your fridge, you can make this lightening fast. I would even serve these quesadillas huevos rancheros for dinner with a Mexican salad of lettuce, corn, beans, tomatoes, olives, cilantro, avocado and jicama (optional). Vegetarians, rejoice!

QUESADILLAS HUEVOS RANCHEROS

Adapted from Real Simple magazine

Serves 4
  • 4 (6-inch) corn tortillas (we've done it with flour tortillas too)
  • 1/2 cup grated Monterey Jack cheese (or a Mexican cheese blend) + a couple Tbsp. pimento cheese (truly optional, but oh so good!)
  • 3 hard-boiled eggs
  • 1/4-1/3 cup salsa
  • Guacamole OR diced avocados & light sour cream (optional)
Make the hard-boiled eggs.

Lay the com tortillas on a cookie sheet. Place in a 325º F oven for 10 minutes.

Remove from oven and top 2 of the tortillas with the Monterey Jack cheese and the sliced hard-cooked eggs. This is what they will look like:


Top with the other tortillas.

Bake until the cheese melts, about 5 minutes. Cut into wedges and decorate with spoonfuls of salsa.

Serve with hashed browns and fruit salad for a more complete meal :)

Monday, May 9, 2011

Eggs on Spring Break: PW's Migas


Hey all! I was hoping to post this on Cinco de Mayo (5th of May), but I ran out of time since we've been out of town yet again. Anyway, my friend, Holly, inspired me to make this when she posted a picture on Facebook. Holly, I'm hooked! I love big breakfasts on the weekend--especially holiday weekends. These migas remind me of the chilaquiles my husband and I love to eat on our Mexican vacations.

Pioneer Woman's blog has a MUCH better post on this. She's absolutely amazing and her blog is phenomenal. I used to wonder how she was able to do so much and later found out she has a lot of hired help--good for her!!! I aplaud women who are honest about their lives because they help dismantle this notion that perfection is attainable. I love Ms. Drummond's approach to life and her recipes. I think she may just be the younger generation's Martha Stewart....but, now I'm wondering which generation I'd be categorized into....hmmm....either way, both inspiring women! Wish I could spend time with each of them.

This is a wonderful recipe and I urge you to try it--I found it to be incredibly flexible--add more spices, use less peppers, replace eggs with some egg whites....either way, it will be good! I made 1/3 of the recipe and it still turned out great.

PIONEER WOMAN (REE DRUMMOND)'s MIGAS (aka EGGS ON SPRING BREAK)

Yield: 6 servings (I say more like 8)
  • 4 whole corn tortillas
  • 1 whole jalapeno, seeds and membranes removed, finely diced
  • 4 whole plum tomatoes, roughly chopped
  • 1 whole green pepper, roughly chopped
  • 1 whole red bell pepper, roughly chopped
  • 1 whole medium onion, chopped
  • 12 whole large eggs (I used 1/3 egg whites and the rest whole eggs)
  • ¼ liters Cotija cheese, grated--may use Cheddar, Monterey Jack, etc. (liters?! ridiculous. I translated this to a heaping cup of cheese)
  • ⅓ cups cilantro, chopped
  • 1 Tbsp. butter
  • 1 Tbsp. olive oil
  • ¼ cups half-and-half (I used fat-free half & half--but would have easily used milk)
  • *1 cup black beans (my addition-totally optional-read the last sentence of instructions)
  • OPTIONAL: for serving--diced avocados, salsa, sour cream

In a bowl, whisk together eggs and half & half (or milk)--I added half the cilantro at this point (not sure why). Salt and pepper eggs, then set aside.

In a small skillet over medium heat, heat oil and fry each corn tortilla just until crisp. Remove to a paper towel-lined plate to drain. Chop tortillas and set aside.


In a large skillet over medium-high heat, melt the olive oil with the butter (you can use a little less if you can get away with it). Add onions and bell peppers and cook until starting to turn brown/black, about 3 to 4 minutes. Add in diced jalapenos (and beans, if using) and stir to combine.

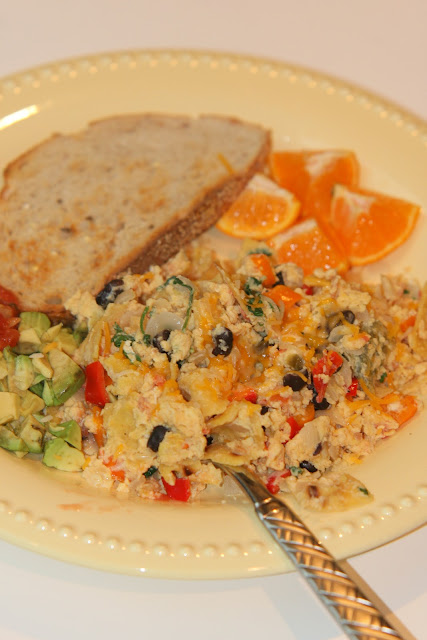
Add tomatoes to the skillet and stir around, then add tortilla pieces, stirring gently to combine. Reduce heat to low. When the heat has decreased, pour egg mixture into skillet. Stir gently to cook with the peppers, folding mixture very gently as it cooks.


Add in grated cheese and chopped cilantro, and stir to combine.


*PW's note: Serve with black beans and iced coffee. But since I didn't feel like making the beans separately, I just added a cup of drained, rinsed black beans in with the onions and peppers. Totally optional, of course. I like the migas with some fresh cut oranges, toast (this is beyond optional), and hot coffee. SUCH a good breakfast!!!!


And since we're talking about Spring Break, here's a couple pictures from our Mexican vacation last month...I can't wait to go back! Enjoy your breakfast!


Monday, March 14, 2011

Rustic Romanian Sour Cherry Cake (Pandispan)


This rustic tart cherry cake was one of my most favorite desserts as a little girl. My Romanian grandmother made it, my Romanian mother made it, and now you and I can say that we can make it too. It's a traditional Romanian dessert with an Ottoman name--'Pandispan' which literally means 'Spanish bread' filled with sour cherries. I was so grateful to be able to bake with my mom for a bit on my parents' latest visit. I miss them already....

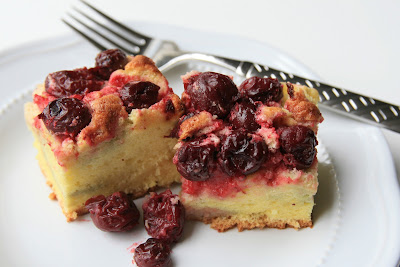
So, this is basically a sponge cake that traditionally calls upon tart cherries--but you can make it with regular sweet cherries too. With the exception of the cherries, it has basic ingredients that you would most likely have in your house: eggs, salt, sugar, flour, baking soda, some optional citrus zest, etc. It mades a terrific snack cake with tea in the afternoon or as a coffee cake served with a latte. My husband's eyebrows did a backflip when he finished his first bite. I love, love, love this simple, rustic, fruity, fluffy cake!

The beauty of this cake (and why I like to call it "Chameleon Cake") is that it works for so many different kinds of fruits! You can make this cake with blueberries, apricots, etc. And, if you get really creative, you can use nuts and/or essences such as almond, orange, etc. Also, the ratio is pretty much 1:1:1 on eggs, flour, sugar.


RUSTIC ROMANIAN SOUR CHERRY CAKE (PANDISPAN)

  • 6 eggs, separated
  • 2 pinches of salt
  • 6-7 Tbsp. sugar PLUS 2 Tbsp. more sugar
  • 6 Tbsp. all purpose flour
  • Scant 1/8 tsp. baking powder
  • Zest of one lemon OR orange (your preference--you can skip it, but the lemon is delightful!)
  • 2 Tbsp. oil (my mom uses olive oil, we tried almond oil this time--but canola or vegetable should work too)
  • ~4 cups tart cherries or regular cherries (fresh preferred, frozen fine to use too--no need to defrost)
  • Powdered sugar or vanilla sugar (for serving)
Preheat oven to 350 degrees. Grease and flour a 9X13 inch pan (or two 8X8 pans).

In a medium-large bowl, beat just the separated egg whites with the salt until frothy and foamy (maybe a minute or less)--you can use a stand mixer or a hand mixer. Add the 6-7 tablespoons of sugar by one at a time and continue to beat in between each addition. Add the baking powder and continue to beat until the eggs are completely whipped and you can see slight peaks.

Here's what it will look like:


Very gently fold in the oil with a spatula. Then fold in the egg yolks and flour--one egg yolk and one tablespoon of flour at a time until pretty much incorporated. Then add the citrus zest. Fold the mixture from the outside in (or basically mix the bottom and flip it over the top--sort of in a clockwise motion and work your way around the bowl) with a rubber spatula being careful not to stir in the opposite direction (which can 'deflate' the fluffy egg mixture). Folding in this way will help keep the cake light. (Folding-in my world- then, means 'gentle smooth overlapping mixing.')

Pour the, now pale yellow, mixture into the 9 X 13 inch pan. I like to use a glass dish so you can see all the pretty red cherries.

Meanwhile, mix the 1-2 Tbsp. of leftover sugar with the cherries. Drop the cherries into the batter by hand and evenly disperse. There isn't any need to push the cherries down into the batter--they will fall into the batter on their own, somewhat.

(In the picture above, we were experimenting with pan sizes, so our cherries didn't sink into the batter as much as usual-- since we used a pan that was too small and we overflowed it with batter and not enough cherries--hence the need for a 9 X 13 inch pan!--but as you can see, still a pretty rustic cake.)

Bake the pandispan cake for about 50-60 minutes--or until the cake center is not jiggling very much, a toothpick inserted comes out clean, and the top starts to get golden in color.

Let the cake cool. Cut into squares. Sprinkle with powdered sugar or vanilla sugar before serving. Can also be served with ice cream.

Serves 6-8.

This is a WONDERFULLY simple cake. I took it to my  'Pleasantville' neighbors here in Memphis suburbia. So good!

Sunday, February 27, 2011

Sweet Potato Leek Frittata


First, let me start off by saying I had no hand in making this. My mother in law made this for us while we were visiting. We LOVE to be her guinea pigs and try her cooking. Second, I really enjoyed this frittata and therefore wanted to feature it for you guys. This frittata made a good vegetarian breakfast-but I think it would make a great dinner served with some crusty bread and a green salad. If you're looking for a fun way to use healthy sweet potatoes and an easy meal--try this frittata.

A few recipe notes: Don't get scared by the amount of eggs--three of us ate it two mornings in a row and we STILL have half the frittata left. The recipe is supposed to yield 6 servings....however, our portions were smaller and we served it with fruit and lemon bread. The original recipe calls for 4 garlic cloves, but we all thought that we would use less next time we made it. In addition, we're big cheese lovers, so my mother in law added extra cheddar on top (WONDERFUL!).

Leeks always make me think of spring.....so this may be your 'good-bye winter' meal.

 SWEET POTATO LEEK FRITTATA
Adapted from the Rachel Ray Show
  • 3 Tbsp. extra virgin olive oil
  • 2 large sweet potatoes, cut in half and thinly sliced
  • 2 medium leeks, thinly sliced
  • 2-4 cloves garlic, finely chopped or grated
  • 12 extra-large eggs (large eggs should be fine)
  • 1/3 cup milk or half-and-half  (fat free half & half would work well here)
  • A splash of hot sauce (such as Tabasco brand)
  • Salt and ground black pepper
  • 1/2 cup shredded white sharp cheddar cheese (regular is fine too)
  • 1/2 cup (a couple of handfuls) flat-leaf parsley leaves, chopped
Heat a 12-inch, nonstick, oven-safe skillet over medium-high heat. Add olive oil, sweet potatoes, leeks and garlic, and cook until the veggies are tender, 6-7 minutes.
 
Beat eggs together with milk or half-and-half, a splash of hot sauce, some salt and pepper. Pour the eggs in the skillet over the filling. Using a spatula, raise the cooked egg off the bottom of the pan, allowing more of the still-liquid eggs to settle on the bottom of the pan.

When the frittata has set, sprinkle the top with cheese and transfer to the oven. Cook for 10-12 minutes until top is deep golden brown. Remove and let stand 5 minutes.

Garnish with parsley, cut into wedges and serve.

Sunday, January 30, 2011

EASY French Toast to Die For


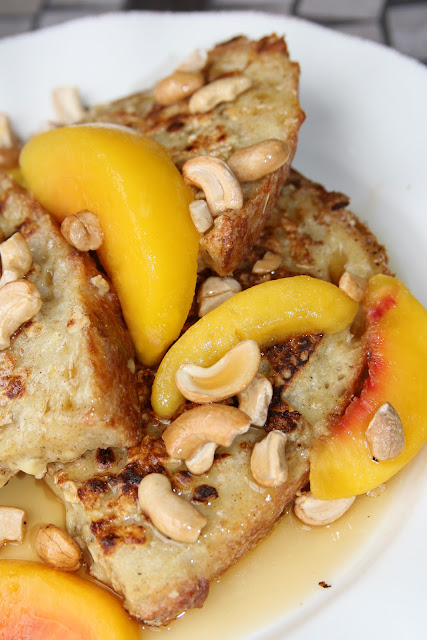
Thank you Mark Bittman for the best basic French bread recipe. I have built upon it by adding oats, flax meal, wheat germ, and topping the toast with fresh peaches and cashews. Ok, so maybe we had to defrost the peaches--not much to work with in January, but still....very, very good. I think almost Mother's Day/Father's Day-worthy. Bittman recommends using challah bread (especially instead of white Wonder bread....), but since it's so hard to find (and I haven't tried making that yet), we used an everyday white bread I recently made. I will post on that recipe soon (but frankly, getting a little worried my audience is sick of the bread posts by now). But,you can use any bread you have on hand--it's an especially great use for bread that may be going stale.

Anyway, I'm sharing Bittman's recipe with you because 1) Every family needs a french toast recipe as part of breakfast repertoire and 2) Because it's good. I hope you will love this french toast as much as our family does. By the way, despite its name, French toast is NOT from France. Apparently, there is mention of the dish from the 4th or 5th centuries in Rome. And a similar dish was very popular in the middle ages. These days, the English call it 'Eggy Bread.'


FRENCH TOAST
Adapted from How to Cook Everything by Mark Bittman

You can make this dish eggier by adding less milk. If you like mushy French toast--you may need more batter as you will want to soak your bread in the batter more so than 'dip' it. If you like your French toast on the crispy side, add 1/2 cup flour to the batter. You can also make it by crispy by dredging the battered toast in sweetened bread crumbs or crushed cornflakes (my personal favorite).

Makes 4 servings

2 eggs
1 cup milk
Dash of salt
1 Tbsp. sugar (optional-I always skip this because adding syrup is sweet enough)
1 tsp. vanilla extract and/or ground cinnamon (I like to add them both)
Butter or canola oil (as needed)

My add-ins--BESIDES the 1/2 cup of flour which makes it crispy--our favorite:
1/2 cup oatmeal
1 Tbsp. wheat germ
1 tsp. ground flax meal

Preheat a large griddle or skillet over medium-low heat while you prepare the liquid mixture.

Beat the eggs lightly in a broad bowl and stir in the milk, salt, and optional ingredients (if you are using any of them).

Add approximately 1 tsp. of butter or oil to the griddle or skillet and when it is hot, dip each slice of bread into the batter and turn it over to get both sides covered. Then place the toast on the griddle adnd cook until nicely browned on each side, turning as necessary (you may find that you can raise the heat a bit). Serve, or hold in a 200 degree F oven for up to 30 minutes.

Serve with warm maple syrup and fruit/nuts. We tried them with cashew pieces and fresh peaches, but you can try almond butter and applesauce or berries and cream, etc. There are many possibilities.

Wednesday, January 12, 2011

For Breakfast or Dinner: Baked Potato Frittata


How good does this sound? You can serve this baked omelete either for breakfast with fruit and toast or for dinner with a crisp green salad. It's a great excuse to use up leftover baked potatoes. But in case you don't have those, I included the directions for how to use uncooked potatoes in this recipe.

I don't usually have chives on hand around this time of year, so green onions fit the bill just great. We used organic nitrate-free turkey bacon. I suggest that you skip the salt in the recipe as I felt the at the frittata turned out a bit too salty since it called for bacon (a cured meat). I made half the recipe (to serve 4 people) and it worked out beautifully. Also, no worries if you don't have a frittata pan (who does?)--just use a dutch oven (you SHOULD have one of these! Haha.) or an oven-proof frying/saute pan.


BAKED POTATO FRITTATA
adapted from Williams-Sonoma

Serves 8

2 russet potatoes, 1 1/4 lb. total, scrubbed and cut into 1-inch dice
2 Tbsp. olive oil
Freshly ground pepper
10 (turkey) bacon slices, chopped
10 eggs
1 1/2 cups shredded cheddar cheese
1/4 cup, plus 1 Tbsp. minced fresh chives (or green onions)
1/2 cup light sour cream

Preheat an oven to 400°F.

In a bowl, stir together the potatoes, 1 Tbsp. of the olive oil, salt and pepper. Transfer to a baking sheet and bake, stirring occasionally, until the potatoes are golden brown and tender, about 30 minutes. Let cool for 30 minutes.

Increase the oven temperature to 500°F.

In a pan (frittata pan or oven safe frying pan or even a dutch oven) over medium-high heat, cook the bacon, stirring occasionally, until crisp, about 10 minutes. Transfer the bacon to a paper towel-lined plate to drain. Discard the fat in the pan. Finely chop 2 Tbs. of the bacon and reserve for garnish-OPTIONAL-you can always just throw everything in-still looks good. (If you use TURKEY bacon, you can skip this draining step since it won't leave extra fat--you can just set the pan aside.)

In a large bowl, whisk together the eggs, salt, pepper, 1 cup of the cheese and the 1/4 cup chives/green onions.

In the pan holding the bacon, over medium heat, warm 2 tsp. of the olive oil. Add the potatoes and diced bacon to the pan and pour in the egg mixture. Cook, using a rubber spatula to lift the cooked edges and allow the uncooked eggs to flow underneath, about 2 minutes, then cook for 4 to 6 minutes more. Continue to cook, covered, until the eggs are set, about 6 minutes. (I will come clean here and tell you that I basically let the eggs start to set as soon as I poured them in and then popped the whole dutch oven pan--uncovered--in the oven for about 10-15 minutes until it was golden. It was fantastic--no flipping and mixing and waiting. I like to make things easier when I can.).

Uncover the pan and sprinkle the frittata with the remaining 1/2 cup cheese. Transfer the pan to the oven and bake until the cheese is golden brown and bubbly, about 4 minutes.


Gently shake the pan to loosen the frittata and slide it onto a serving plate. Garnish with the reserved chopped bacon and the 1 Tbsp. chives/green onions. Serve immediately with the sour cream.


A final word about frittatas, taken from The New Basics Cookbook by Julee Rosso and Sheila Lukins, 1989, Workman Publishing:

“Frittatas are to Italians what omelets are to the French. In a frittata (or tortilla in Spain) the filling is mixed with the eggs and the whole mixture is cooked slowly in a skillet until set, then quickly browned under the broiler. Frittatas are a bit drier than omelets, not so fussy in their timing, and much easier to make for a gang. The filling ingredients are what make the frittata so wonderful, but it’s the eggs that bind everything together. Frittatas can be served hot right in the skillet or left to cool at room temperature. They can be cut into pie-shaped wedges for brunch or supper or little squares for appetizers…”