Showing posts with label miscellaneous. Show all posts

Wednesday, August 8, 2012

Barbecue Rubbed Salmon


When we recently moved, I was going through my spice drawer and found this really good rub I had made months ago. I figured it would be the perfect little helper for some fish when we moved in when I need something fast but didn't want to make anything elaborate. I was right! It's sweet and smoky and has just the right spice blend. This barbecue rub is really an awesome thing to have on hand and would make for a good gift come holiday time!

I used these salts in my barbecue rub and if you're around a Trader Joe's...try them...they are so good! I'm addicted! (please excuse the horrible cropping)


You can make the barbecue rub ahead of time and just use a little bit on chicken or fish right before baking or grilling. It simplifies dinner considerably! Add more cayenne pepper for a kick, if you prefer. So, key words? EASY. FAST. And really, even healthy!

This isn't really a recipe more than a guideline....I roasted my fish, but you can easily grill it skin side down.

We served the salmon with steamed broccoli, fresh yellow tomatoes and a side salad of corn, beans, and green onions.


BARBECUE RUBBED SALMON

Servings vary based on how many fillets you use.

  • Salmon fillets (wild-caught if you can get them)
  • Olive oil spray
  • Basic barbecue rub (my recipe follows)--about 1/2 Tbsp. for each fillet can be used
  • Lemon or lime wedges for serving, optional


Preheat oven to 400 degrees.

Spray a shallow cooking sheet pan with some cooking or olive oil spray. Place salmon skin side down on sheet. (I like to line my pans with aluminum foil--sprayed with cooking spray--to make for an easier clean-up.) Spray salmon fillets with olive oil until they are evenly covered--generally, it ends up being about 1/2 a tablespoon of rub per fillet. Gently sprinkle and pat some barbecue rub until the fillets are lightly covered.

Bake for about 15-20 minutes. Every oven seems a little different, so check for 'doneness'--that fish flakes easily around 15 minutes.

Serve with lemon or lime wedges.


BASIC BARBECUE RUB


  • 1/4 cup firmly packed brown sugar
  • 1/4 cup smoked paprika
  • 3 Tbsp. black pepper
  • 3 Tbsp. smoked salt (or regular coarse salt)
  • 2 tsp. garlic powder
  • 2 tsp. onion powder
  • 2 tsp. celery salt
  • ½ tsp. cayenne pepper (or more if you wish)
  • ½ tsp. chili powder
  • ½ tsp. cumin

Mix all ingredients in a small bowl—a small whisk helps break up any lumps in the brown sugar. Store in an airtight container, away from heat and light. 

Rub will keep for months!!

Use on chicken or fish. (I'm sure it would do fine on red meat, but I haven't tried it.)

Makes about 1 cup.
**If you use 1/2 a Tablespoon of rub on a piece of meat, that will give you ROUGHLY about 32 servings, as 1 cup has 16 Tablespoons (thank you Google!).

Wednesday, May 9, 2012

Mississippi Comeback Sauce: Y'all Come Back, Ya Hear?


A few weeks ago, on Easter, our sweet friends invited us to go down to their family farm. We had an AMAZING day with their wonderful, tight-knit family. And it got me thinking about Southern food and traditions now that we are moving. And I realized that I've come to love a lot of things about the South--so much so, that I feel more at home down here than I do back in a big city environment of the North. They're all about Faith, Family, & Football. LOVE that. Even if I'm still struggling with the last one.

Anyway, here's a lovely view from Slayden, Mississippi.


And a couple other things that made me smile:


Since it was Easter, the kids were lucky enough to dye some eggs. Here's another great love the South has cultivated in me--MASON JARS!


So, with Mississippi on the brain, I had to try this Southern sauce I had heard about--it's origin is unknown--some say it was invented by a restaurant chain (Outback Steakhouse, I think) and others believe it was created by a Greek immigrant after the second world war. Whoever made it up was onto something GENIUS because this sauce is simply DELICIOUS! It goes with everything...like a pumped up version of Thousand Island dressing, sweet, salty, tangy, and just a tad spicy. We loved it with grilled vegetables, bread, and fish. It was awesome as a dipping sauce for chicken fingers. It would be terrific as a salad dressing or drizzled onto a baked potato as well. Or use it as a sandwich condiment.

You'll find new uses for it, surely. And, you really will keep coming back for it!


One of the ingredients is chili sauce. You can use this Heinz kind, but I used this Nestle Maggi kind. Southerners love Duke's mayonnaise, but I perverted the recipe by using my favorite vegenaise--so delicious! The sauce will keep for a couple weeks. In a Mason jar, of course.


COMEBACK SAUCE
Adapted & loosely changed from Southern Living


·         1/2 cup mayonnaise 
·         1/4 cup olive oil
·         3 Tbsp. chili sauce
·         2 Tbsp. ketchup 
·         1 Tbsp. water
·         1 tsp. lemon juice
·         1 tsp. white wine vinegar (optional)
·         2 tsp. Worcestershire sauce
·         2 tsp. prepared mustard (I used yellow-but I think they mean Dijon or ground mustard)
·         1 tsp. coarsely ground pepper
·         Dash of paprika (I prefer smoked paprika)
·         Dash of hot sauce
·         1 small onion, minced or grated (or 1/2 a medium onion)
·         1 garlic clove, minced or grated


Mix all ingredients together. Store, covered, in refrigerator.

This stuff is FABULOUS on fish! (that's salmon below) And some other things too. Hope you'll give it a try!


And yes, we do grill bread--it's amazing! Spray it with olive oil, rub some garlic on it, and grill away!


Hope you guys like this sauce as much as we do--I served it to my visiting dad who couldn't get enough.

Saturday, February 18, 2012

Garlicky Sunflower Seed Spread with Parsley


I got this intriguing sunflower seed recipe from my friend, Carla, after she posted a great picture of it on Facebook. She got it from Ligia Pop, a Romanian raw food chef. I was a bit unsure about trying it because I'm not familiar with raw recipes...however, this was SO delicious! This fabulous dip/spread only requires a  handful of ingredients and tastes nutty, fresh, creamy, salty, tart, and sweet (that almost covers it all, doesn't it??).

It was a delicious spread on the pumpkin, sunflower & flax seed bread I just posted on. Carla said it is terrific served on cucumber slices as an appetizer. But, I liked dipping my carrots in it and my daughter liked dipping her crackers in it--so yes, you can use it as a dip! I imagine this sunflower seed spread would be wonderful drizzled with olive oil, if you preferred, or sprinkled with some smoked paprika before serving. I can't wait to try it again with different kinds of herbs. I especially would like to try it this summer with fresh basil instead of the parsley, spread on crostini, and topped it with fresh sliced heirloom tomatoes--YUM!


GARLICKY SUNFLOWER SEED SPREAD WITH PARSLEY

Adapted from my friend, Carla, who got it from www.ligiapop.com

  • 1 cup raw sunflower seeds (I used 1/2 cup raw sunflower seeds & 1/2 cup roasted sunflower seeds)
  • 2 garlic cloves
  • 3 Tbsp. fresh lemon juice
  • 1/4 tsp. agave nectar
  • 1 small handful fresh parsley, rinsed & lightly patted dry
  • ~1/4-1/3 cup water
  • Salt & pepper, to taste (cracked sea salt is particularly good)

In a food processor or blender (I used my Vitamix), blend/process all ingredients. Add more water, if necessary, until the texture is to your liking.


All I can say--is YUM!

Saturday, January 28, 2012

Non-Dairy Chocolate Sauce to Die For


Last night, we had a great dinner with friends. And I got to bring dessert--which paled compared to the meal, but every once in a while, I let myself get spoiled. Seriously, isn't it the most wonderful thing in the world when someone feeds you a home-cooked meal?! It was my first time making a chocolate sauce to go with an amaretto cheesecake. And we really liked this chocolate sauce. Of course, it comes from famed pastry chef, David Lebovitz. Apparently, he's been making it for 20 years. Yeah, it's pretty darn good!

Since Valentine's Day is coming up, I figured maybe some of you might be looking for a fast and easy chocolate sauce to drizzle over your desserts. You might have to resist eating it out of a jar. Keep it in the fridge and warm it up before serving. I made some small changes in parentheses. I used agave nectar instead of corn syrup--I have a feeling that corn syrup would give you a bit thicker and shinier texture. 

  • One thing I did do that did end up tasting pretty delicious, was do 1/2 cup coffee (strong, unsweetened) + 1/2 cup water. However, keep in mind that coffee is acidic--and that helped me understand why my sauce did end up crystallizing a tiny bit--the acid affected the integrity of the sauce--not enough to bother us, but enough to notice it visually. I think it would be better to add a tablespoon or two of coffee liqueur instead if you want a little mocha flavor.

By the way, we weren't the only ones having fun--check out our children having their first date--this cracks me up as they were even provided 'candlelight'...the only thing missing is a shared pasta noodle between those busy mouths. 


Love may be in the air.....I think it would be great to add a little peppermint extract to this chocolate sauce and serve it over ice-cream at Christmas...or Valentine's Day. Which we are DEFINITELY preparing for at this house. All I hear about is hearts...heart songs, prayers, books, crafts,


..we even watched a little open heart surgery on youtube ('that was cool, mom!'). Hope everyone can use a little chocolate in preparation :)

THE BEST CHOCOLATE SAUCE
Adapted from www.davidlebovitz.com
About 2 1/2 cups
  • 1 cup (250 ml) water
  • 1/2 cup (100 g) sugar
  • 1/2 cup (160 g) light corn syrup, agave nectar, or glucose (I used agave nectar)
  • 3/4 cup (75 g) unsweetened cocoa powder (preferably Dutch-processed)
  • 2 ounces (55 g) bittersweet or semisweet chocolate, finely chopped--(I used 3 ounces of good quality semi-sweet chocolate chips)
  • 1/2 tsp. sea salt (my addition)

In a medium saucepan, whisk together the water, sugar, corn syrup (or agave or glucose), and cocoa powder.
Bring to a boil over medium heat. Once the mixture has just begun to simmer and boil, remove from heat and stir in the chopped chocolate until melted.
Serving: You should let the Chocolate Sauce stand for a few hours before serving, which will give it time to thicken a bit.
Storage: Store the chocolate sauce in a covered container in the refrigerator for up to 10 days. Rewarm before serving.
ENJOY! This sauce is delicious over cheesecake and when added to hot milk to make hot chocolate. Serve it over strawberries and ice-cream or dip bananas in it for a delicious treat. 

Sunday, January 22, 2012

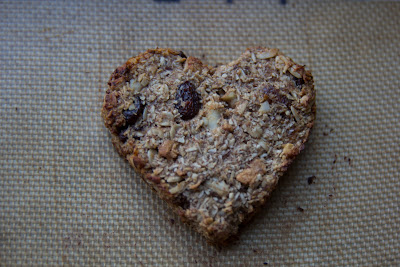
Soft Granola Cookie Hearts


These little treats are vegan. I hesitate to say that as many people are still coming around to not being scared by the word 'vegan.' I was one of those people that would instantly shut down at the idea of veganism due to less than tasty vegan food I had previous eaten (and if anyone has good—I mean, edible, vegan cheese--I'd love to know about it because I have yet to find that). But now that the world is coming around more to the idea of vegan eating (obviously from my chicken & dairy recipes, I'm not fully convinced I want to be totally vegan), the public is finally getting exposed to eating BETTER vegan food/recipes. You know, things that don't taste like cardboard. And recipes that aren't just composed of raw vegetables (not that there is anything with raw vegetables!).

Well, my child has been sick quite a bit this winter already--mainly due to exposure to other kids with illnesses—playdates and Mother's Day Out/Preschool. Because of this, I tried to give her less dairy. And because of the reward system instituted last spring, she thinks she deserves treats for good behavior (thank you potty training). So, what's a mom to do? Make vegan treats.
I love this little recipe—I hope you will too! It's one of those that you won't feel guilty eating or giving to your children. It's a sugar-free treat, has plenty of fiber from the whole grains and dried fruit and protein from the nuts. You could use any dried fruit you like, I just happen to like dried pineapple in things lately. I would also like to replace the bananas with prunes or pumpkin in this recipe sometime. These come together really fast (despite that at first glance it seems to have a lot of ingredients).

I tried to make this particular one more appealing to my daughter by shaping the cookies into little hearts (use a cookie cutter). And in doing so, realized that this would be a great little Valentine's 'cookie' to make with your kids. However, I'm sure any cookie cutter would do or you could just drop the 'dough' onto the sheet and shape with your hands if you are a minimalist.


SOFT GRANOLA COOKIE HEARTS
Makes 22-24

For Liquid Mixture:

  • 1 cup mashed bananas (about 3 medium)
  • 3 Tbsp. almond or soy milk
  • 1 tsp. pure vanilla extract
  • ¼ cup safflower oil (canola or another flavorless oil can be replaced)
  • zest of one orange (you could skip—but I like it in conjunction with the cloves)
Dried Fruit to add to liquid mixture—can replace with your favorites for 1 cup total of dried fruit:

  • ¼ cup chopped dried pineapple
  • ¼ cup chopped dried apple
  • ½ cup raisins (golden raisins fine too)
For dry mixture:

  • 1 ½ cups old fashioned oats (not instant)
  • ¾ cup shredded, unsweetened, coconut
  • 1 Tbsp. cinnamon
  • ¼ tsp. cloves 
  • ½ tsp. salt
  • 1/8 tsp. baking powder (I like aluminum-free)
  • ¼ cup almonds (processed in food processor to make 'almond meal')
Nuts to add to dry mixture--can replace with nuts of your choice for a total of ½ cup chopped nuts:

  • ¼ cup chopped Brazil nuts
  • ¼ cup walnuts

Preheat oven to 350 degrees. Set aside cookie sheets with Silpats or covered with parchment paper.

In a small bowl, mix your liquids. Add the dried fruit and mix well. If need be, use a whisk and push down on any clumps of fruit to separate and stir again. Set aside to let the fruit soften while you work on the dry ingredients.

In a larger bowl, stir your dry ingredients together and add in the nuts.

Now, add your liquid mixture to your dry mixture and stir well.

Place a cookie cutter (or different shaped ones—use medium-big sized cutters) on the cookie sheet and fill with granola mixture until it reaches about halfway into the height of the cookie cutter. Pat down with a spoon and spread evenly into the cookie cutter. Lift up your cookie cutter leaving the shape behind. Repeat until you get your sheet(s) filled. The 'cookies' don't rise much so you won't need to worry that they'll spread out into each other.

Bake for about 15-20 minutes—keep your eye on them so they don't burn (try to swap cookie sheets halfway--the bottom one can go on top and the top one can go on bottom).

Let cool before eating. (I store these treats in a covered tupperware container in the refrigerator & freeze half) 


Oh yeah, they're also really good for breakfast with a glass of soymilk and some coffee.


Wednesday, January 11, 2012

Dark Chocolate Lavender Truffles....LOVE at First Bite


WOW. I have been dreaming of lavender recipes lately....and finally, I tried something with my dried lavender (courtesy of the bulk spice department in Whole Foods). Chocolate & lavender are an amazing team. If you like the smell of this herb, then you will like the taste of this treat. If you don't...then maybe you should still try it--but make 1/2 a recipe. Lavender is native to the Mediterranean region. I've heard a lot of people say that they can't imagine lavender in food--that it just reminds the of soap. I suppose it is clean & relaxing. And the word does come from the latin, lavare, which means 'to wash'...It's one of those herbs like cilantro or tarragon--you either love it or hate it. I happen to love it. My aunt and I dream of visiting lavender fields across the globe!

Here's one in Tasmania (photo from Wikipedia):


and one in Provence (photo from Lizzie Shepherd: Photography):


There is something incredibly decadent about combining these two flavors--the peaceful, calming nature of lavender--with the explosive, luxurious, and deep flavor of chocolate. It's like having a vacation in a bite! Truffles are an easy, but heavenly, treat to make.

When making these heady treats--read my recipe all the way to the end first--I wrote a note on whether to include or eliminate the lavender flowers.

I made a double recipe of these awesome truffles (so I'd have something to give out at the tail end of the Christmas holiday) and tried hard to remember the yield....I think 25-35 for a double recipe. But of course, it also depends on how big you make your truffles....now, I can't wait to try other flavor possibilities--these chocolates are otherwise expensive at the store! Somehow, they tasted expensive at home too.....


DARK CHOCOLATE LAVENDER TRUFFLES
Adapted from www.voilawithemily.com

  • 8 oz. dark chocolate (53% cocoa or above), chopped--the better the quality, the better the truffle
  • 1/2 cup heavy whipping cream
  • 2 tsp. dried lavender buds
  • 1 tsp. pure vanilla extract
  • 1/4 cup unsweetened cocoa powder or 1/4 cup blanched almond crumbs (I needed more like 1/3 cup)


Chop chocolate into small chunks (I actually didn't even bother to chop them!), place in medium size bowl and set aside. Simmer cream in small sauce pan. Once simmering, pour in lavender buds and vanilla, whisk together. 
Now, this is just my suggestion-- let sit a few minutes to let the lavender flavor fully set and then strain the lavender pieces out through a sieve (RESERVING HOT CREAM!) Some people don't like their chocolate to have anything in it--like herb leaves/buds. I prefer my chocolate smooth so I can be undistracted during my afternoon moment of bliss as I tune out the cats that are in heat on my porch, the crashing of some dish off the countertop my toddler has pulled on, or the sound of the garbage truck dragging my recycling across the street. But, that's just me and my untethered moment (bliss).
Add cream/lavender mixture to the chopped chocolate. Let sit for a few minutes before stirring until smooth. (I just stirred immediately until it was all combined.)
After the mixture is smooth, place in fridge for 3 hours or more.
Remove bowl and with a teaspoon or melon baller, roll out balls of the chocolate, placing on a cookie sheet lined with parchment paper. Place the cookie sheets back in the fridge for another 30 minutes. When truffles are firm, roll in your (clean) hands quickly to form small spheres (the temporary heat of your hands helps the cocoa/almonds to adhere to them better). Roll these round spheres in cocoa powder or the chopped almonds, and either serve or return to the fridge for safe keeping. 
Store in refrigerator. They save for at least several weeks!!
Really: BLISS BITES!

Thursday, October 20, 2011

Roasted Red Pepper Hummus


Sorry this is another hummus post--but, I just love hummus. I have expressed it before, but seriously, I REALLY really love hummus. My mom and I made roasted red peppers last time she visited me and we froze them. While going through my freezer, I decided to make a roasted red pepper hummus because those pita chips looked awfully lonely. It turned out excellent.

Moments after this picture was taken, my child tried to inch closer to the hummus and in trying to help her, I pushed the container over the edge and precious dip spilled all over the kitchen floor. My toddler burst into tears. 'What's wrong? Did that scare you?', I asked. 'All my hummus is gone!', she wailed. Well, luckily for her, this made a double batch--I'm freezing some (Yes, the recipe below makes a double batch of any of my other hummus recipes--but you can halve it. We just eat a lot.). 

It's just on the slight side of spicy, but you can use less crushed red pepper.

ROASTED RED PEPPER HUMMUS

Serves a big crowd as an appetizer

  • 1/2 cup roasted red peppers
  • 2 (15 oz.) cans garbanzo beans (chickpeas), drained (reserve 1/2 cup of liquid)
  • 1/2 cup freshly squeezed lemon juice
  • 4 Tbsp. tahini (sesame seed paste)
  • 3 Tbsp. extra virgin olive oil
  • 3 medium garlic cloves
  • 1 tsp. dried parsley
  • 1 1/2 tsp. salt (sea salt preferred)
  • 1 tsp. crushed red pepper flakes
  • 1/4 tsp. smoked paprika
  • 1/4-1/2 tsp. ground cumin

Strain the beans, reserving portion of liquid.

Using a food processor or blender, combine all ingredients and mix until smooth, stirring to ensure even mixing consistency if necessary.

Spoon into covered container and refrigerate overnight before serving, if possible. Store in refrigerator. Hummus will keep for about 2 weeks. 

Hummus can be served alone or with pita chips and/or veggies.

(Having trouble with blogger so if part of my font seems 'off'--sorry! I've been working on it, but can't seem to find a solution yet.)

Wednesday, September 28, 2011

Hazelnut Hummus


I have been remiss in posting. Which is because I haven't spent much time in the kitchen for the last few weeks. We've been BUSY. And gone. A lot. I'm guessing you guys have been busy too! Now that we have officially reached the first couple days of fall, I am craving fall foods. And happy times in the kitchen with the doors wide open (with no fear of flies), the smell of cinnamon, the new Bon Iver album playing, and the sound of little girl chatter in the background...

While going through my fall decorating box in the attic (one of the few that the squirrels living in my attic have not gotten to yet), I found a bag of hazelnuts I used as filler. And it got me thinking....the poor hazelnut is like the stepchild of the peanut or the pecan--but its taste magnificent. Besides coffee creamer, I don't see too many foods including the hazelnut--maybe because the hazelnut is an expensive nut. But it is my favorite nut. I ADORE it. If you like Frangelico, you understand.

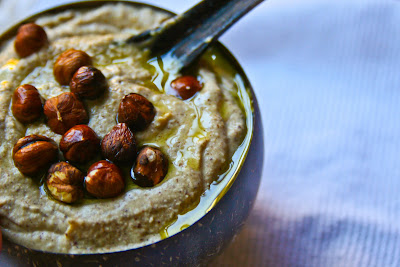
So, when I ran across a picture of hazelnut hummus online here, I decided to try my hand at it with the shelled, roasted hazelnuts waiting in my freezer. I can't believe how good it turned out. It's not like traditional hummus--no garlic. It's a spicy, sweet and salty dip/spread and it is amazing and definitely sings 'Fall is Here!' The only thing that would have put this over the top would be to use hazelnut oil instead of olive oil. Hazelnut oil has amazing flavor and depth. However, it is pricey, needs to be stored in the fridge, and might be harder to find (Whole Foods sells it). If you like a more subtle nut flavor, use olive oil--I loved it!

Serve this hazelnut hummus with pita chips or on crostini with blue cheese alongside crisp apples and pears and spiced cider. I can't wait to make this again--think it would be an amazing appetizer to a girls get-together.


SAVORY-SWEET SPICED HAZELNUT HUMMUS 
 Inspired by www.babble.com

  • 1 (15 oz.) can chickpeas, UN-drained
  • 1 cup shelled and roasted hazelnuts
  • 2 Tbsp. sesame 'tahini' paste
  • 2-3 Tbsp. extra-virgin olive oil, PLUS more for drizzling on top of finished hummus
  • 2 Tbsp. pure maple syrup
  • 2 Tbsp. freshly squeezed orange juice (or freshly squeezed lemon juice--but orange works so well with the nutty and maple flavors)
  • 1 tsp. sea salt
  • 1/4 tsp. cayenne pepper (use less if you don't care for much heat)
  • 1/4 tsp. ground cinnamon
  • 1/4 tsp. ground nutmeg
  • 1/8 tsp. smoked paprika (optional-but good)

Using a heavy duty blender, process all ingredients until smooth (a Vitamix works awesome for this!). Spoon out into a serving dish and drizzle with more olive oil or hazelnut oil. Garnish with hazelnuts, if desired.

Makes enough to serve a small group (4-6 people) as an appetizer.

Saturday, August 6, 2011

The Versatile Roasted Eggplant, Pepper, & Onion Spread

I really like this spread. It is very similar to the one my mother has made my whole life from my Romanian heritage (zacusca)--but truth be told, my mother and aunt's roasted vegetable spread is better by far than anything else I've tried. One day, I will master it and post on it. It's also not as pureed. So, if you want to keep your spread with more texture, dice the vegetables a little smaller--this may also require less cooking time, so keep your eye on the oven--and skip the processing or process just slightly until you get the texture you want. One of these days, I may actually throw in a few mushrooms--can't imagine that would hurt.

I call this roasted vegetable spread 'versatile' because I think it's a good base for other recipes/uses. For instance, it's delicious on crostini with a slice of Manchego cheese on top. You can also use it as a sauce: Just add a little chicken stock, or for a really over the top sauce--mix it with heavy cream (or heavy cream and half and half until you reach the consistency you'd like) and toss with pasta. I like to mix it with whole wheat pasta and place the pasta in a baking dish, sprinkle it with cheese (fresh Mozzarella and/or Parmesan), and bake it until the cheese is all melted and the dish is hot throughout. Or mix some of the roasted vegetable spread with cream cheese for an alternative bagel spread.

But probably my favorite use, is for the creamy dip that is listed below the original recipe below.

ROASTED EGGPLANT SPREAD

Yield: 6-8 Servings

  • 1 medium eggplant
  • 2 red bell peppers, seeded
  • 1 red onion peeled
  • 2 garlic cloves, minced
  • 3 Tbsp. good olive oil
  • 1 1/2 tsp. salt
  • 1/2 tsp. freshly ground black pepper
  • 1 Tbsp. tomato paste (or tomato sauce)
  • 1 small handful of fresh parsley (my addition--so optional!)

Preheat the oven to 400 degrees F.

Cut the eggplant, bell pepper, and onion into 1-inch cubes. Toss them in a large bowl with the garlic, olive oil, salt, and pepper (I do this directly on the baking sheet--one less dish!). Spread them on a baking sheet. Roast for 45 minutes, until the vegetables are lightly browned and soft, tossing once during cooking.

Cool slightly.

Place the vegetables (and parsley) in a food processor fitted with a steel blade, add the tomato paste, and pulse 3 or 4 times to blend. Taste for salt and pepper.


For an alternative creamy dip/spread, try the recipe below (you just use half of the above quantity of spread--I'm not saying make half a recipe, just use half of your total amount). It's so simple and absolutely delicious--I took it to my friends' house when visiting and it was a great appetizer to our farmer's market dinner of green beans, yellow tomatoes, corn, boiled new potatoes, and fresh peasant-style bread (thanks Misha). My friends asked for the recipe, so here it is below.

CREAMY ROASTED EGGPLANT SPREAD

Mix 1/2 of the above roasted vegetable spread with (basically reserve half of your total recipe):

  • 1 (8oz) package reduced-fat cream cheese, softened
  • 1 Tbsp. freshly squeezed lemon juice
  • 2-3 Tbsp. mayonnaise
  • Salt & pepper, to taste
 Mix all ingredients together and serve with pita crisps or crostini.

Serves ~6-8 people

Wednesday, August 3, 2011

Octane Energy Bars

I've been dragging lately...my energy level is down because of this ridiculous heat. So, I blame the heat for my unproductivity--unfortunately, it's one of the busiest times of the year for me. I could either do this:


Or...try something healthier. After having my mother in law visit recently to help us out (my husband had his 4th weekend home since 2011 started this weekend), I was inspired by her energy and pulled out an energy bar recipe I've been meaning to try since college (yes, since COLLEGE). It was featured in the local paper outside of Chattanooga, TN. I didn't name them 'Octane Energy Bars'--so I realize the term 'octane' doesn't scientifically apply. It's been a while since chemistry has been on my radar, but according to Wikipedia (no, it's not my only source!), 'By the mid-nineties, the phrase [octane] was commonly being used as an intensifier and has apparently found a place in modern English vernacular.'  Now, let's hope these bars act like rocket fuel. I've adapted the recipe to suit my needs and make it somewhat easier to follow directions after some trial and error.


Am I ever glad that I made these!!! These energy bars are absolutely phenomenal. WAY better than your grocery store granola bars. Decently healthy recipe, in fact. The only other time I used brown rice syrup was for the crunchy brown rice crispy espresso nut bars from Heidi Swanson (she calls them 'Big Sur' power bars). I really like cooking with it now! It's not cheap though...you can find it Whole Foods or online--Heidi Swanson says that it doesn't give you that jolt of sweetness that other sweeteners do and has a more rounded flavor. The bars are chewy, sweet, nutty, and sort of creamy.

Reasons to make these:
  1. Your kids will love them.
  2. They taste like a treat. You're forced to eat healthier.
  3. It's a great snack when in a hurry.
  4. They have a ton of fiber. At least the fat is a 'good fat.'
 Cons: You have to go to the health food store to buy the ingredients. If you saw how annoying it was to shop at my small Whole Foods,  you'd understand. But, it was worth it. Enjoy!


OCTANE ENERGY BARS


 Makes ~18-24 bars
  • 1 cup rolled oats
  • 1 cup crunchy grain cereal (I used crispy brown rice cereal, but you can use 'Rice Krispies'--just not 'puffed' rice cereal)
  • 1/4 cup sesame seeds
  • 1 1/2 cups dried apricots, chopped (I used 1 cup dried apricots + 1/2 cup dried cherries)
  • 1 cup raisins
  • 1/2 cup wheat germ
  • 1/2 cup protein powder (I used vanilla-flavored soy protein powder)
  • 1 tsp. butter or olive oil (I used Smart Balance spread)
  • 3/4 cup brown rice syrup
  • 1/2 cup natural peanut butter
  • 1 tsp. cinnamon

 TIP: Get all your ingredients together and read through the entire directions because you need to move sort of quickly--it really helps.

Preheat oven to 350 degrees. Grease a 9X13 inch pan and set aside.
Toast the first 3 ingredients (oats, cereal, sesame seeds) for about 10 minutes (I used a shallow edge-rimmed cookie sheet), stirring once, about halfway. Do NOT let the mixture brown. (You can turn your oven off at this point as you will no longer need it.)

Meanwhile, in a separate smaller bowl, mix the wheat germ with the protein powder and set aside.

In a large mixing bowl, spoon in the toasted oat-cereal-sesame seed mixture. Mix in the dried fruits, trying to separate the pieces. Then, add the wheat germ-protein powder mixture to this and stir until incorporated as best you can.

In a saucepan over medium heat, melt butter or heat oil, and add rice syrup until bubbly. Mix in the peanut butter and cinnamon (I just put all of these in a pan and heated them until they were incorporated, melted, and more liquid like).

Pour the liquid mixture over the dry ingredients and QUICKLY mix together and transfer to the 9X13 inch pan (Come clean moment: I had to use my hands to fully incorporate everything and it was much easier because it's not like mixing sticky rice crispy treats). Pat mixture with your hands to spread it out evenly.

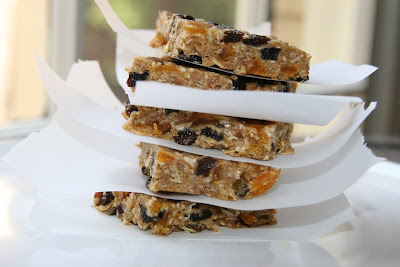
Refrigerate the bars for at least 4 hours. Cut into about 24 bars and wrap each bar in wax paper.


Store in refrigerator.

Friday, July 8, 2011

Snappy Red Sauce


I have a dirty little secret. I know we all have those--whether we want to admit it or not. I'm almost too ashamed to admit it. Pause. But, here goes. I watch a bad show. It helps me realize I'm really not crazy. That there are other people out there who absolutely define crazy. People out there who put their lives front and center so that we, as viewers, can watch with shame and horror and then feel downright normal. Who are these people? They are The Real Housewives of New Jersey.


I know some of you may be take a higher road and don't watch reality tv. Or own a tv. Well, more power to you. Can someone come and take mine away? Because this really is like watching a train wreck. Do I recommend this show? No. Do I have a problem because I continue to watch it? Most likely. I always feel like I need an emotional shower and the need to pray after this show. Yet, I continue to watch it and then say to myself....'See, you're fine!' It's totally ok that you apologize before any new thing you serve to friends and family before they taste it. It's totally ok to have to physically force and rip open your tupperware drawer because everything in there is jammed in unorganized. It's totally ok to refuse to wear hosiery from February to November. It's totally ok to think the Mr. Clean magic eraser is really magical. And it's ok to be Dharma to your Greg.

Anyway, I digress. My point is that on this crazy show, the mother of all that is crazy is a character named Teresa. Who has an obnoxious life. And an obnoxious house. And an obnoxious husband. And seeminly obnoxious children. But, my goodness! It looks like her cooking is to die for! She has written two cookbooks so far (watch out Giada!). The first was 'Skinny Italian' and the second is 'Fabulicious' (because everything in her life is 'fabulous'--and you know, I think her attitude is awesome! I think we should all go around saying our lives are fabulous--whether we wear animal print and have a gold bathroom or not). Anyway, after an internet search of some of her recipes, I'm convinced that she may know what she's talking about. Her recipes make one salivate in anticipation. And they don't look that complicated! So, as a warning, I will be trying a few here and there.

Below is Teresa's 'snappy red sauce'. A basic (slightly spicy) red sauce that is a staple in her Italian family's home and the basis of many of her recipes. I tried it and really like it. And what's strange is that 2 year old ate it up by spoonfuls. It really is a fast and basic red sauce that is delicious on pasta. I'm considering using it on pizza dough. The recipe is a great jumping-off point for other additions. But it's very balanced and uses ingredients you would not have a hard time finding in your home or grocery store.


SNAPPY RED SAUCE*
Adapted from Fabulicious by Teresa Giudice

  • 1 Tbsp. extra-virgin olive oil
  • 1 small onion, chopped
  • 1/4 tsp. salt
  • 2 garlic cloves, minced
  • 1/2 tsp. red pepper flakes
  • 1 28-oz. can crushed tomatoes in thick puree
  • 3 Tbsp. chopped fresh Italian parsley

Heat oil in a large saucepan over medium heat. Add onion and salt. (Teresa says that a little salt brings out the onion flavor.) Cook, stirring occasionally, until onion is translucent, about 5 minutes.
Add garlic and red pepper flakes and stir until garlic is fragrant, about 1 minute. Stir in tomatoes with their puree and parsley and bring to a boil.

Reduce heat to medium-low. Cook at a brisk simmer, stirring occasionally, until slightly reduced, about 5 minutes. Serve hot as a pasta sauce.

Makes 3 1/2 cups (enough for 1 pound of pasta)

*For my tastes, I prefer to add a little more salt and stir in about a teaspoon of olive oil at the end. Also, if I'm not serving it with a dish already using these same herbs, I would add some basil or oregano in with the parsley.

Tuesday, June 14, 2011

Product Review: Collopsable Colanders. Where have you been all my life?


I LOVE this collapsable colander by OXO Good Grips! I've had two of these types of colanders for a couple years. They were purchased for myself. By myself. For Christmas. Worth every bit of that $15 I paid ON CLEARANCE! I thought they were SO expensive at the time! But now, I haven't been able to find one under $19.99. They sell for $29.99 on Amazon. I loved it so much that I bought my mom one too. Keep in mind that you can always use your Bed, Bath, and Beyond 20% coupons that come in the mail for such purchases.
There are a few different brands of collapsable colanders, but I picked OXO because they were a little slimmer shape. The products that I have that are OXO brand are good design and very helpful. I also like this smaller sized colander.

Recently, I saw a 2-pack of colapsable colanders at Costco for $19.99 and thought they were a real steal (they were green and white). I'm all for items that take less storage space. Let me show you what I mean...below on the upper right are 'regular' colanders. Below on bottom left, is collapsable one. My smaller one is not pictured, but it fits right next to it. Makes a big difference. They are dishwasher safe or hand wash. These OXO colanders are heat resistant/safe, have great handles, wipe clean easily and stand up well in the sink. Also, food doesn't get stuck in the holes (hate that). Fantastic product.

So if you're short on space and make pasta, wash produce, rinse beans, often, consider some collapsable colanders.