Showing posts with label mexican. Show all posts

Sunday, June 12, 2011

Summer Staple: Black Bean & Corn Salad (or Salsa)


One of my greatest buddies, Lila, posted this recipe on FB recently. She's an amazing cook. She was my college suite-mate and we used to have 'fancy dinner nights'. I miss her cooking. She recommended it from http://www.allrecipes.com/ and here is the original recipe. But, in the interest of time and availability, I had to make do today and the result was still very delicious. Thank you Lila for the recipe and I will make the original sometime soon with peppers and avocado (but with a little less oil). Below is my abbreviated, in-a-bind, version. We couldn't stop eating it--hope you all make Lila's version first!

This is the PERFECT picnic food. Also, a salad you can make a day or so ahead of time before serving. When my friend Kelly and I used to travel for business outside of Charleston (Mount Pleasant, SC), we would always have lunch at this cute place called Square Onion at I'On--a lovely little casual lunch bistro in an idealistic community where you could eat on the sidewalk and see how the other side lived. In our case, the 'other side' were the posh stay at home moms that seemed to have nannies, perfect hair in sweltering 95 degrees, and shopped as a sport. Kelly and I would arrive, hurried, sweaty in our business attire, carrying some file folder that we'd try to sort out over caprese sandwiches and this delightful black bean and corn side salad and figure out who would get the coordinator to write up the adverse events and who would bribe the medical records lady with food for extra files that we realized we needed. Makes me miss you Kelly! Can't eat this salad without thinking of those times....

Hope you all will enjoy this summer staple--salty, tart, spicy, and full of flavor. A great side to sandwiches or quiche or a delicious dip with crispy tortilla chips.


BLACK BEAN AND CORN SALAD

Serves 4

  • 1 can black beans, rinsed and drained
  • 1 can corn, drained
  • 2 Roma tomatoes, diced
  • 2-3 green onions, chopped (use both white and green parts)
  • 1 handful of fresh cilantro, chopped (I used a cilantro 'cube' from Trader Joe's)
  • 1 clove garlic, minced
  • 1 lime, juiced
  • 1 Tbsp. olive oil
  • 1/2 tsp. ground cumin
  • 1/8 tsp. chili powder
  • 1/8 tsp. cayenne pepper
  • Salt & pepper, to taste
Toss all ingredients together and serve as a side dish or with chips as a salsa. Taste for seasonings. You can serve the salad either cold or at room temperature.

Store leftovers, covered, in the refrigerator.

Sunday, June 5, 2011

Easy Breakfast or Dinner: Quesdillas Huevos Rancheros


I cut this quick little recipe out of a magazine almost 7 years ago and it has become one of our favorite breakfasts. And if you're rolling your eyes at another Mexican breakfast, you are once again going to miss out on a good meal. We are obsessed with Mexican=type things in this house... Bookmark this recipe to use next year when you are left scratching your head and wondering what to do with leftover hard boiled eggs after Easter has passed.

This dish makes me think of what healthier fast food could be (well, if you omit the pimento cheese especially)....but still cheesy, quick, easy (well not as easy as going through the drive through....but easy when you consider how few ingredients it has and simple preparation), and amenable to all ages. A fun meal for a real family. 

If you have hard boiled eggs already waiting in your fridge, you can make this lightening fast. I would even serve these quesadillas huevos rancheros for dinner with a Mexican salad of lettuce, corn, beans, tomatoes, olives, cilantro, avocado and jicama (optional). Vegetarians, rejoice!

QUESADILLAS HUEVOS RANCHEROS

Adapted from Real Simple magazine

Serves 4
  • 4 (6-inch) corn tortillas (we've done it with flour tortillas too)
  • 1/2 cup grated Monterey Jack cheese (or a Mexican cheese blend) + a couple Tbsp. pimento cheese (truly optional, but oh so good!)
  • 3 hard-boiled eggs
  • 1/4-1/3 cup salsa
  • Guacamole OR diced avocados & light sour cream (optional)
Make the hard-boiled eggs.

Lay the com tortillas on a cookie sheet. Place in a 325ยบ F oven for 10 minutes.

Remove from oven and top 2 of the tortillas with the Monterey Jack cheese and the sliced hard-cooked eggs. This is what they will look like:


Top with the other tortillas.

Bake until the cheese melts, about 5 minutes. Cut into wedges and decorate with spoonfuls of salsa.

Serve with hashed browns and fruit salad for a more complete meal :)

Monday, May 9, 2011

Eggs on Spring Break: PW's Migas


Hey all! I was hoping to post this on Cinco de Mayo (5th of May), but I ran out of time since we've been out of town yet again. Anyway, my friend, Holly, inspired me to make this when she posted a picture on Facebook. Holly, I'm hooked! I love big breakfasts on the weekend--especially holiday weekends. These migas remind me of the chilaquiles my husband and I love to eat on our Mexican vacations.

Pioneer Woman's blog has a MUCH better post on this. She's absolutely amazing and her blog is phenomenal. I used to wonder how she was able to do so much and later found out she has a lot of hired help--good for her!!! I aplaud women who are honest about their lives because they help dismantle this notion that perfection is attainable. I love Ms. Drummond's approach to life and her recipes. I think she may just be the younger generation's Martha Stewart....but, now I'm wondering which generation I'd be categorized into....hmmm....either way, both inspiring women! Wish I could spend time with each of them.

This is a wonderful recipe and I urge you to try it--I found it to be incredibly flexible--add more spices, use less peppers, replace eggs with some egg whites....either way, it will be good! I made 1/3 of the recipe and it still turned out great.

PIONEER WOMAN (REE DRUMMOND)'s MIGAS (aka EGGS ON SPRING BREAK)

Yield: 6 servings (I say more like 8)
  • 4 whole corn tortillas
  • 1 whole jalapeno, seeds and membranes removed, finely diced
  • 4 whole plum tomatoes, roughly chopped
  • 1 whole green pepper, roughly chopped
  • 1 whole red bell pepper, roughly chopped
  • 1 whole medium onion, chopped
  • 12 whole large eggs (I used 1/3 egg whites and the rest whole eggs)
  • ¼ liters Cotija cheese, grated--may use Cheddar, Monterey Jack, etc. (liters?! ridiculous. I translated this to a heaping cup of cheese)
  • ⅓ cups cilantro, chopped
  • 1 Tbsp. butter
  • 1 Tbsp. olive oil
  • ¼ cups half-and-half (I used fat-free half & half--but would have easily used milk)
  • *1 cup black beans (my addition-totally optional-read the last sentence of instructions)
  • OPTIONAL: for serving--diced avocados, salsa, sour cream

In a bowl, whisk together eggs and half & half (or milk)--I added half the cilantro at this point (not sure why). Salt and pepper eggs, then set aside.

In a small skillet over medium heat, heat oil and fry each corn tortilla just until crisp. Remove to a paper towel-lined plate to drain. Chop tortillas and set aside.


In a large skillet over medium-high heat, melt the olive oil with the butter (you can use a little less if you can get away with it). Add onions and bell peppers and cook until starting to turn brown/black, about 3 to 4 minutes. Add in diced jalapenos (and beans, if using) and stir to combine.


Add tomatoes to the skillet and stir around, then add tortilla pieces, stirring gently to combine. Reduce heat to low. When the heat has decreased, pour egg mixture into skillet. Stir gently to cook with the peppers, folding mixture very gently as it cooks.


Add in grated cheese and chopped cilantro, and stir to combine.


*PW's note: Serve with black beans and iced coffee. But since I didn't feel like making the beans separately, I just added a cup of drained, rinsed black beans in with the onions and peppers. Totally optional, of course. I like the migas with some fresh cut oranges, toast (this is beyond optional), and hot coffee. SUCH a good breakfast!!!!


And since we're talking about Spring Break, here's a couple pictures from our Mexican vacation last month...I can't wait to go back! Enjoy your breakfast!


Tuesday, April 26, 2011

Potato & Veggie Sausage or Chorizo Crispy Dinner Tacos


Despite my picture....Yum, yum, yum, yum, yum, yum, yum. (Please understand that we don't get to eat dinner until 8 most nights, so the lighting is AWFUL and my pictures are thus awful!). They say necessity is the mother of invention. They are right. This has been dinner for a couple nights and it's a keeper. I like the variety from beans now and then...We even used a pre-made guacamole from Costco--it's not the greatest, but it's wonderful when mixed with a couple teaspoons of light sour cream, juice of one lime, some extra salt & pepper, and chopped cilantro. Then it's like a guacamole topping.

If I were making these for breakfast, I'd stir in a couple of whipped eggs in the last few minutes of the potato/onion mixture. Otherwise, these would make a delicious lunch or dinner. 


POTATO AND VEGGIE SAUSAGE OR CHORIZO CRISPY DINNER TACOS

Makes ~8 servings 

  • 1 large potato, peeled and diced small (or two smaller potatoes)
  • 1 large onion, diced and divided
  • ~1 cup water (read directions first)
  • salt and pepper to taste
  • 1/4 tsp. ground cumin
  • 1/2 tsp. chili powder
  • 3 cloves garlic, minced 
  • 4 Morningstar Farms brand sausage patties, crumbled (or 1 link of incased large soy chorizo--peel off the plastic wrap--try a Yves or a Trader Joe brand)
  • handful of cilantro, chopped
  • Crispy corn tortillas--the shaped stand-up ones (Trader Joe's makes great ones in a pack of 12)--you will probably use about 10 or so...depending on how much you fill them

 For taco toppings--use all or any you prefer:
  • salsa
  • sour cream
  • guacamole or chopped avocado
  • extra cilantro
  • shredded lettuce
  • diced tomato
  • olives
  • shredded cheese

In a large saucepan over medium heat, heat about a tablespoon of olive oil. Add potatoes and the diced onion and cook until lightly browned. Season with salt and pepper, spices, and minced garlic cloves. If needed, add water in 1/8-1/4 ounce increments so that it prevents the potatoes from sticking to the pan and also so that less fat is used. Cover with a lid--it will ensure quicker cooking. Cook for several minutes until the potatoes are fork tender.
Add the crumbled sausage patties OR soy chorizo to the pan and saute for a few minutes until the ingredients are hot and browned all over. Mix in the cilantro.

NOTES: vegetarian meat is pre-cooked and not raw like meat--so it's ok to add them in later (If you have never worked with soy chorizo before, you will need to cut off one end of the plastic casing and squeeze the "meat" out of it into your pan. It resembles ground taco meat and is orange/red in color.). If using real sausage, add it in much earlier so to ensure even and thorough cooking.

When everything is heated through, remove the mixture from heat. Spoon the potato/sausage or chorizo mixture onto warmed corn tortillas and top with salsa, guacamole, lettuce and extra cilantro, etc.

Serve warm. You will be very happy :)

Friday, March 4, 2011

Crispy Black Bean Tacos with Feta & Cabbage Slaw


A wonderful thing happened to me. Because of Facebook, I got reacquainted with an old classmate--former pastry chef & friend extraordinaire, Julie. I have never forgotten my sweet friend and now we talk about motherhood and recipes instead of boys and Banana Republic. Anyway, long story short--she sent me this amazing recipe that she makes for her family--this should go in your 'what are we having for dinner?' file ASAP (Julie, please send me more-this recipe was UNBELIEVABLY GOOD!).

These black bean tacos with cabbage slaw & feta are relatively fast, cheap, and healthy. Plus, you won't miss the meat. Serve with Spanish rice if you want. Easily double or quadrulple the recipe for more people. Really, this is one of my most favorite meals--love, love, love it!
(By the way, I tried them with regular queso/Mexican cheese and feta and the feta won out in the taste department--it may sound strange, but it works beautifully!)


CRISPY BLACK BEAN TACOS WITH FETA & CABBAGE SLAW
Adapted from Smitten Kitchen & Une-Deux Senses

Yields: 6 tacos, 2 servings

For the black beans:
  • 1 (15 oz.) can black beans, drained
  • 1/2 a small onion, thinly sliced
  • 2 garlic cloves, thinly sliced (or chopped however)
  • 1/2 tsp. ground cumin
  • salt and freshly ground black pepper, to taste
 For the cabbage slaw:
  • 2 tsp. olive oil (I skipped this & didn't miss it)
  • 1 Tbsp. freshly squeezed lime juice
  • *2 cups coleslaw mix
  • 2 green onions, chopped
  • 1/3 cup cilantro, chopped
  • 1 Tbsp. mayonnaise or sour cream (optional)
  • salt and freshly ground black pepper, to taste (try a smoked salt for a real punch of flavor!)
 For the tacos:
  • 2 Tbsp. olive oil
  • 6 corn OR flour tortillas
  • ~1/3-1/2 cup crumbled feta cheese (reduced fat is fine!)
  • Hot sauce, for serving (optional)
 To make the bean mixture: In a medium pan, heat the oil over medium-high heat. Once hot, add the onion and garlic and saute until translucent, about 3 minutes. Add the black beans, cumin, and salt and pepper to taste. Use a fork to slightly mash the beans and cook until heated through, about 3 minutes.

To make the cabbage slaw: Mix 2 tsp. of olive oil and lime juice in a medium bowl. Add the coleslaw, green onions, cilantro and toss to coat. If desired, you can also add the sour cream/mayonnaise for a creamier slaw. Season with salt and pepper, to taste.

For tortillas: Heat 1 tsp. of olive oil in a large nonstick skillet over medium heat (I used cooking spray--but keep your vent on). Add three tortillas in a single layer. Once golden brown, flip, then spoon 1/4 of the bean mixture onto each tortilla and cook for 1 minute or until golden brown. Repeat with the remaining tsp. of oil (or cooking spray) and tortillas.

To serve: Fill the tacos with feta and slaw. Serve with hot sauce, lime wedges and sour cream.


*To make your own cabbage slaw mix: combine equal parts of shredded green & purple cabbage--(adding shredded carrots or radishes is totally optional).

Wednesday, March 2, 2011

Roast Tomatillo Salsa

 Be brave. Be very brave. Try green salsa. It's really good!


WOWSA! I cannot believe that this week was the FIRST TIME I've ever bought a tomatillo. On our wild drive across the state this week (due to thunderstorms & tornadoes), we stopped to eat at Moe's. If any of you have ever gone to Moe's or a restaurant like it, you know that it's a good time. Well, I tried their delicious mild tomatillo salsa again and thought, 'I should try this at home'--even though I find uncommon ingredients such as tomatillos 'intimidating'. We are afraid of what we don't know--from the future, to tomatillos :)

Moe's tomatillo salsa was probably made with fresh tomatillos, but after reading about tomatillo salsa, I decided to roast mine. Inspired by a recipe from Gourmet magazine (November 1999), my first adventure was successful. This salsa is very different than your average salsa--sweeter, more tart. But perfect with really salty tortilla chips. I think next time, I might use this salsa to top enchiladas or to make chicken chili.
Here is the original recipe--mine below is changed significantly and I'm sticking with it.

By the way, tomatillos are NOT green tomatoes! They belong to the same family--the 'nightshade' family--which also includes the potato and eggplant. Tomatillos are a staple of the Hispanic diet and used in many sauces. Oh, and if you wonder where to get them outside of your regular grocery store, try a Hispanic market/grocery store--they should be plentiful there.

ROAST TOMATILLO SALSA

Makes about 3.5 cups.
  • 2 lbs. fresh tomatillos
  • *2-3 fresh jalapeno peppers (seeded or unseeded--your call--keeping in mind that's where most of the heat resides)
  • 3 garlic cloves, peeled
  • 1 large onion, coarsely chopped (I used half a red onion and half a white onion)
  • 2 tsp. coarse salt
  • 3/4 cup fresh cilantro
Preheat broiler. Set cilantro aside.

Remove tomatillo husks and rinse under warm water to remove stickiness. Cut them in quarters or halves. Place the peppers, garlic, and fresh tomatillos on rack of a broiler pan 1 to 2 inches from heat, turning ingredients once, until tomatillos are softened and slightly charred, about 7-10 minutes.

Pulse all ingredients (including the cilantro) in a food processor (you can do it in the blender, but I prefer to use the processor so as to retain some texture and not end up with a puree).

*You can always use serrano chili peppers as the original recipe calls for but I can only handle one new ingredient a week so I went with jalepenos. Plus, I think they may be less spicy...someone correct me if I'm wrong.

With limeade (or margaritas), it will make an amazing pre-dinner snack. We sat out on our porch enjoying this salsa and even the 22 month old liked it:

Sunday, February 6, 2011

Fiesta Chowder


I know, it's the day of the superbowl and everyone is eating dips and chips or ordering pizza or having barbeque sandwiches. Well, I figured I'd share a delicious Fiesta Chowder recipe, courtesy of Southern Living, that would bode well for a super bowl party. We had company over the weekend and everyone really liked it. It's one of my favorite soups and definately a good one to keep warm in the crock pot while people are over.

The original recipe called for cooked, chopped chicken, but I boiled and shredded mine this time--I wanted to see if it would work and it did. But I like either method just fine and included both methods.  I've even made this soup with Fri-Chik (vegetarian chicken). If you can't find a can of corn with red and green peppers, just use regular corn. I'll often use Rotel tomatoes and chilies and regular corn instead of the Mexican stewed tomatoes and chilies. It's really a fail-proof recipe! And a hit with all ages and sexes.

We served this soup with my hot corn dip (see recipe here), cheddar-chili bread (previous post), a wonderful strawberry orange almond salad (that my friend, Lindsay, brought over), and warm apple crisp with vanilla bean ice cream (courtesy of my friend Chelsea). I'll see if I can procure those recipes for you all sometime. Dip, soup, bread, salad, comfort dessert, beer for the guys? Who's not going to be happy, right?
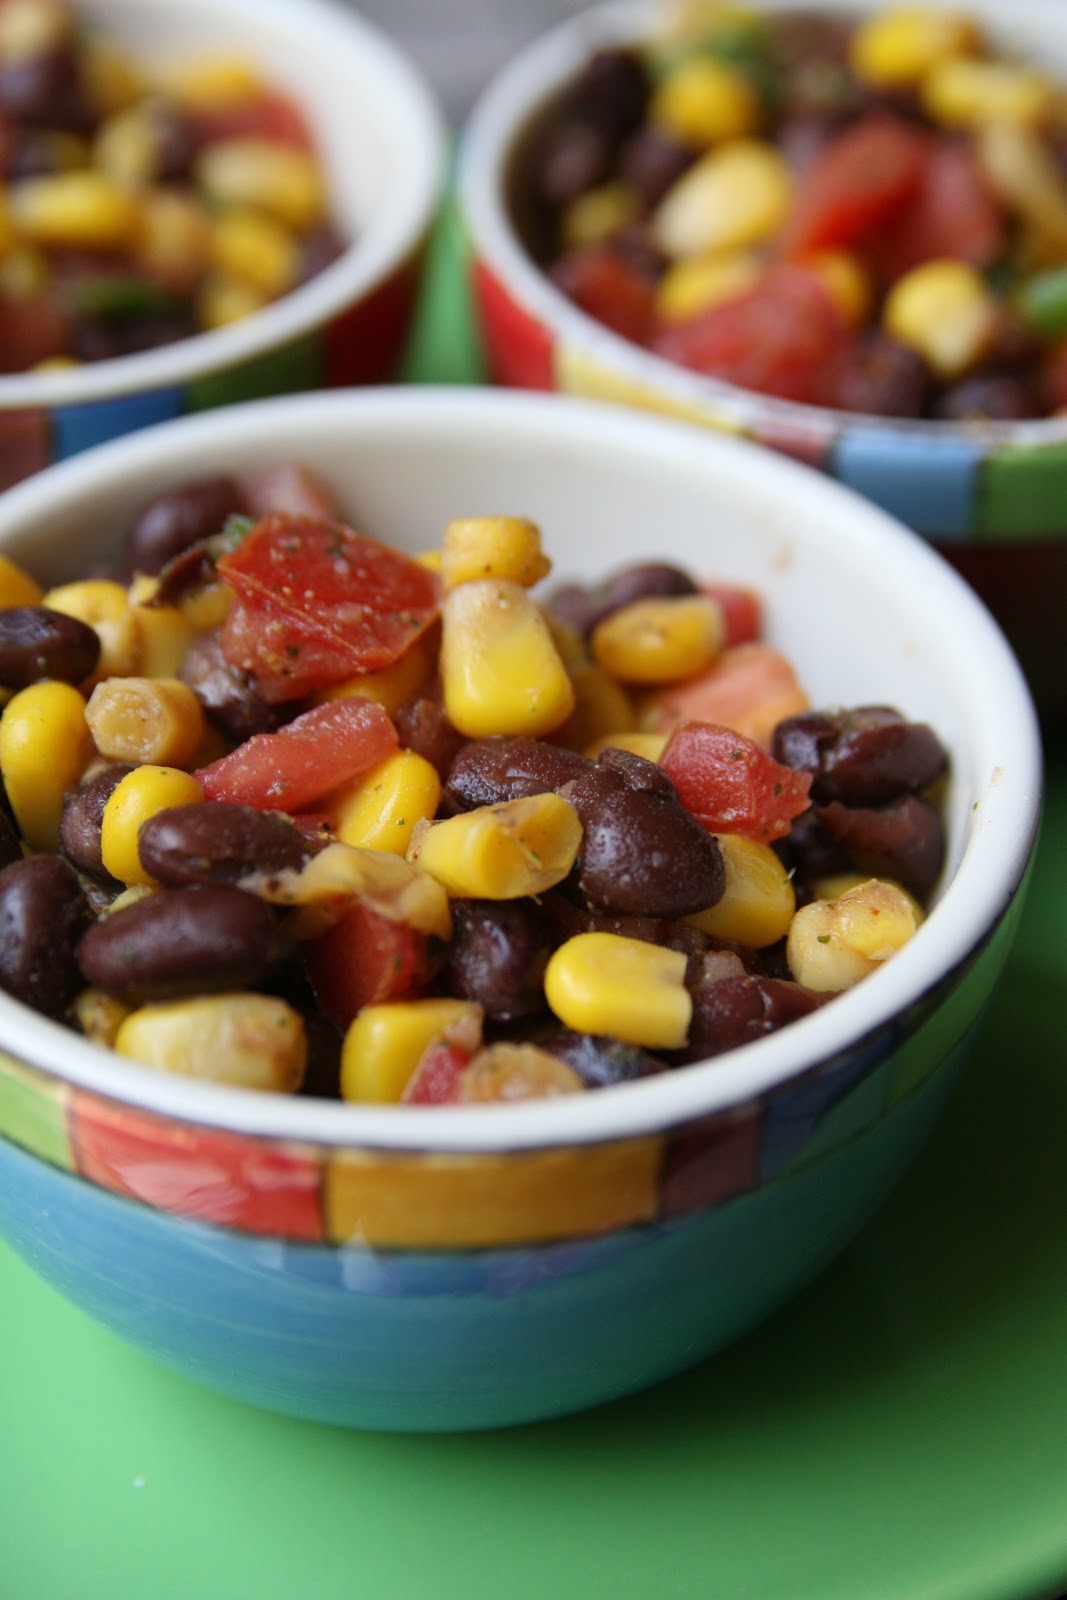
FIESTA CHOWDER
Adapted from Southern Living
The ingredient list may be long, but the results are fast and delicious.


Yield: Makes 8 to 10 servings

3 tablespoons all-purpose flour
1 (1.4-ounce) package fajita seasoning, divided
4 skinned and boned chicken breast halves, cubed
3 tablespoons vegetable oil (I use olive oil when I do fry the chicken)
1 medium onion, chopped
1 teaspoon minced garlic
1 (15 1/4-ounce) can whole kernel corn with red and green peppers, drained
1 (15-ounce) can black beans, rinsed and drained
1 (14 1/2-ounce) can Mexican-style stewed tomatoes
1 (4.5-ounce) can chopped green chiles
3 cups water
1 cup uncooked instant brown rice
1 (2 1/4-ounce) can sliced ripe olives (optional-but good!)
1 (10 3/4-ounce) can condensed nacho cheese soup (I used cheddar cheese soup)
3 tablespoons chopped fresh cilantro
1 tablespoon lime juice (I squeezed half a lime)

Garnish: chopped fresh cilantro, chopped green onions (my favorite), breadsticks (optional)
*Combine flour and 2 tablespoons fajita seasoning in a heavy-duty zip-top plastic bag; add chicken. Seal and shake to coat. Cook chicken in hot oil in a large Dutch oven over high heat, stirring often, 4 minutes or until browned.

Reduce heat to medium-high; add onion and garlic; sautรฉ 5 minutes. Stir in remaining fajita seasoning, corn, next 5 ingredients, and, if desired, olives.

Bring mixture to a boil; reduce heat to medium-low, cover and simmer 5 minutes.

Remove lid, and stir in nacho (or Cheddar) cheese soup, chopped cilantro, and lime juice.

Garnish and serve with breadsticks, if desired (they recommend breadsticks, I recommend cheddar-chile bread--recipe to follow).

*Or use shredded boiled or roasted chicken and follow the recipe as follows (skipping the flour coating and frying, but adding all the fajita seasoning in with the soup).


NOTE: I threw everything except the condensed cheese soup in the crock pot (chicken was cooked this time) and left it on the lower setting for about 6-7 hours. An hour before serving, I added the nacho/Cheddar cheese soup and mixed it all in. It was a real winner in my book. So, you can try it that way too. Email me if you have any questions.

Cheddar and Chilies Bread--NO Knead Again


Yet again, Nancy Baggett has given me confidence. This may be the seventh loaf I have made out of her cookbook. Simply Amazing is what she should have called her bread. This bread tastes very, very good. It's so pretty when you slice it...you can see green and yellow bits. And it goes very well with a chili or Mexican soup. I hope you will love it as much as we did.

One thing to note, of all the breads I've tried, this one was a bit harder since I actually ended up using my hands (HA!) to incorporate the cheese and chilies in the dough...but, it was only minimal effort. You guys should try this bread--making bread is easy once you read through the recipes and see how little is actually required of you. The biggest work is waiting and planning ahead. But, it's so worth it! I can't believe how easy this is!!!!

CHEDDAR & CHILIES BREAD

Adapted from Kneadlessly Simple by Nancy Baggett

From the forward: The Hispanic influence on American culture over the past decades has been pervasive and shows up not only in the popularity of Mexican and Tex-Mex fare, but also in the widespread availability of ingredients like assorted chiles. Once found only in ethnic communities and markets, green chiles turn up in everything from soups and quiches to corn casseroles and both quick and yeast breads. (If you aren’t familiar with green chiles, note that they are just slightly piquant; they are not the same as jalapeรฑos.) This is a delightfuly savory bread, particularly if a top-quality white cheddar is used. The loaf is shot through with cheese and bits of green chiles, and the crust is golden brown. It is great with chili, hearty, full-bodied soups, and bean dishes; it also makes an unusual but very appealing sandwich bread.

For a different look and milder taste, prepare the equally easy cheddar and pimiento variation provided at the end of the recipe.

Super-Easy: A minimum of fuss-free, easily mixed ingredients. No hand-shaping.

Yield: 1 large loaf, 12 to 14 slices each

3 1/2 cups (17.5 ounces) unbleached white bread flour, plus more as needed
1 Tbsp. granulated sugar
1 1/2 tsp. table salt
1 tsp. instant, fast-rising, or bread machine yeast
2 Tbsp. corn oil, canola oil, or other flavorless vegetable oil, plus extra for coating dough top and baking pan
1 2/3 cups ice water, plus more if needed
8 ounces (3 lightly packed cups) coarsely grated very sharp cheddar cheese, preferably white cheddar (I used regular orange cheddar)
1/2 cup very well-drained and patted dry chopped canned green chiles


FIRST RISE: In a large bowl, thoroughly stir together the flour, sugar, salt, and yeast. In another bowl or measuring cup, whisk the oil into the water. Thoroughly stir the mixture into the bowl with the flour, scraping down the sides until the ingredients are thoroughly blended. If the mixture is too dry to incorporate all the flour, a bit at a time, stir in just enough more ice water to blend the ingredients; don’t over-moisten, as the dough should be stiff. If necessary, stir in enough more flour to stiffen it. Brush or spray the top with oil. Cover the bowl with plastic wrap. If desired, for best flavor or for convenience, you can refrigerate the dough for 3 to 10 hours. Then let rise at cool room temperature for 15 to 20 hours. If convenient, stir the dough once partway through the rise.

SECOND RISE: Vigorously stir the dough, gradually sprinkling over and incorporating the cheese and chiles. Fold them in very thoroughly to ensure they are evenly distributed . If necessary, thoroughly stir in enough more flour to yield a very stiff dough. Using a well-oiled rubber spatula, fold the dough in towards the center, working all the way around the bowl. Invert the dough into a well-greased 9 × 5-inch loaf pan. Evenly brush or spray the dough top with oil. Using well-oiled kitchen shears or a serrated knife, make a G-inch-deep slash lengthwise down the center of the loaf. Cover the pan with nonstick spray–coated plastic wrap.

LET RISE USING ANY OF THESE METHODS: For a 1 1/2- to 2 1/2-hour regular rise, let stand at warm room temperature; for a 1- to 2-hour accelerated rise, let stand in a turned-off microwave along with 1 cup of boiling-hot water; or for an extended rise, refrigerate for 4 to 24 hours, then set out at room temperature. Continue the rise until the dough nears the plastic. Remove it and continue until the dough reaches 1/2 inch above the pan rim.

BAKING PRELIMINARIES: 15 minutes before baking time, place a rack in the lower third of the oven; preheat to 425ยบF.

BAKING: Reduce the heat to 400ยบF. Bake for 30 to 40 minutes, until the top is nicely browned; cover the top with foil as needed. Continue baking for 20 to 30 minutes longer, or until a skewer inserted in the thickest part comes out with just a few particles clinging to the bottom (or until the center registers 204ยบ to 206ยบF on an instant-read thermometer). Then bake for 5 minutes more to be sure the center is done. Cool in the pan on a wire rack for 10 minutes. Turn out the loaf onto the rack; cool thoroughly.

SERVING AND STORING: Cool thoroughly before slicing or storing. Store airtight in plastic or aluminum foil. The bread will keep at room temperature for 2 to 3 days, and may be frozen, airtight, for up to 2 months.

CHEDDAR AND PIMIENTO BREAD—Omit the green chiles and substitute an equal amount of well-drained and patted dry chopped jarred pimientos. Otherwise proceed exactly as directed.

Check out this gorgeous cheese and chili flecked bread that came out of my oven! YUM! If it comes out seeming like the crust is a rock and you're nervous, just wrap it in a kitchen towel and let it cool. I promise the crust will soften. This may be one of our favoite breads--the flavor is amazing!

Tuesday, February 1, 2011

On Nights We're Paupers....Spanish Rice & Black Beans


This meal holds sentimental value to me.  My mother in law made this meal the first weekend my husband took me home to meet his family. That was 11 years ago and we still love it! One weekend in college, my husband tried to make it with his roommates and missed a step. The beans ended up being disastrous on our GI system--and a small crowd of 6-8 of us all suffered. I've never forgotten that weekend. And now I'm really careful when cooking beans (ha!).

If you want to go the long route in cooking beans from scratch, here's a great article on the myths of soaking and salting beans and also how to properly cook them. This meal is healthy, affordable, and it's a surprising crowd pleaser. My mother in law makes the beans in a crock pot, but I've adapted the recipe to make it faster to prepare on an everyday evening. So I'm sharing this recipe in case you are like myself and most moms trying to find a meal for your family that is both fast to prepare and healthy. If you want a from-scratch recipe for yellow rice (and want to avoid MSG), see Emeril's recipe here. But below is the cheater's version :)

You will be surprised at how something so simple can be so good!

SPANISH RICE AND BLACK BEANS
Serves 4

For beans:
2 cans black beans, undrained
2 garlic cloves
1-2 tsp. olive oil (or chili-flavored olive oil)
1-2 tsp. Worcestershire sauce
OPTIONAL spices--a couple dashes of any or all of these: cumin, marjoram, cayenne pepper, oregano, chili powder

10 oz (you can buy 2 (5oz) pkgs) of (saffron) yellow rice (some brands are Mahatma, Vigo, or Goya)

1 bunch green onions, chopped
2 tomatoes, diced
Shredded mexican cheese and/or light sour cream (OPTIONAL)

Cook rice according to package directions. While rice is cooking, in a medium cooking pot over low heat, lightly saute the garlic in the olive oil for a minute or two. Add both undrained cans of black beans, Worcestershire sauce, and any spices you are using.

Continue to cook over low heat, stirring every so often to prevent beans from sticking to the bottom of the pan. You can mash part of the beans or leave them whole. Turn off the flame and cover to keep warm.

To serve, place rice on each plate, top with black beans, green onions, tomatoes, and any cheese or sour cream you are using.

Saturday, December 4, 2010

Hueveos Rancheros

Want a fun and different weekend breakfast? We just got back from California and I was craving these huevos rancheros that we had in a little bistro near the ocean in Santa Monica. I can't even believe that the version below was better than what we ate out, but it was. And it's so easy!

You can easily double the recipe for more people and you can also use refried beans, if you prefer. You can also skip the beans or eat them on the side. If you don't have salsa, just use some Rotel diced tomatoes and chilies-you can doctor it up with cilantro or corn if you're feeling adventurous.


HUEVOS RANCHEROS
Serves 2

2 large or extra large eggs
4 small corn tortillas
~1/2 cup black beans (Cuban style, if you can find them) or pinto beans
~3/4 cup salsa (I mixed a more watery hot salsa with some Rotel tomatoes & chilies), warmed
~1/2 cup shredded Mexican cheese blend

Cook your eggs to your liking--you can scramble them or cook them sunnyside up the way I did above (we don't like runny yolks, but different strokes for different folks, right?). Add salt and pepper to the eggs as they are cooking. When cooked, cover and keep warm (you can keep the eggs warm by covering with aluminum foil in a preheated oven--about 200-250 degrees).

Using some Pam or coooking spray, heat up the corn tortillas until they start to bubble (flip) and slightly brown (just slightly).

On two separate plates, add a couple tablespoons of salsa. Put 2 heated and crisped corn tortillas on top of the salsa. Divide the beans evenly atop the tortillas and add one egg on top of these tortillas. Sprinkle with cheese and top with more salsa. (You can add fresh chopped cilantro or diced avocado as well).

Makes 2 amazingly delicious servings.

Thursday, September 30, 2010

Easy Hot Spinach Salsa Queso Dip

If you have processed cheese laying around, you should definitely make this. (I know, I know--I'm supposed to be into healthier cooking and Velveeta is not considered good for you. But we all need a little processed cheese in our lives. And if you snub your nose at that....you're no friend of mine. AAAAND, you're totally missing out.)

The 'heat' (spice) can be controlled by what type of salsa you get--we used a medium spicy salsa and it was tempered somewhat by the creamy/mild cheeses. And it gave just the right amount of heat.


HOT SPINACH SALSA QUESO DIP


  • 10 ounces frozen chopped spinach, thawed and drained
  • 1 lb Velveeta cheese (2% fat--this is the reduced fat version)
  • 8 ounces cream cheese (light)
  • 1 jar salsa (I used 3/4 full jar of a 16 ounce jar)
  • A handful of chopped cilantro (optional-but good)


Now there's 3 ways to make this:

1) Cut the Velveeta and cream cheese into cubes and place all ingredients in a microwaveable-safe dish. Heat until cheese has melted and stir to combine all ingredients.

2) If you prefer, you can place all the ingredients in an oven safe dish and bake until the dip is heated through--continuing to stir to mix all ingredients. I usually put the dip in at 350 degrees for about 15 minutes--keep an eye on it as it depends on how deep your dish is--it can take as little as 10 minutes or as much as 20-25 minutes to have all the cheese melted. When it's hot and bubbly, it's ready!

3) OR, you can place all ingredients in a crockpot and heat until cheese has melted (continuing to stir the mixture to combine ingredients). It should take somewhere around an hour to have the cheeses melt (but check as crockpots vary). This particular method is great if you can leave it on the low setting--then your dip will stay warm for a while. But I bet it won't last!

Serve warm with tortilla chips. Heaven! Should make a small crowd very happy before dinner is served (like 4-6 people).


Tuesday, September 28, 2010

Easy, Healthy, Chicken and Salsa Soup


Fall is here!!! Woo-hoo! I’m so inspired but I have to mark the cool weather start with soup—we LOVE soups. Chicken and salsa soup is a SUPER easy dinner to make when you are in a hurry and I guarantee it’s a surefire winner of a meal for guests too!

The beauty of this soup is that if you already have cooked chicken on hand, you don’t have to follow the directions below—you can throw all the ingredients in a soup pot and heat until it starts to boil. Then turn off the heat and your soup is ready!


CHICKEN AND SALSA SOUP


2 boneless, skinless chicken breast halves, cut into bite-size pieces
2 (14.5-ounce) cans reduced-sodium chicken broth (or approx. 3 1/2 cups)
1 to 2 tsp. chili powder
1 tsp. garlic powder or 2 cloves minced garlic
1 tsp. cumin (optional-but good)
1 1/2 cups loose-pack frozen whole kernel corn
1 can black beans (about 14-15 oz), rinsed and drained (optional-but very good)
1 cup bottled chunky salsa (fresh salsa is best-I prefer the Herdez brand if fresh is not available)

For serving:
About 1 cup shredded Mexican cheese—Cheddar or Monterey is good (if your salsa is mild, you can use Monterey Jack cheese with jalapeรฑo peppers instead)
*3 cups tortilla chips
Light sour cream (optional)

Combine chicken, water, broth and chili powder in large saucepan. Bring to a boil. Reduce heat to low.

Cover; cook for 8 minutes. Uncover; add corn. Cook for 5 minutes or until chicken is no longer pink.

Stir in salsa; heat through. Sprinkle cheese over each serving. Serve with tortilla chips and sour cream or any other toppings of your choice.

Makes about 6 servings.

**I like to use baked corn tortilla strips as a topping instead of tortilla chips: Cut about 10-12 corn tortillas into strips (any size) and spray lightly with olive oil (the olive oil version of ‘Pam’) and sprinkle lightly with salt (optional) and cumin/chili powder. Bake at 325-350 degrees for 5-10 minutes or so—when they start to turn brown, take them out of the oven. They help thicken the soup, when added before serving, and provide a great texture!

Wednesday, August 4, 2010

Ole, Ole! Chicken Enchiladas & Mexican Corn


These enchiladas and corn are delicious! Sort of threw it together last minute and am super pleased. Served along with salad and chips and salsa. I first had a type of corn like this at our favorite little Mexican deli in town called Las Tortugas.
My uncle is visiting and both the boys enjoyed dinner and said "WHAT did you put on this corn? Really good!" I hope you enjoy it because it will be unlike the corn you are used to--but still wonderful!


MEXICAN CORN
4 ears of corn, shucked

Topping:
1/4 cup melted light butter
1/4 cup light mayonnaise (you can use fat-free but I hate it b/c it's too sweet)Juice of half a lime
1/2 cup grated Cotija cheese (or Parmesan)
1/4 tsp. chili powder
1/4 tsp. cumin
1/4 tsp. crushed red pepper (or cayenne pepper)
1/8 tsp. salt

For serving:
4 wedges lime (optional)

Preheat an outdoor grill for medium-high heat.

Grill corn until hot and lightly charred all over, 7 to 10 minutes, depending on the temperature of the grill.

While the ears are grilling, mix the melted butter, mayonnaise, lime juice, grated cheese, and spices together. Now, you can choose to wait and not mix in the cheese (see next step).

Spread mixture on the grilled corn when complete. If you would rather have your cheese on top of the spread, sprinkle cheese after you have spread the mixture on the corn.

Serve each ear with a lime wedge.


CREAMY CHICKEN ENCHILADAS

2-3 chicken breasts, cooked and shredded
4 oz. 1/3 less fat cream cheese, softened (about room temperature)
1/2 cup grated Cojita or other white Mexican cheese that is grated
1 (14.5 oz) can Rotel (diced tomatoes and chilies), drained
1/2 cup Mexican cheese blend + more for sprinkling on top of enchiladas
2 cloves garlic, minced
1/3 cup cilantro, chopped
1 (15.5 oz) can chili beans, undrained
1 (16 oz) jar salsa (I LOVE Herdez brand-mild)
12 corn tortillas, approximately

Preheat oven to 350 degrees.

Set aside a 9X13 inch pan or two 8X8 inch pans. I did not grease my pan and encountered no problems. But, I might suggest that you do (just in case).

In a bowl, gently mix all ingredients together. Fill each corn tortilla with a small amount of mixture and roll up. Place seam side down in the pan (I prefer to do two 8X8 dishes and freeze one of them for later use).

Evenly spread the salsa over the top(s) of the corn enchiladas and cover with a small amount of cheese (your choice on how much cheese--especially depending on the results of your cholesterol labwork).

Bake until enchiladas are bubbly, hot, and cheese has melted. Sprinkle with more chopped cilantro, if desired.

One 8X8 inch pan should serve 4-6 people depending on how many sides you have. A 9X13 inch pan should probably serve 10 people with 2-3 different sides.

Tuesday, July 13, 2010

Grilled Margarita Orange Roughy Tacos with Fresh Salsa


I have another (sweeter) fish taco recipe that I will post sometime, but in the meantime, these were SO GOOD! I used a smoky, agave tequila (yes, with worm still in the bottle) that I got it in Mexico for exactly this reason: for cooking.... the smokiness of the tequila with the bit of char from the grill made for an excellent pairing with the tangy, creamy goodness of the salsa. Also, I used a "natural" triple sec...one made from real orange peels, not artificial flavorings. If you are interested, check out the Stirrings line.

You don't even need sour cream if you let the salsa sit for a while--all the tomato juices blend with the ripe avocados and fresh-squeezed lime juice. We make a little extra salsa because we love to scoop it up with tortilla chips.


The perfect summer food....takes me back to the Baja Peninsula...

GRILLED MARGARITA ORANGE ROUGHY TACOS WITH FRESH SALSA

Fish:
2 Orange Roughy Fillets
1/4 cup tequila
1/4 cup triple Sec (or orange juice)
Juice of one lime
Salt, taste
Black pepper, to taste
1-2 cloves garlic, finely minced
1 tablespoon olive oil

Salsa:
2 medium tomatoes, peeled, cored, and chopped
1 ripe avocado, chopped
1 small clove garlic, minced
1/2 a small purple onion, diced
1 small jalapeno pepper, seeded and finely chopped (optional)
1 green onion, diced (optional)
3 tablespoons minced fresh cilantro
Salt, to taste
Juice of 1/2 a lime

To serve:
2-4 Tortillas (depending on how big you make yours)
Lettuce, chopped
Shredded Mexican cheese blend

Place fish in a glass dish large enough to hold fillets in a single layer. Combine tequila, triple sec, lime juice, salt, garlic and oil; pour over fish, rubbing all over. Cover and marinate the fish for 1 hour at room temperature or for 2-3 hours in the refrigerator, turning occasionally--either way you decide to let it marinate.

Before serving time, combine salsa ingredients in a serving dish. Let sit for 10-15 minutes to let the flavors mix into each other.

Heat grill to the highest setting. Remove fish from the marinade (you can either discard the marinade, or you can boil it for about 2 minutes and spoon over the cooked fish fillets at the end). Cook the fish on the grill--about 4 minutes per side or until fish is opaque.

Heat tortillas (some people put them on the grill very shortly--but I've never tried it). Add fish, cheese, salsa, and lettuce into your tortilla and roll up. Great to serve with Mexican rice on the side.

Serves 2-3 (good sized portions depending on how big your fish fillets are).


Saturday, May 8, 2010

Vegetarian Enchiladas (can also be Vegan)

Our house has a new staple!


Now THIS is what I consider vegetarian food. Not a plate full of vegetables as some people think vegetarians eat. This is a recipe that can be easily made vegan by substituting non-dairy "cheese" for regular cheese, as is called for below. I made them with vegan cheese inside, and a dairy Mexican blend on top. Delicious.

I LOVE this recipe. My husband (who is my recipe barometer) said, "Yum baby, these are really, really good!" And that's AFTER he knew there was tofu in them. I'm thinking that this phrase might make a good epitaph one day.

VEGETARIAN ENCHILADAS

1 pkg. tortillas (I used a 12-count multi-grain)
1 can black beans
1 bag frozen corn (if you use canned corn, be sure to drain it first)
6 green onions, diced
1 pkg. of tofu, crumbled
½ cup cilantro, chopped
¼ tsp. cumin
¼ tsp. oregano
1 small can sliced black olives
1 ½ bags of 3 cheese blend or Mexican blend cheese
1 bottle Santa Fe sauce or Enchilada sauce
Salsa, optional
Sour cream or tofutti sour cream (vegan), optional topping
Guacomole, optional
Mix all ingredients with ½ bottle of Santa Fe sauce or salsa.


Oil or spray bottom and sides of baking pan, and add a small amount of sauce to bottom of pan.

Heat tortillas and spoon in mixture-- then roll and place in baking pan.


Cover with remaining sauce and cheese.

Bake at 350 degrees for 20 minutes, or until heated through.


These are the first ever enchiladas I've had that weren't greasy. However, they will need a some toppings and therefore the sour cream and salsa are really good on them.
This recipe made three 8X8 pans for me...4 enchiladas in two of the pans and 3 enchiladas in the last pan (only because the company didn't count well & there were obviously 11 tortillas in the package instead of 10). These enchiladas freeze well.
If you use a larger pan to include them all, you will be able to feed about about 6-7 people if you include a side of Mexican rice and a salad.

Thursday, April 8, 2010

Haystacks....you know you're an Adventist, when....

...you know what a "haystack" is. And you don't call it "taco salad".


I'm not sure there's an easier meal recipe besides ordering takeout.....this is the PERFECT casual entertaining recipe, picnic food, meal to serve to a huge crowd, or a fun meal with kids.

It's also a terrific way to use leftover chili--meat or vegetarian.

Here's what you'll need:


As you can see, the proportions are very difficult to estimate because it's a "build it yourself" meal & everyone likes more or less of one thing.

HAYSTACKS

Corn chips (we use Fritos)
Chili or beans (we use Bush’s chili beans or black beans, but pinto will do well too)
Grated Cheese (we use a Mexican blend or cheddar)
Chopped onion (if you are an onion lover)Chopped Lettuce
Diced Tomatoes
Avocado or guacamole
Sour cream
Black Olives

Optional, but delicious, add ins:
Salsa
Corn
Rice
Chopped cilantro
Taco seasoning

Ingredients are laid out buffet style. Everyone gets a plate and goes through line, building up their plate & layering ingredients as they see fit.

You gotta live it to understand it. Haystacks are a good time.